Creating and Scheduling Jobs
Scheduling Overview
The Scheduling module is the core of your operations, where assets are allocated to orders. When you create an order, the system generates a job on the scheduling page. Once you allocate an asset to this job, a trip is automatically created. This trip provides a detailed view of the operational journey, including a map of the truck's movement from pickup to drop-off locations. The scheduling page is divided into two modules: Jobs and Trips, ensuring efficient management of your logistics.
Job Scheduling and Asset Allocation Video Tutorial
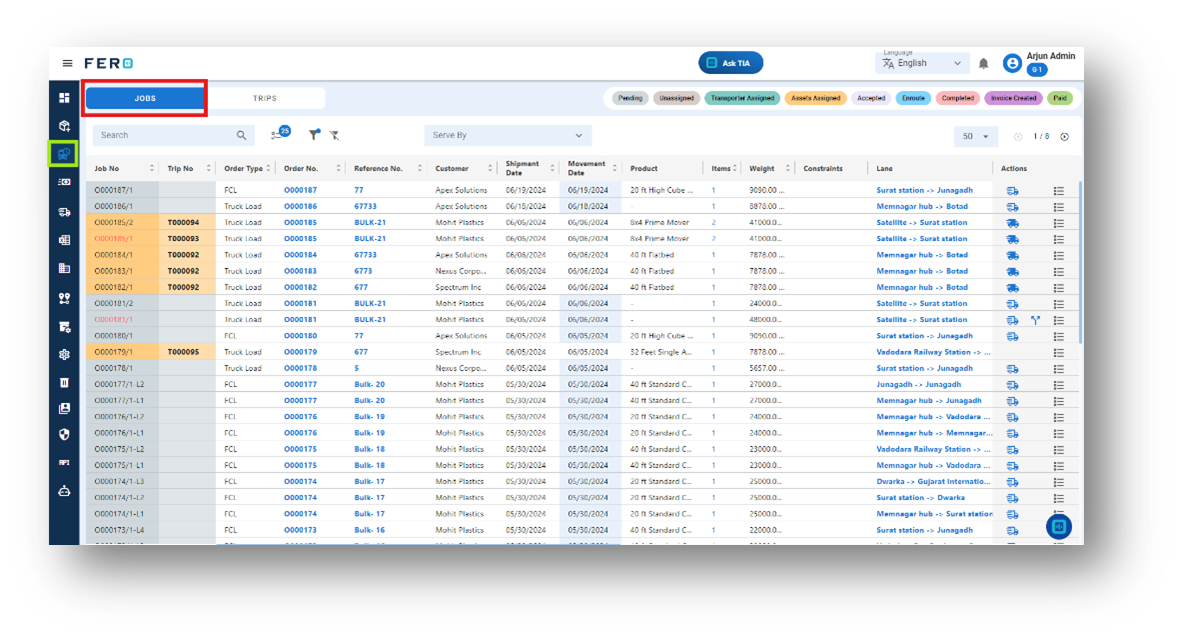
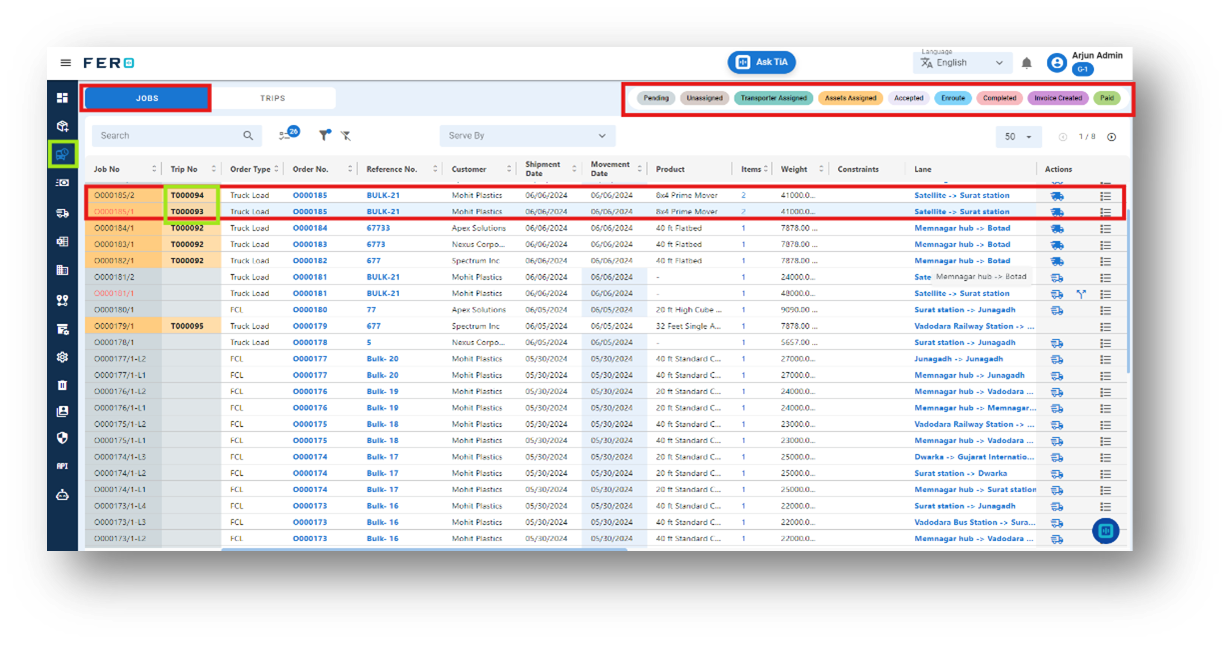
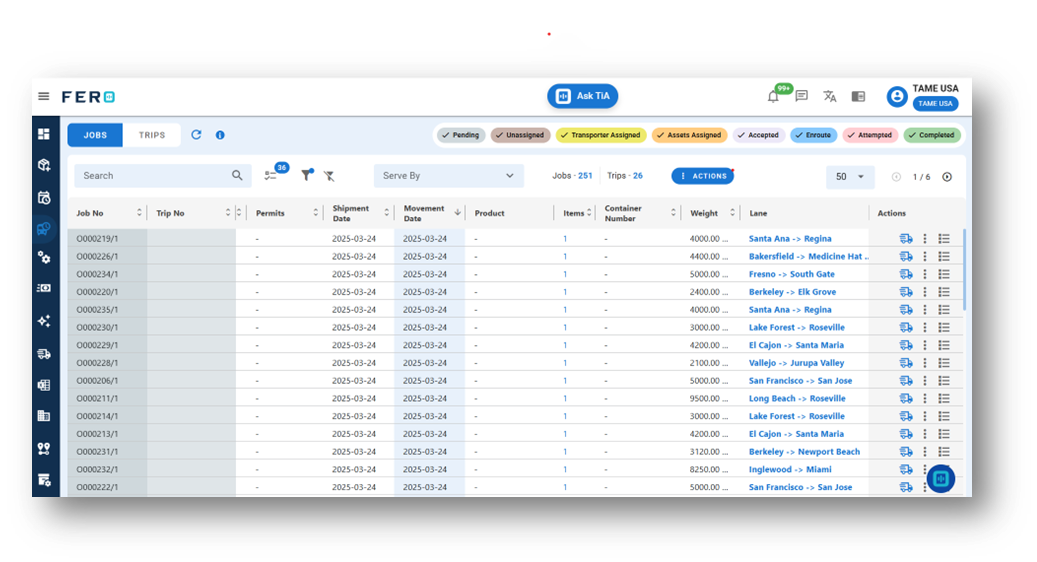
Jobs Overview
The Jobs module is the first part of the Scheduling home. In the Jobs module, you can view all created orders, each with a unique job number. Once you create an order, a corresponding job is automatically generated in the system. From the Jobs page, you can take actions such as allocating assets (vehicles) to fulfil the order delivery process. This ensures that each job is efficiently managed and completed.
How to allocate an asset (vehicle) to a job or order?
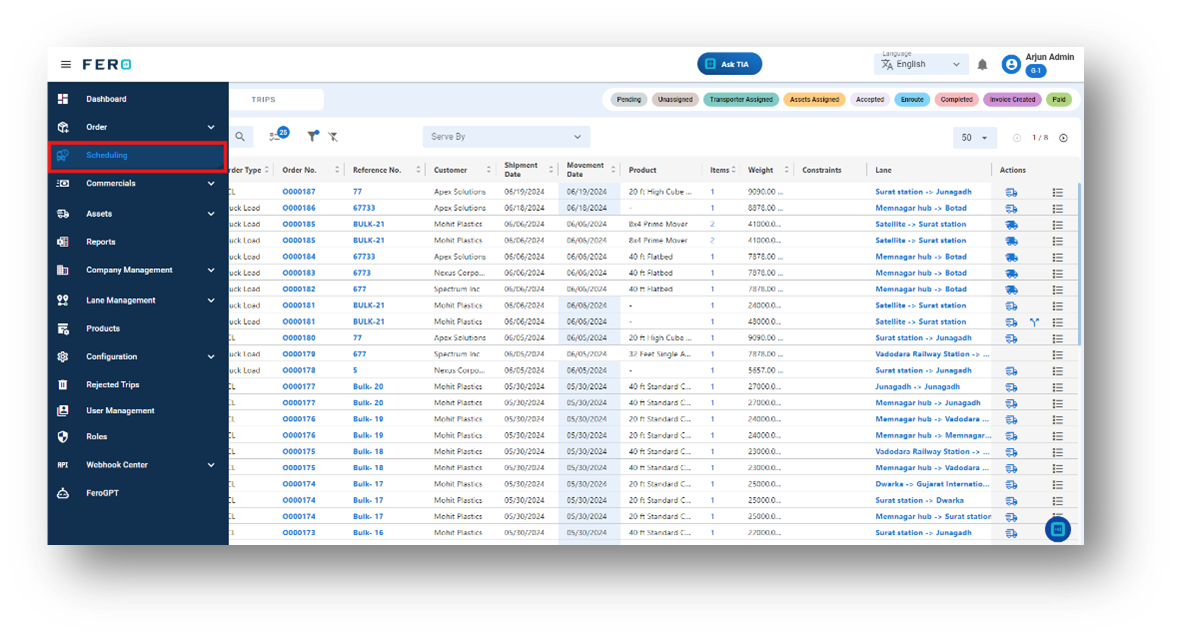
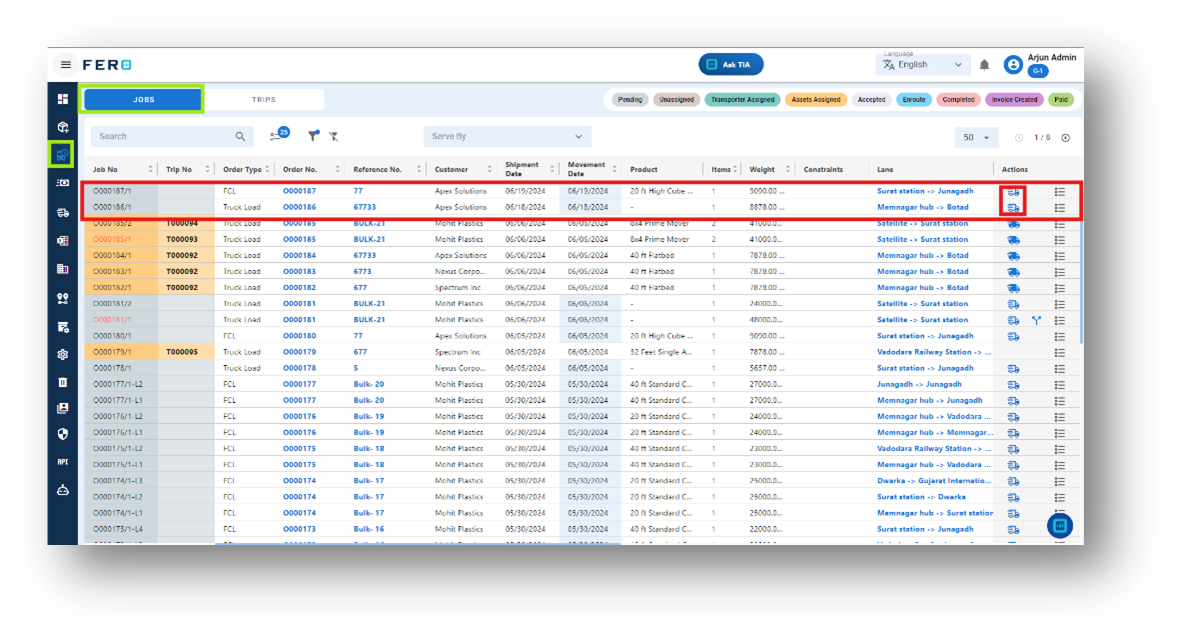
Step 1: Navigate to the scheduling section and click on it to reveal scheduling homepage.

Step 2: Select the job or order that you want to allocate an asset to and initiate the operation by clicking on the truck icon to begin the order process.
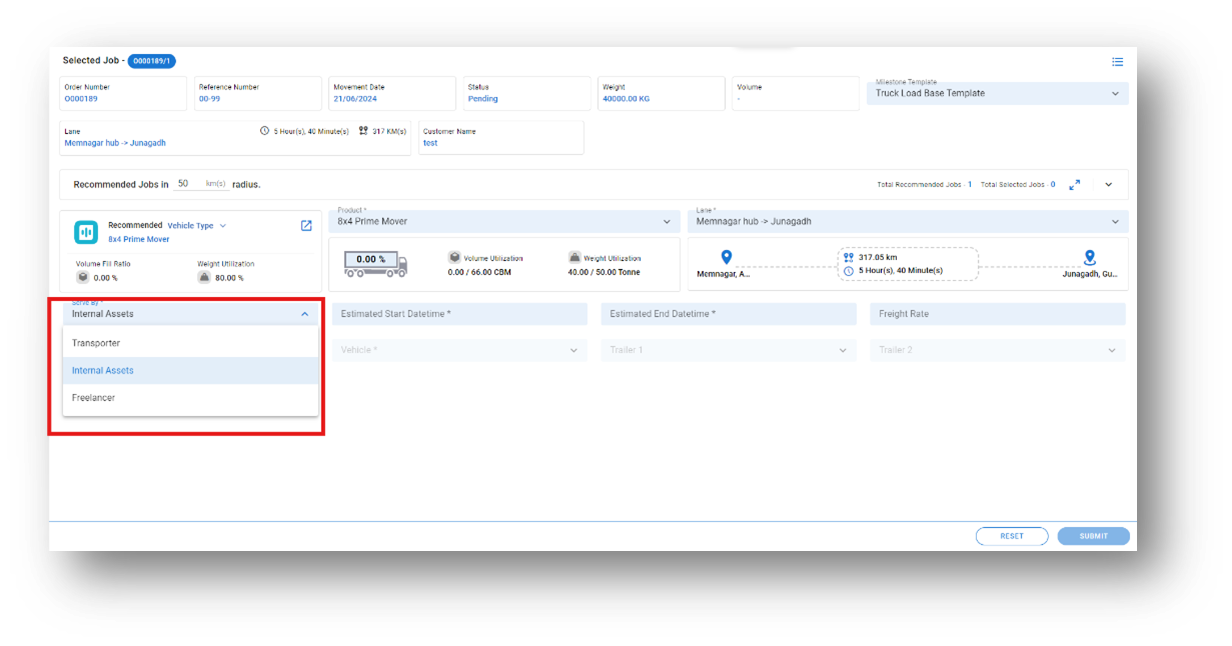
Step 3: After clicking on the truck icon, a job allocation page will appear. From there, you can select options such as allocating the asset by internal asset, transporter, or freelancer.
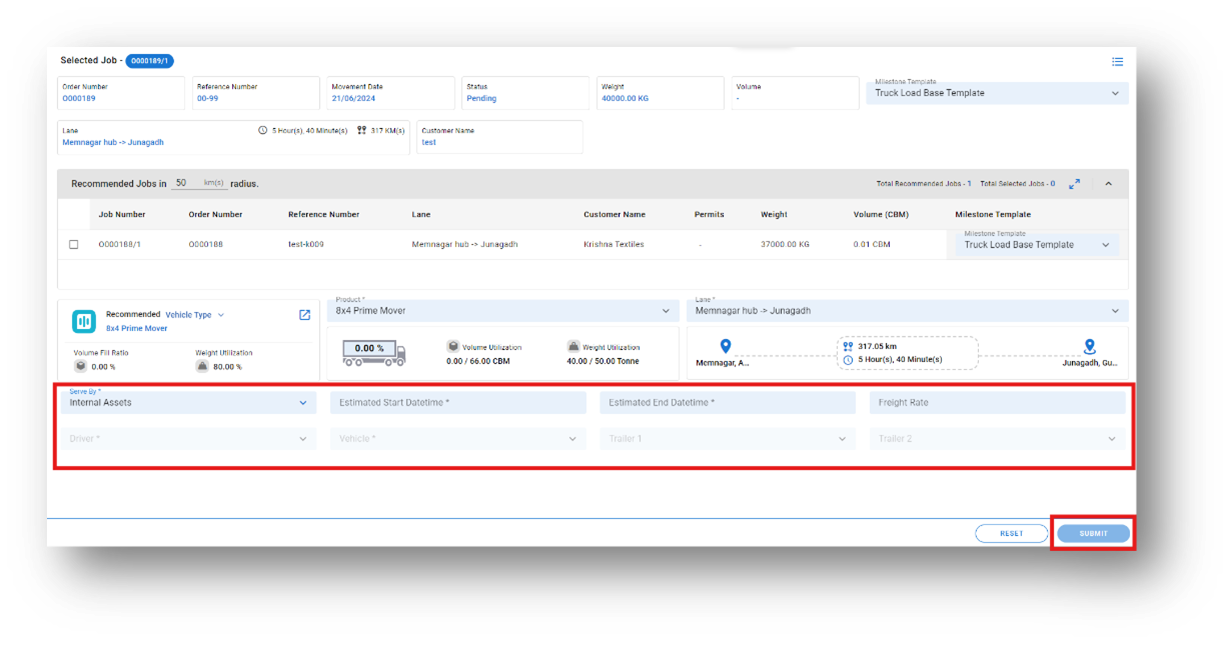
Step 4: Complete the required fields on the "Job Scheduling page" screen:
- Select the Serve By from the dropdown list.
- Choose the vehicle & Driver from the dropdown list.
- Select the product from the dropdown list.
- Enter the rates based on your business operations.
- Select the date range from the calendar.
After filling in all these details, click "Submit" to add your transporter lane rate.
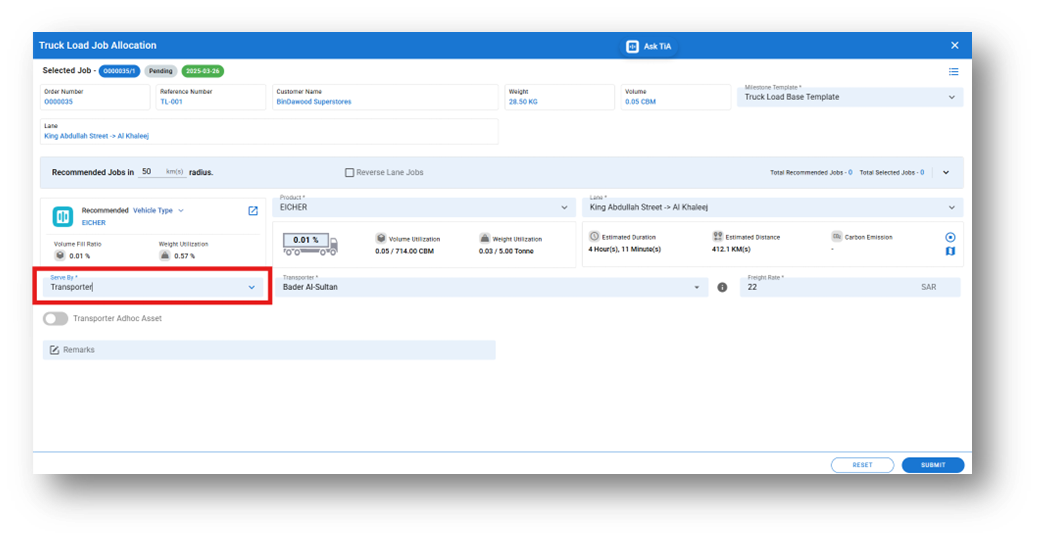
Note on Selecting "Serve By" Option
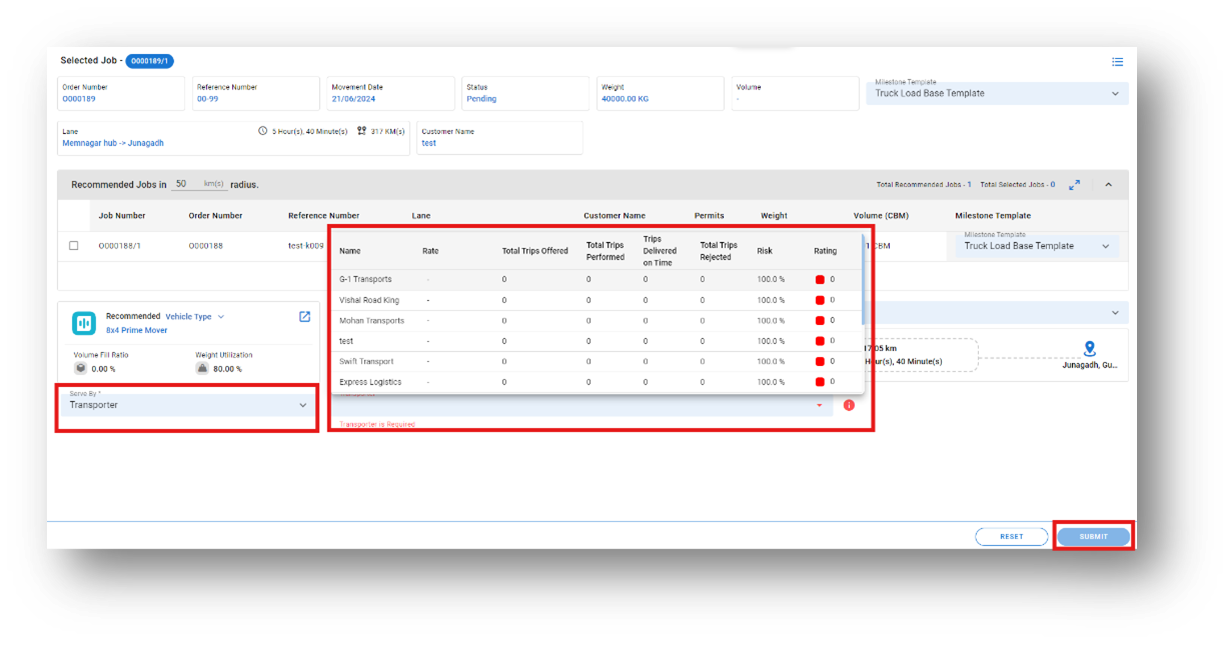
If you select "transporter" in the "Serve By" field, the details required will differ from those needed for internal asset or freelancer. Review the image attached below for better understanding.
- Select Serve by Option: Choose "transporter."
- Transporter Field: A transporter field will appear.
- Select Transporter: Click on the transporter field and select your transporter from the list.
- Enter the Rate: Input the rate for the transporter.
Submit: Click "Submit" to save the details.
As a system administrator, you can directly assign a transporter's vehicle and driver to an order without requiring the transporter to manually accept the order. If you already have the transporter’s vehicle and driver details, follow these steps to assign them directly to the order:
Steps for Direct Allocation of Transporter Assets:
Select Transporter in the "Served By" Field: Choose the appropriate transporter from the transporter list.
Enable Transporter Adhoc Assets: Click the toggle button to activate the option to add Transporter Adhoc Assets.
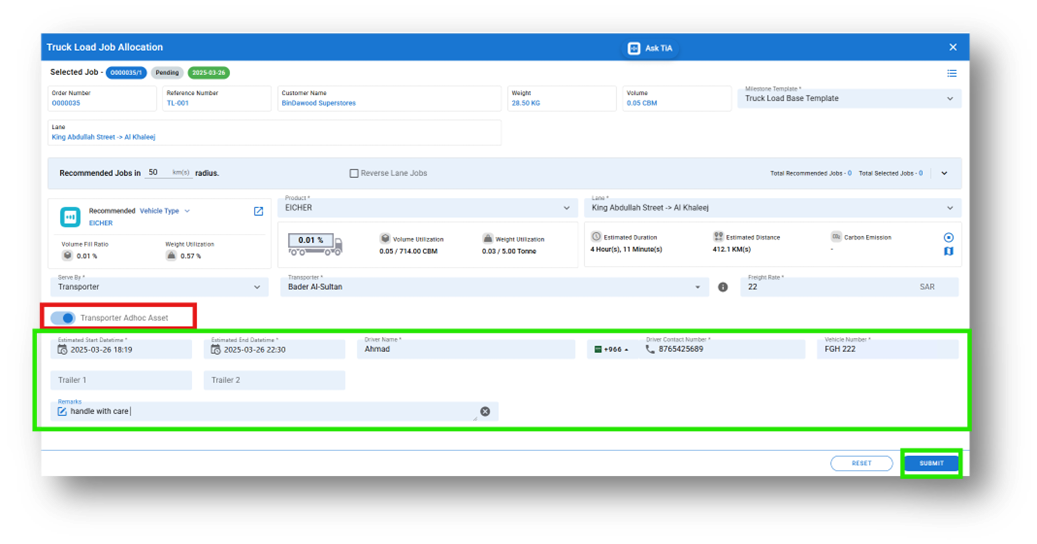
Fill in Required Fields:
Enter the necessary information, including:
- Driver name
- Phone number
- Vehicle number
- Date and time
Step 5: Once you allocate the asset, the system will automatically update the status of the order based on the allocation. Additionally, a trip number will be created for that order, facilitating further tracking and management.
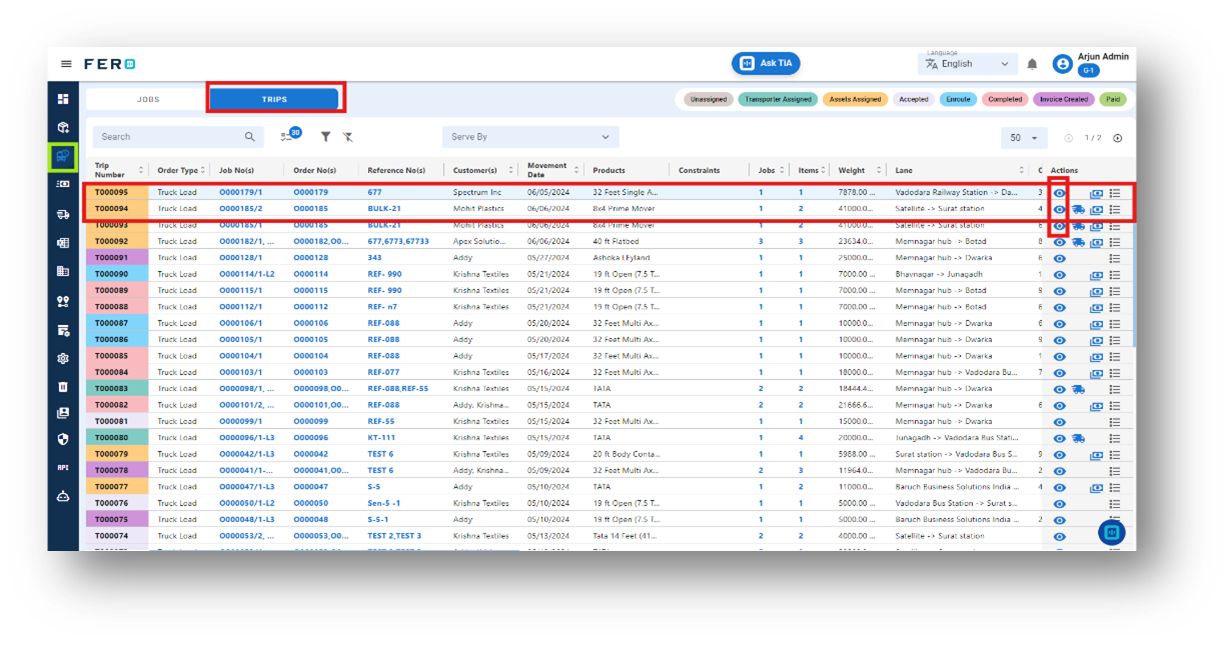
Trips Overview
The Trips module is the second part of the Scheduling home. Here, you can view all allocated job orders, each with a unique trip number. When you assign an asset to a job, a corresponding trip is automatically generated in the system. From the Trips page, you can:
- Re-allocate assets: Adjust the assigned vehicle to fulfil the order delivery process.
- Track progress: View order progress on a map, including real-time operation details and speedometer readings.
- Manage PODs: View and download Proof of Delivery (POD) documents.
- Admin actions: Enroute the trip, complete the trip, and access detailed logs.
This ensures that each trip is efficiently managed and completed.
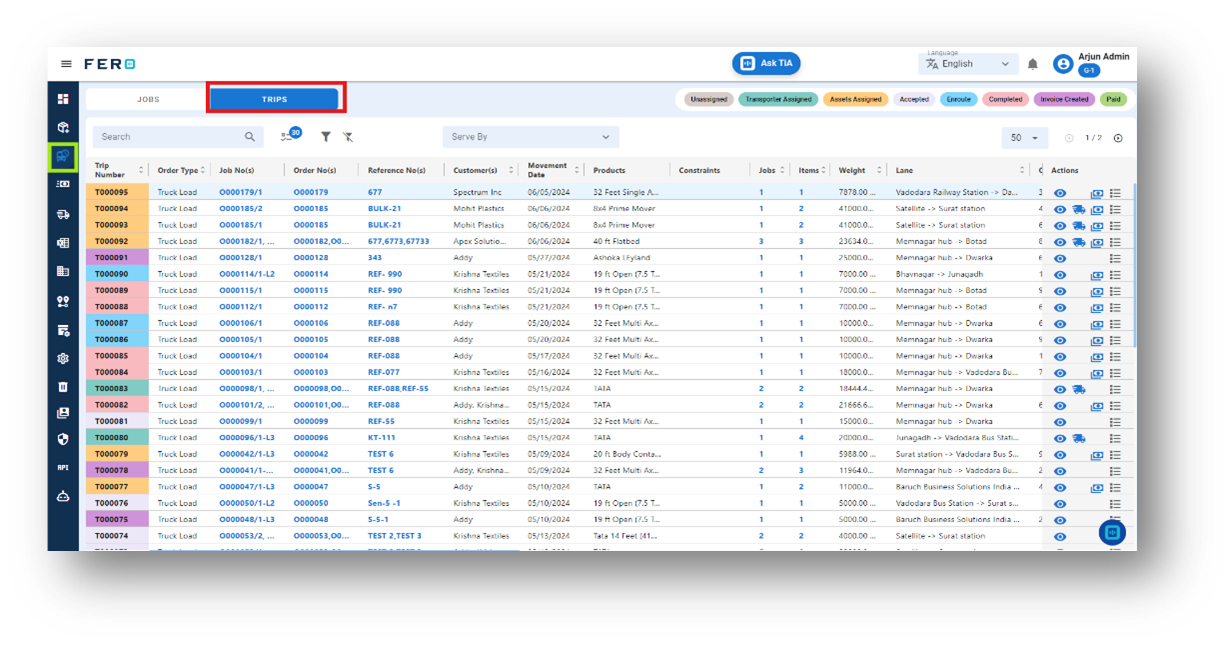
How do I manage the trips module and its functionality?
Step 1: Navigate to the scheduling section and click on it to reveal scheduling homepage.

Step 2: Select the trips you want to view by clicking on the Trips page. This will show the status and operation journey of the selected trips.

Step 3: Select the trip from the list that you want to view by clicking on the eye icon to see detailed information about the order.
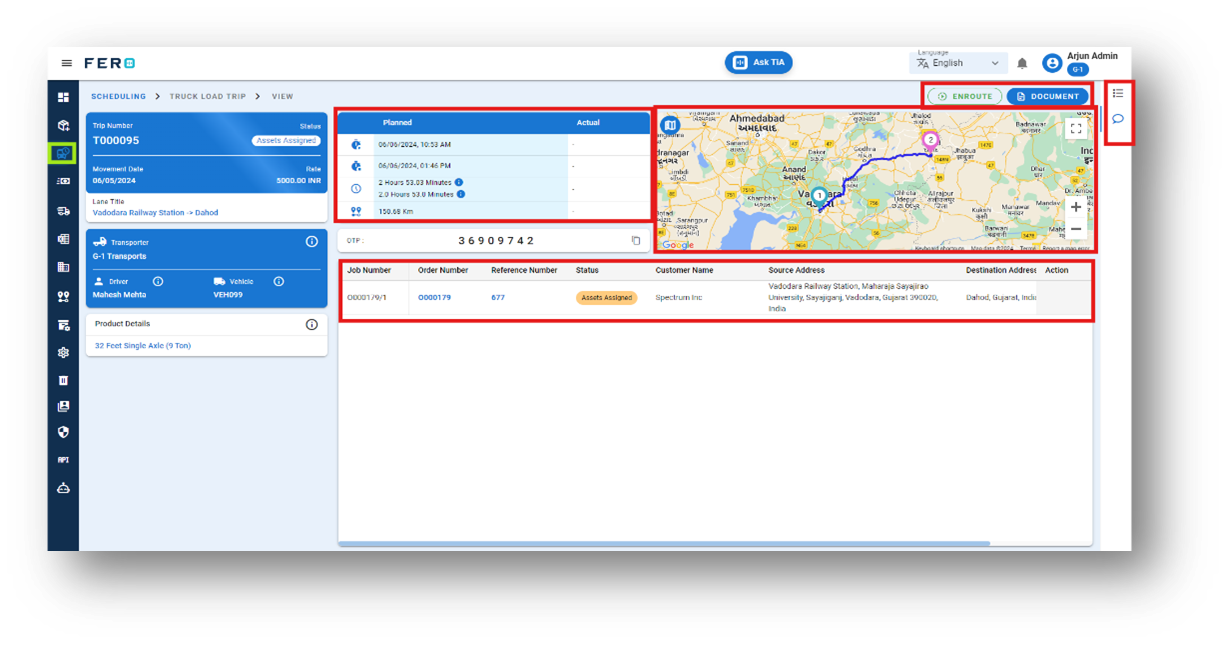
Step 4: After clicking on the eye icon, a detailed trip page will appear where you can:
- View the operation journey on a map, including actual timestamps.
- Access important information such as POD logs and chat functionality to communicate with the driver.
- As an admin, you can also re-route the trip and mark the trip as complete from this page.
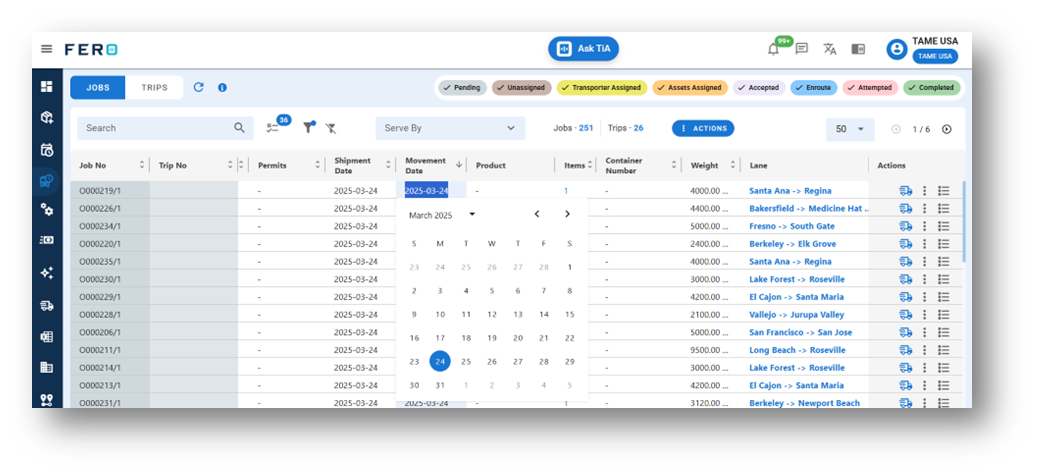
 Case 1:Change Movement Date of Orders
Step-by-Step Guide
Step 1: Navigate to the Orders Dashboard.
Step 2: Select the order whose movement date you want to change.
Step 3: Click on "Movement Date”.
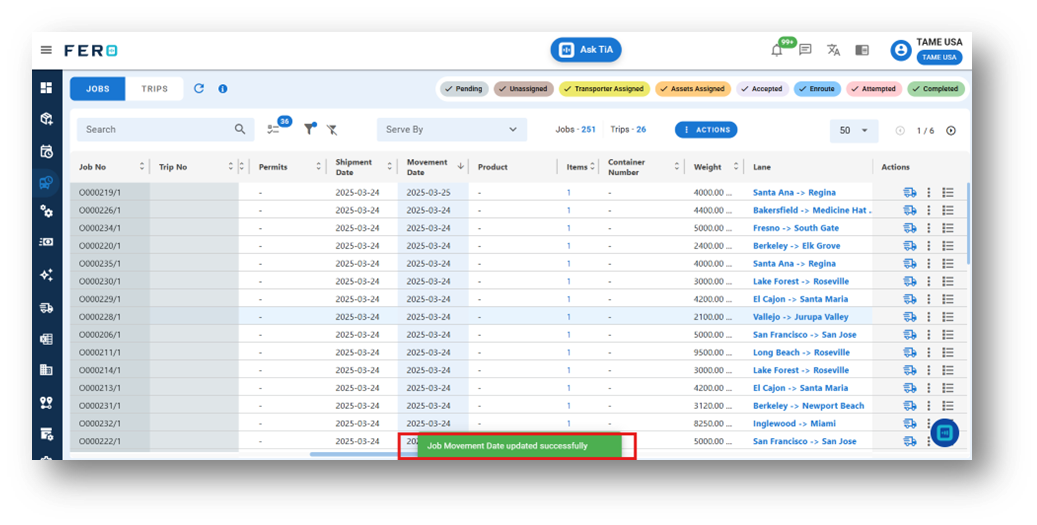
Step 4: Pick a new date from the calendar popup.
Step 5: it reflect the notification.