Managing Contracts and Agreements
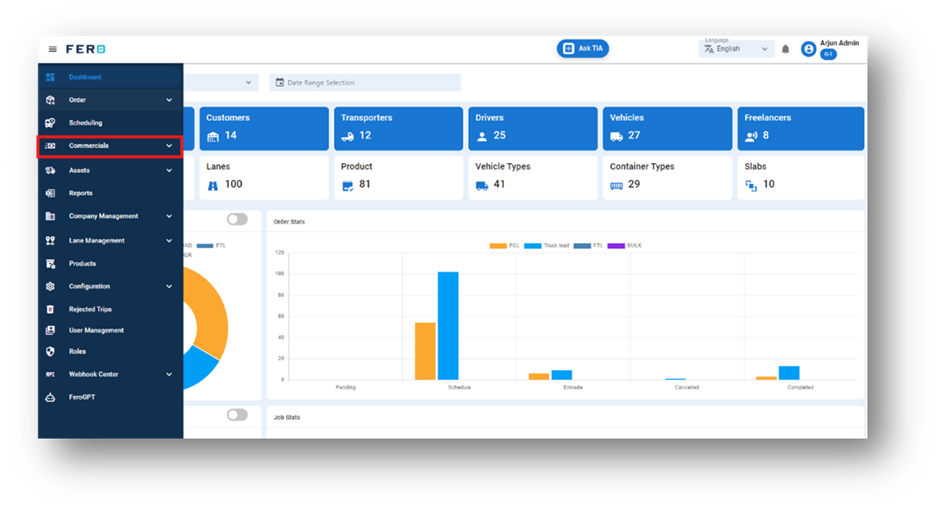
Commercials Overview
The Commercials module involves setting up contracts with external transporters and customers. These contracts are based on specific lanes and product types, such as vehicles, containers, and trailers. Contracts can be configured for various durations, such as 15 days, 3 months, or a year, depending on business requirements.
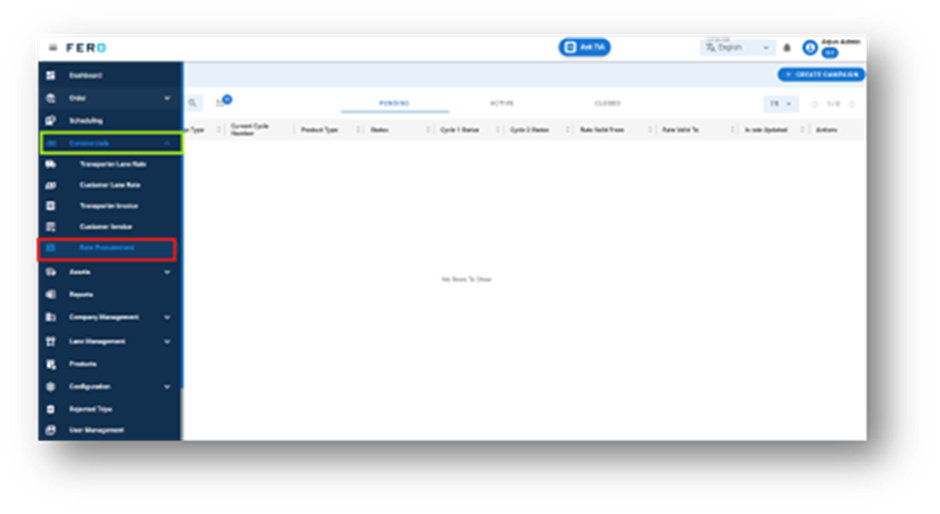
The Commercials module includes the following submodules:
- Transporter Lane Rate: Define rates for transporters based on specific lanes.
- Customer Lane Rate: Set rates for customers based on defined lanes.
- Transporter Invoices: Manage invoices received from transporters.
- Customer Invoices: Handle invoices sent to customers.
- Rate Procurement: Facilitate the process of obtaining and comparing rates.
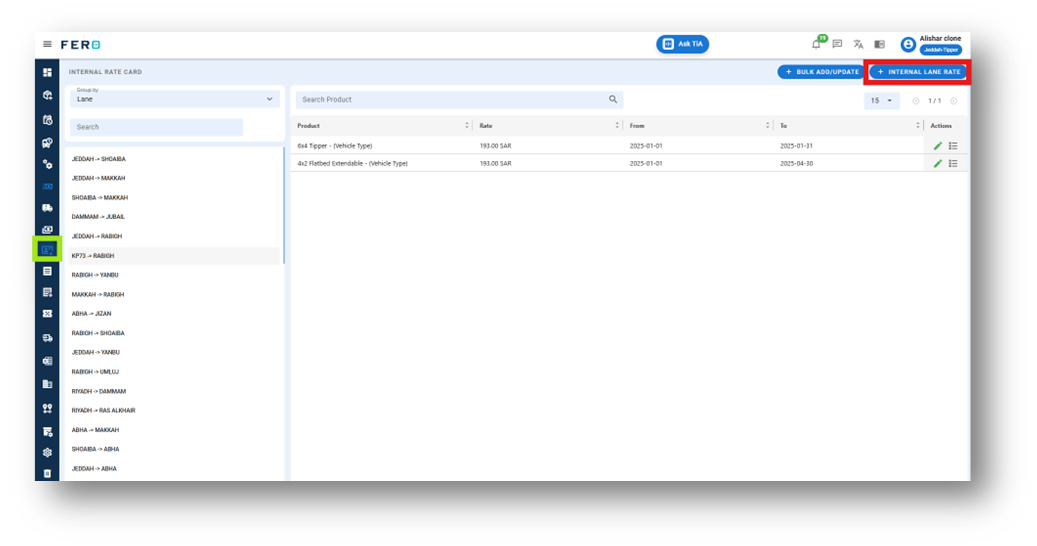
- Internal Rate Card: Define Rates for internal vehicle based on specific lanes.
Commercials Management Video Tutorial
Transporter lane Rate Overview
The Transporter Lane Rate module helps you set up contracts with transporters based on specific lanes. This ensures clear and efficient pricing negotiations.
Key Features:
- Lane-Specific Rates: Assign unique rates for different routes.
- Flexible Contracts: Set contract durations from a few days to a year.
- Easy Adjustments: Update rates to reflect changes in costs.
- Transparency: Maintain clear records of all agreed rates.
This module ensures fair and consistent pricing for all transportation needs.
How do you set up the transporter lane Rates with your transporter?
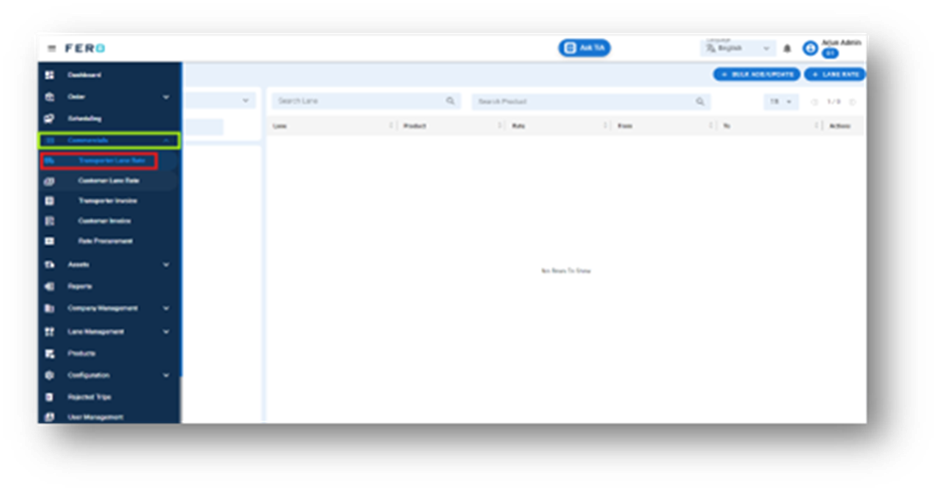
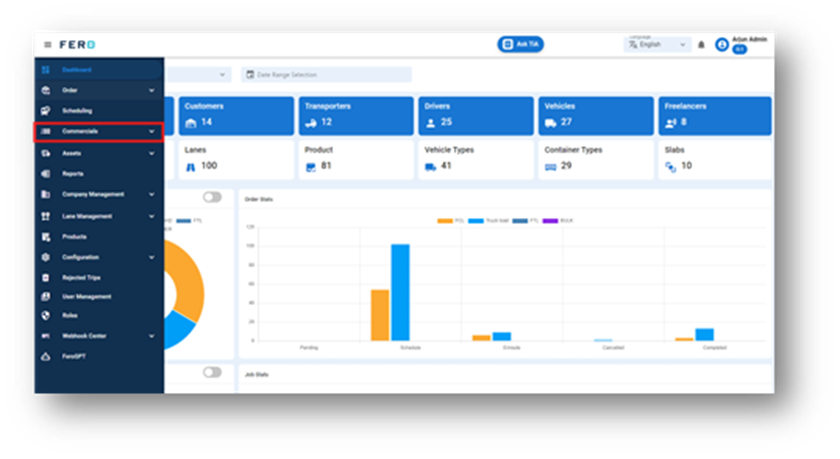
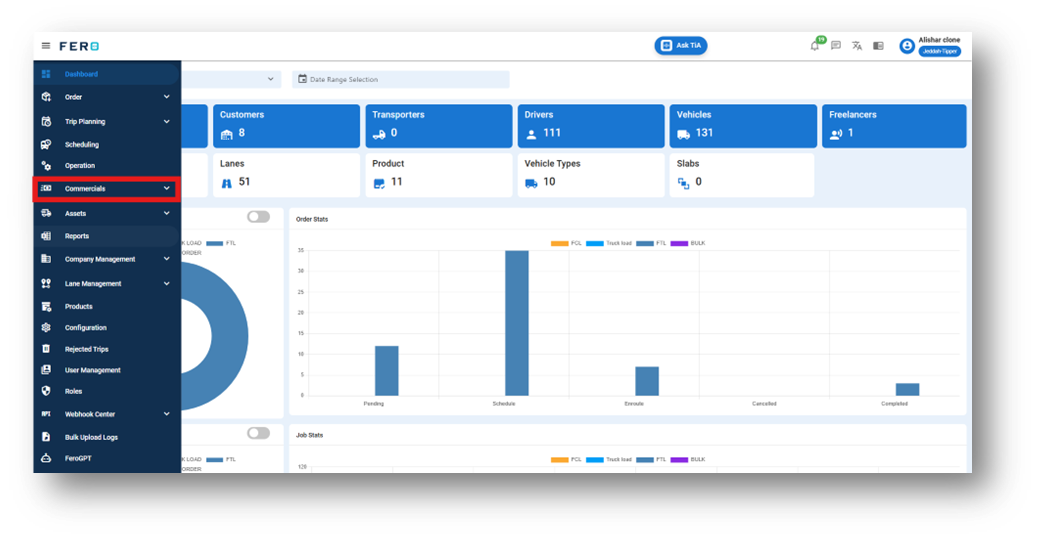
Step 1: Navigate to the Commercials section and click on it to reveal the drop-down list.

Step 2: Choose the Transporter Lane Rate option from the drop-down list to access the Transporter Lane rate homepage.

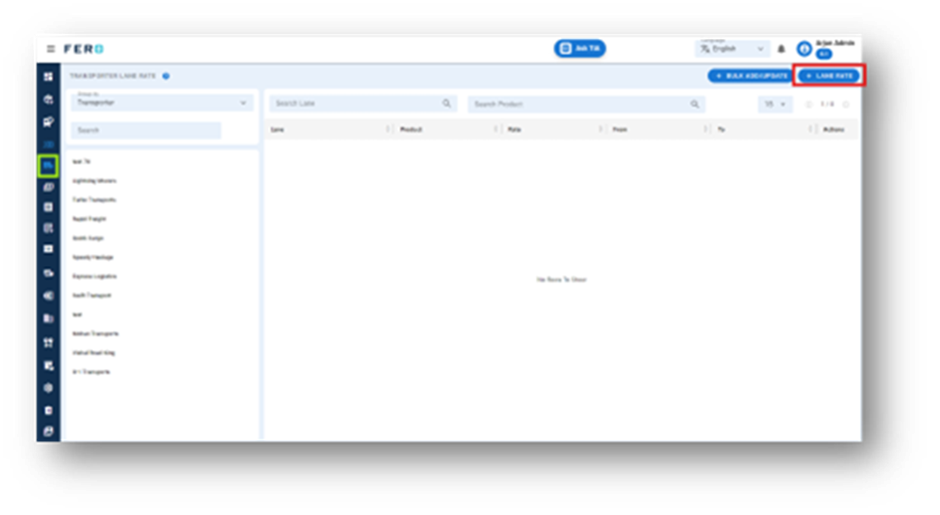
Step 3: Select the "Add Transporter Lane rate" option to create the transporter lane rate creation process.
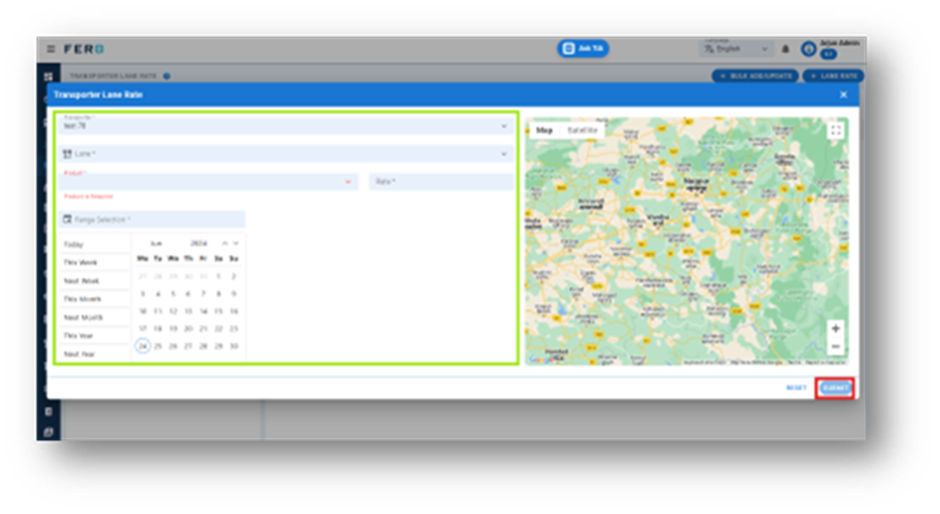
Step 4: Complete the required fields on the "Add Transporter Lane Rate" screen:
- Select the transporter from the dropdown list.
- Choose the lane from the dropdown list.
- Select the product from the dropdown list.
- Enter the rates based on your business operations.
- Select the date range from the calendar.
After filling in all these details, click "Submit" to add your transporter lane rate.
FAQs
Q1. Can I Bulk Upload the Transporter Lane Rate?
Yes, you can bulk upload Transporter Lane rates.
Follow these steps:
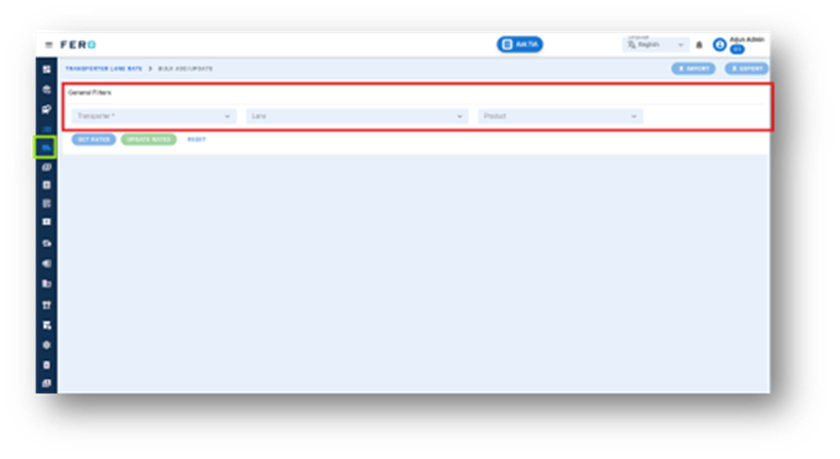
Step 1: Navigate to the bulk upload option.

Step 2: Select the transporter from the dropdown list.
Step 3: Select the lane from the dropdown list.
Step 4: Select the product from the dropdown list (multiple selections allowed).
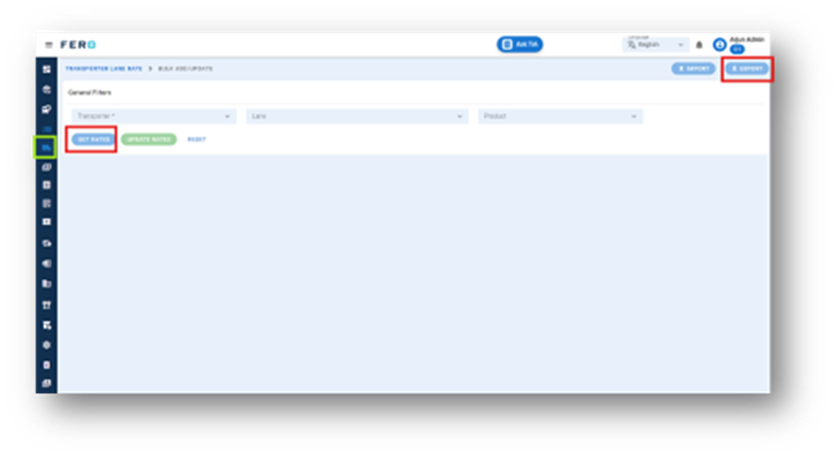
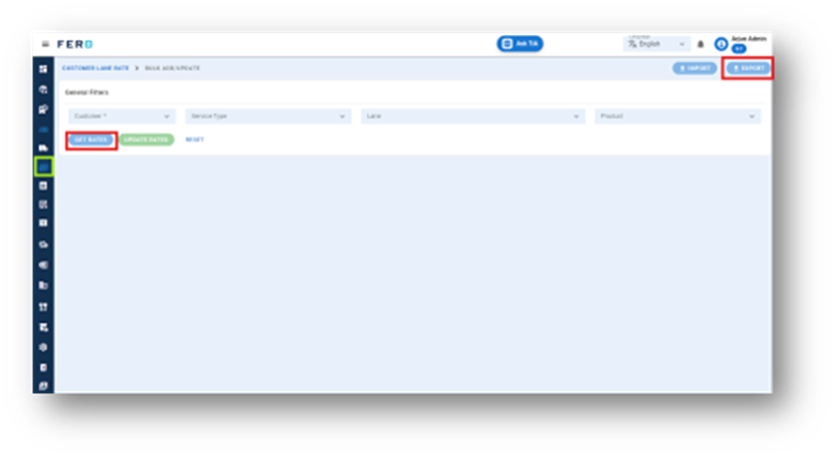
Step 5: Click on "Get Rates" to generate a template.
Step 6: Click on "Export" to download the template file. Fill in the required rates and details in the downloaded file.
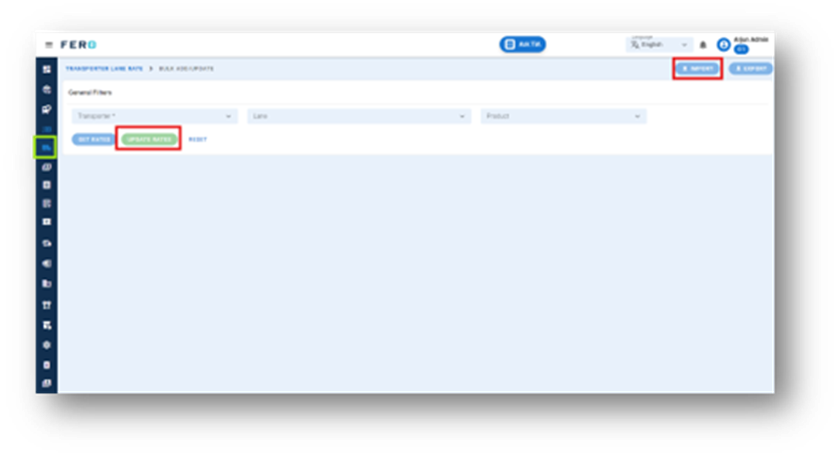
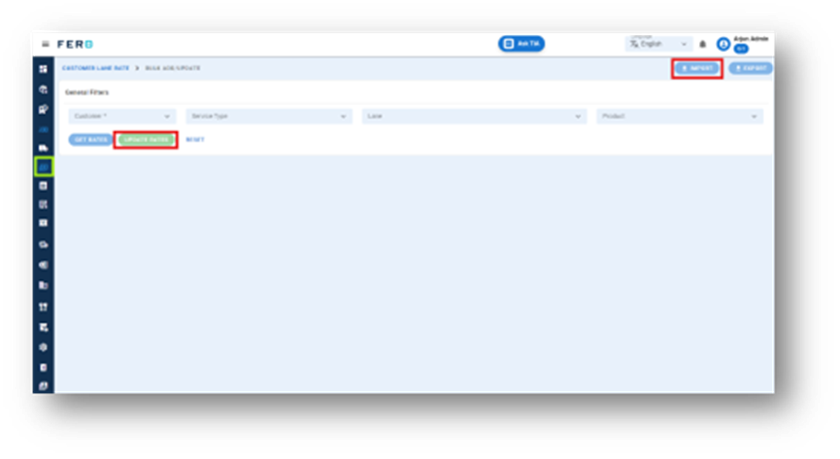
Step 7: Click on "Import" and upload the updated file.
Step 8: Review the data for accuracy Click on "Update Rates" to finalize and add the transporter lane rates to the system.
Customer lane Rate Overview
The Customer Lane Rate module helps you set up contracts with customer based on specific lanes. This ensures clear and efficient pricing negotiations.
Key Features:
- Lane-Specific Rates: Assign unique rates for different routes.
- Flexible Contracts: Set contract durations from a few days to a year.
- Easy Adjustments: Update rates to reflect changes in costs.
- Transparency: Maintain clear records of all agreed rates.
This module ensures fair and consistent pricing for all customer’s needs.

How do you set up the Customer Lane with your customer?
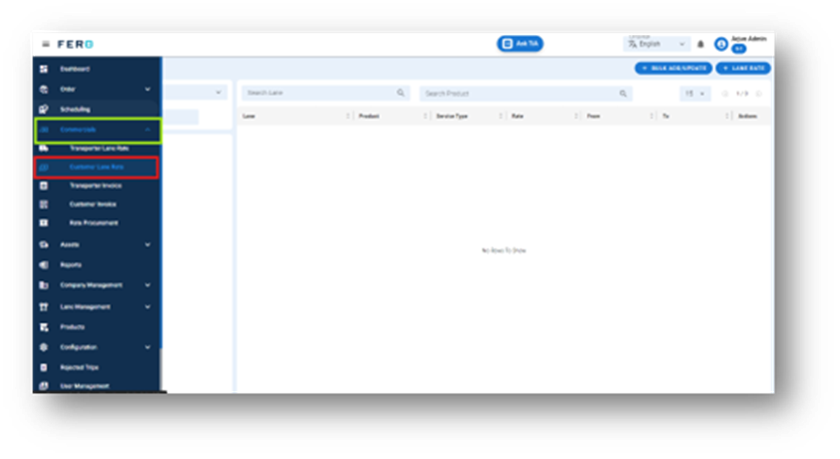
Step 1: Navigate to the Commercials section and click on it to reveal the drop-down list.
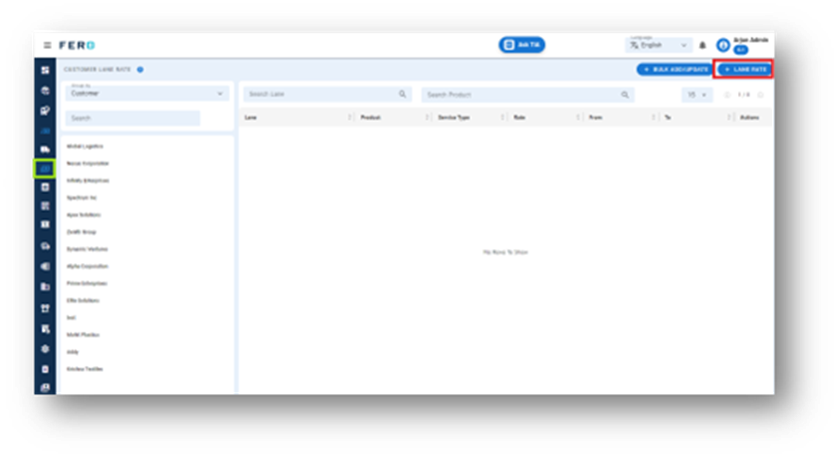
Step 2: Choose the Customer Lane Rate option from the drop-down list to access the Customer Lane rate homepage.
Step 3: Select the "Add Customer Lane Rate " option to create the transporter lane rate creation process.
Step 4: Complete the required fields on the "Add Customer Lane Rate" screen:
- Select the Customer from the dropdown list.
- Choose the lane from the dropdown list.
- Select the product from the dropdown list.
- Enter the rates based on your business operations.
- Select the date range from the calendar.
After filling in all these details, click "Submit" to add your Customer Lane Rate.

FAQs
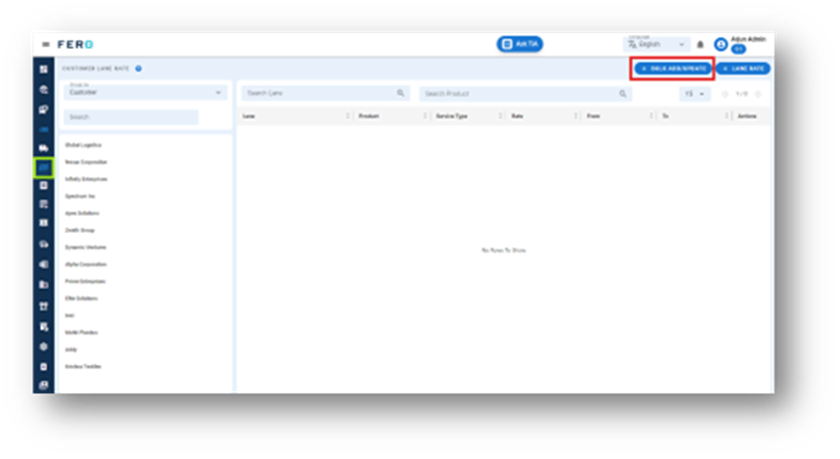
Q1. Can I Bulk Upload the Customer Lane rate?
Yes, you can bulk upload Customer Lane rates.
Follow these steps:
Step 1: Navigate to the bulk upload option.
Step 2: Select the customer and service type from the dropdown list.
Step 3: Select the lane from the dropdown list.
Step 4: Select the product from the dropdown list (multiple selections allowed).
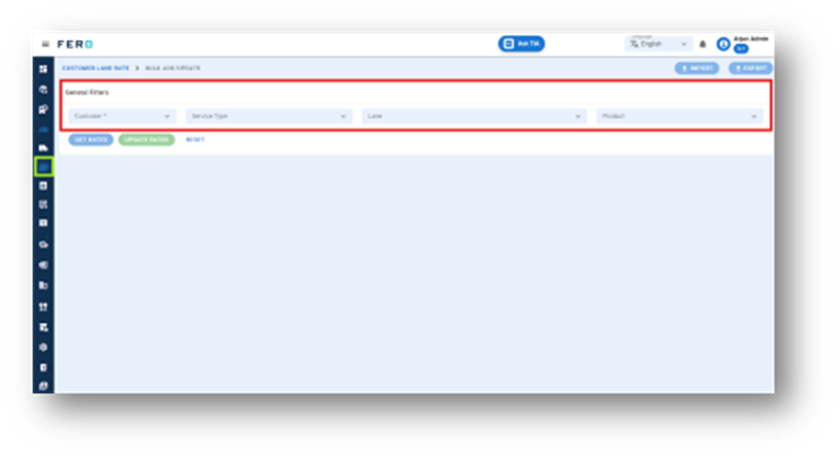
Step 5: Click on "Get Rates" to generate a template.
Step 6: Click on "Export" to download the template file. Fill in the required rates and details in the downloaded file.
Step 7: Click on "Import" and upload the updated file.
Step 8: Review the data for accuracy Click on "Update Rates" to finalize and add the Customer Lane rates to the system.
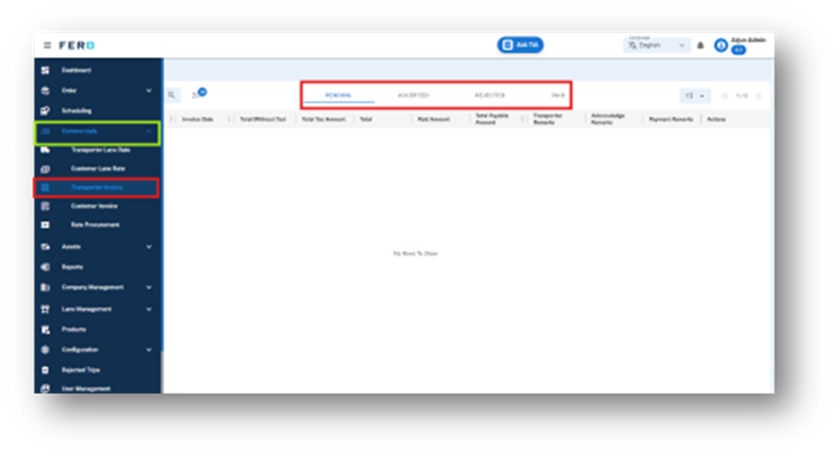
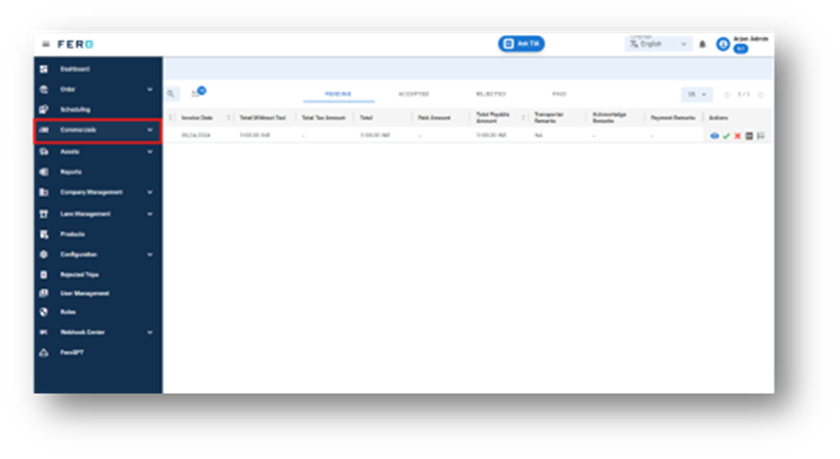
Transporter Invoice Overview
Transporter invoices are created by the transporter for completed orders. As an admin user, you can review and manage these invoices. You can:
- View Pending Invoices: Review the invoices submitted by transporters.
- Accept or Reject Invoices: Based on accuracy and fulfilment, you can either accept the invoice or reject it. Rejected invoices will be moved to the rejection page.
- Mark Invoices as Paid: Once payment is made, you can mark the invoice as paid, and it will reflect on the paid page.
Additionally, as an admin user, you can view the invoice logs and download invoices in PDF format. This ensures efficient and accurate management of transport invoices.
Steps to view, accept and reject transporter invoice
Step 1: Navigate to the Commercials section and click on it to reveal the drop-down list.

Step 2: Choose the Transporter invoice option from the drop-down list to access the transporter invoice homepage.
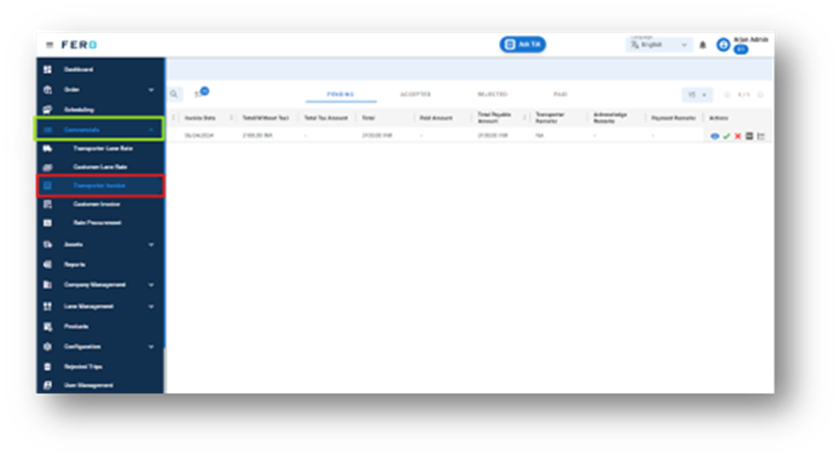
Step 3: Select the "Pending page" option to view, accept, and reject the Transporter invoice.

Customer Invoice Overview
Generate invoices for completed orders, facilitating billing processes and providing customers with clear payment documentation.
- Draft status: To generate invoice of the customer.
- View Pending Invoices: Review the invoices submitted by transporters.
- Accept or Reject Invoices: Based on accuracy and fulfilment, you can either accept the invoice or reject it. Rejected invoices will be moved to the rejection page.
- Mark Invoices as Paid: Once payment is made, you can mark the invoice as paid, and it will reflect on the paid page.
Additionally, as an admin user, you can view the invoice logs and download invoices in PDF format. This ensures efficient and accurate management of transport invoices.
Steps to create customer invoice
Step 1: Navigate to the Commercials section and click on it to reveal the drop-down list.
Step 2: Choose the Customer invoice option from the drop-down list to access the Customer invoice homepage.
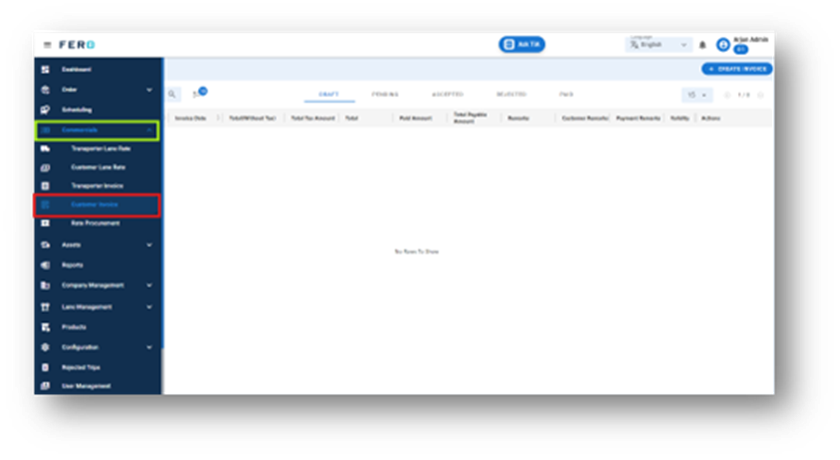
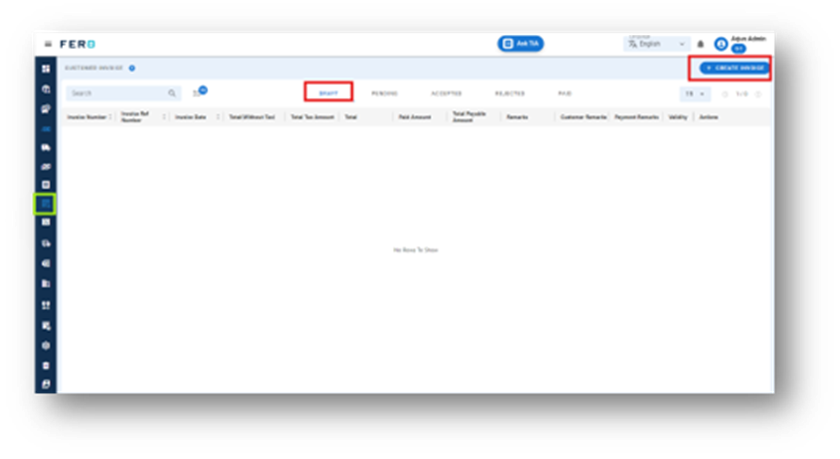
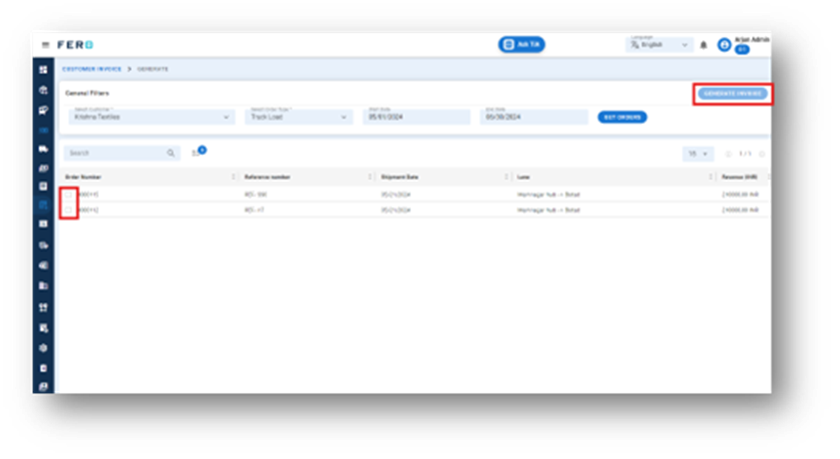
Step 3: Select the "DRAFT page" option to Create the Customer invoice.
Step 4: Select the customer from the dropdown list, choose the order type from the dropdown, then select the start date and end date. Click on "Get Orders".
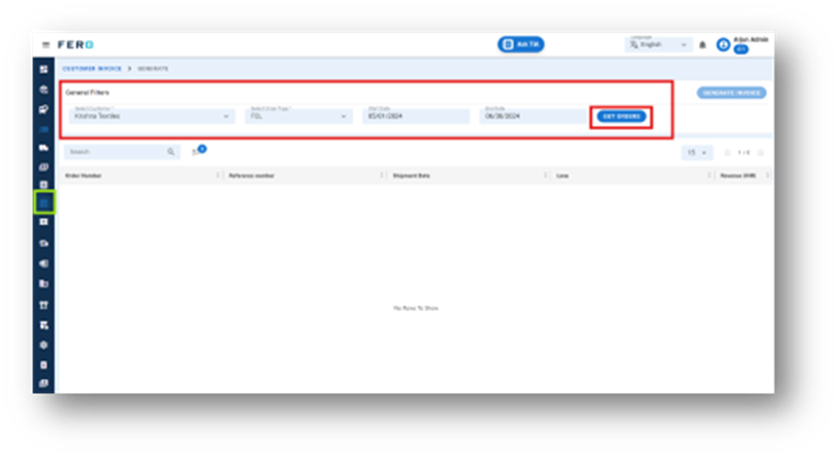
Step 5: Once you click on "Get Orders," a list of orders will appear. Select the orders by clicking on the checkboxes, then click "Generate Invoice".
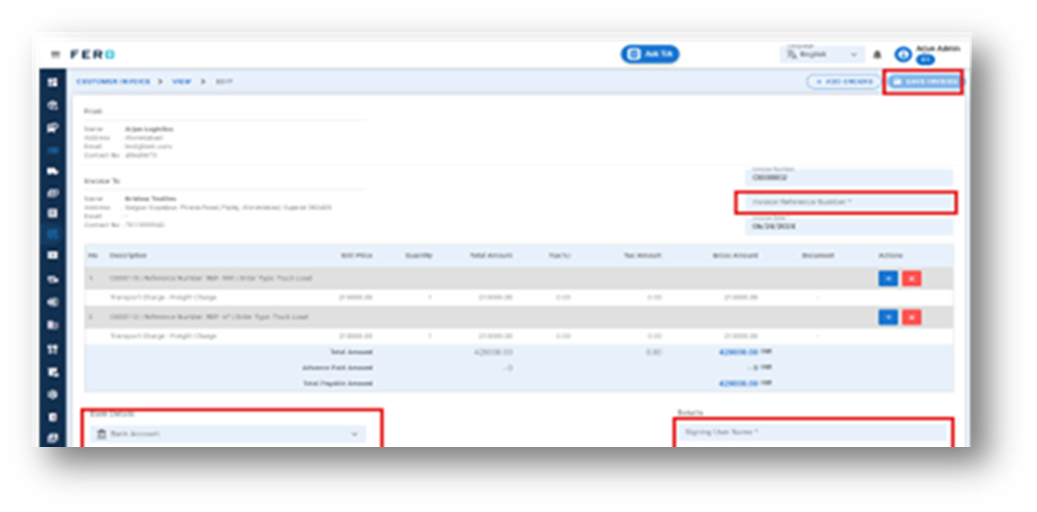
Step 6: A pop-up will appear; select "Yes". An invoice page will appear where you need to fill in details such as the invoice reference number, username for the signature, and bank details. Then click "Save Invoice" to generate your invoice
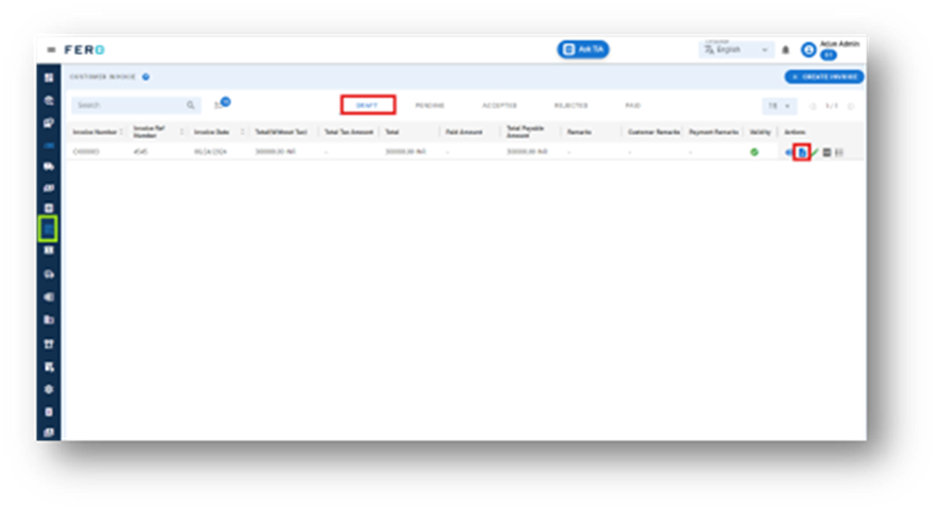
Step 7: Select the "DRAFT page" option to view and send the invoice to the customer. You can edit the customer invoice here. To complete the customer invoice, click on the send icon for customer review.
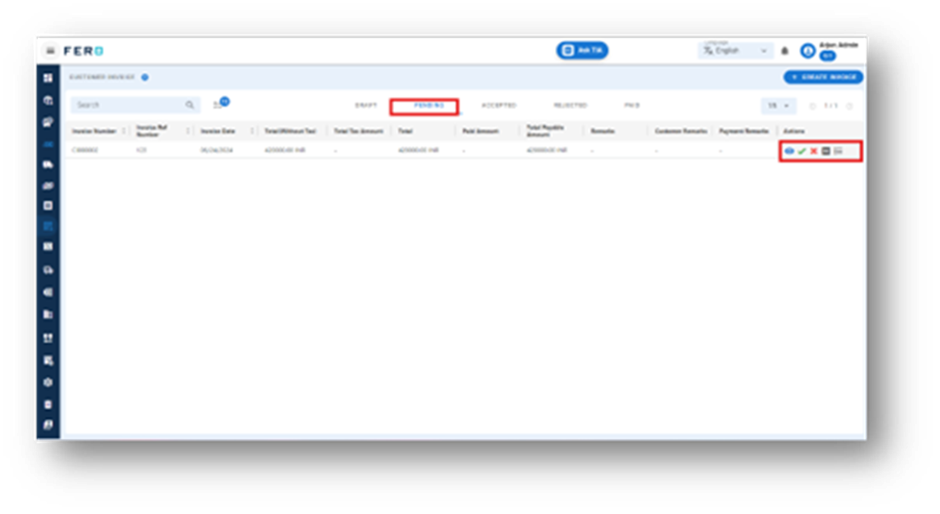
Step 8: Select the "Pending page" option to view, accept, and reject the customer invoice.
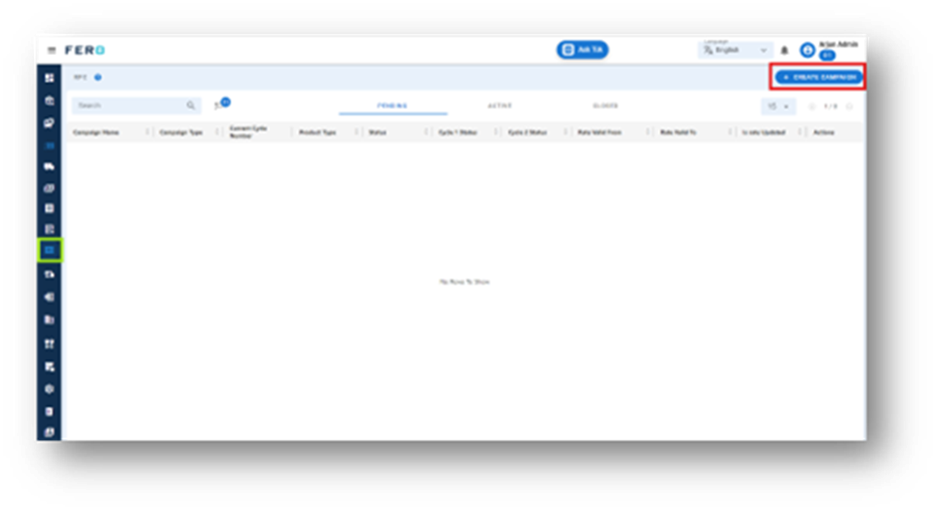
Rate Procurement Overview
Rate procurement determines the most competitive transport rates by creating campaign quotes from transporters based on market prices for various products and Lane types.
Steps to create rate procurement campaign
Step 1: Navigate to the Commercials section and click on it to reveal the drop-down list.
Step 2: Choose the Rate Procurement option from the drop-down list to access the Rate Procurement homepage.
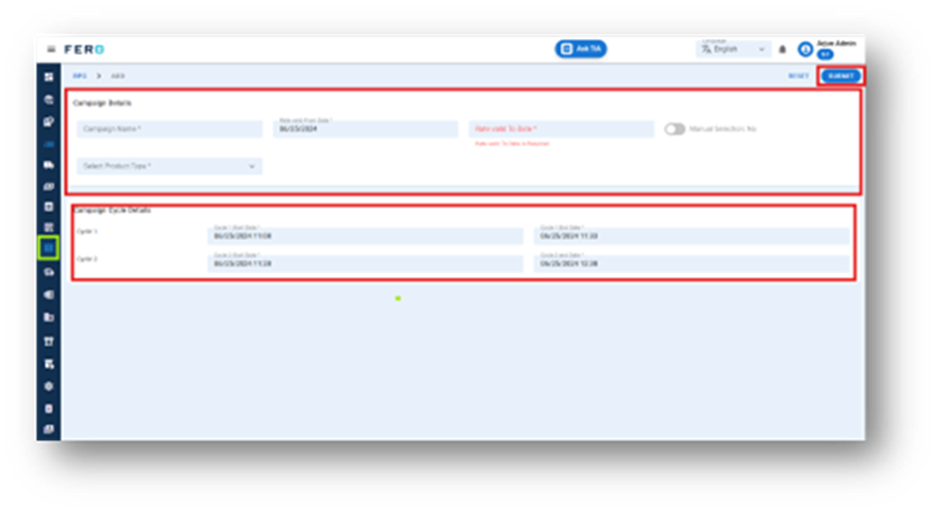
Step 3: Select the "Create Campaign" option to create the Rate procurement campaign creation process.
Step 4: Complete the required fields on the "create Rate procurement campaign " screen:
- Campaign Name: Enter a name for the campaign.
- Rate Validity Dates: Select the start and end dates for the rate validity.
- Product Type: Choose the product type from the dropdown list.
- Campaign Cycle Dates: Enter the cycle date and time details for the campaign.
After filling out all these fields, click "Submit" to create your rate procurement campaign.
Internal Rate Card Overview
The Internal Rate Card module allows you to establish contracts for internal vehicles based on specific lanes. This streamlines pricing negotiations and automates the autofill of freight charges during order assignment, ensuring clarity and efficiency.
Key Features:
- Lane-Specific Rates: Assign unique rates for different routes.
- Flexible Contracts: Set contract durations from a few days to a year.
- Easy Adjustments: Update rates to reflect changes in costs.
- Transparency: Maintain clear records of all agreed rates.
This module ensures fair and consistent pricing for all internal vehicle needs.

How do you set up the Internal rate card?
Step 1: Navigate to the Commercials section and click on it to reveal the drop-down list.
Step 2: Choose the Internal Rate Card option from the drop-down list to access the internal rate card homepage.
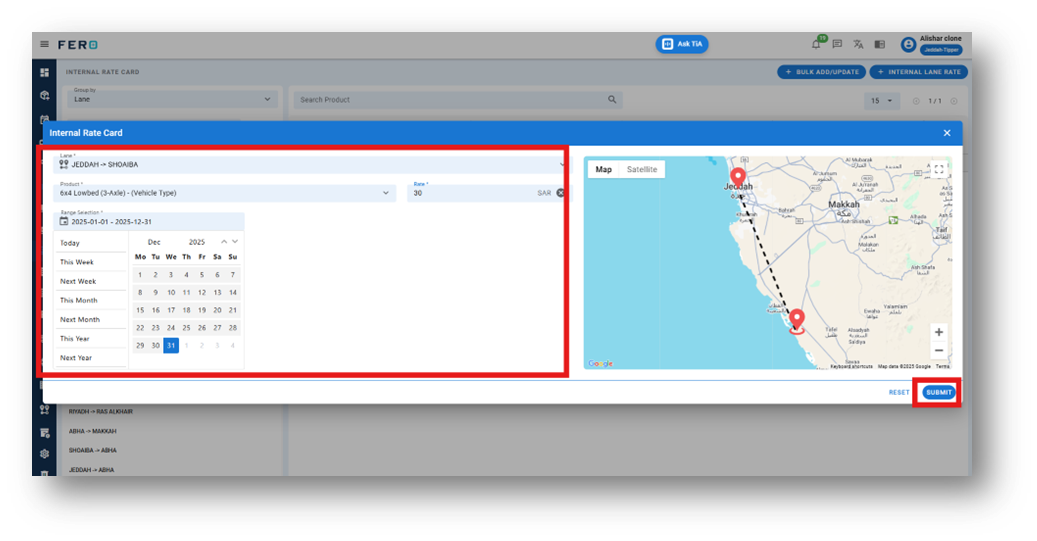
Step 3: Select the "Add internal rate card" option to create the internal rate card creation process.
Step 4: Complete the required fields on the "Add Internal rate card" screen:
- Choose the lane from the dropdown list.
- Select the product from the dropdown list.
- Enter the rates based on your business operations.
- Select the date range from the calendar.
After filling in all these details, click "Submit" to add your Internal rate card.
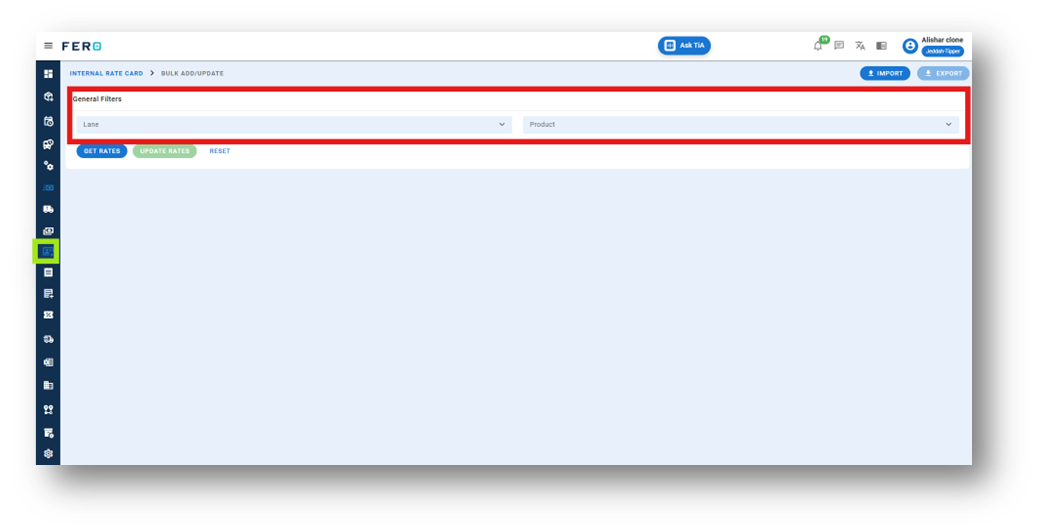
FAQs
Q1. Can I Bulk Upload the Transporter Lane Rate?
Yes, you can bulk upload Transporter Lane rates.
Follow these steps:
Step 1: Navigate to the bulk upload option.
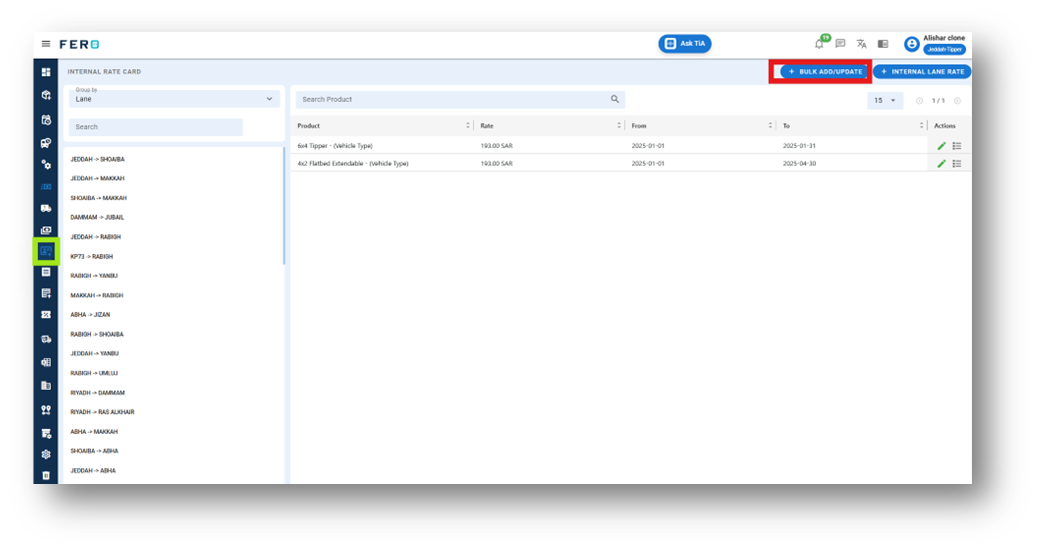
Step 2: Select the lane from the dropdown list. (multiple selections allowed).
Step 3: Select the product from the dropdown list (multiple selections allowed).
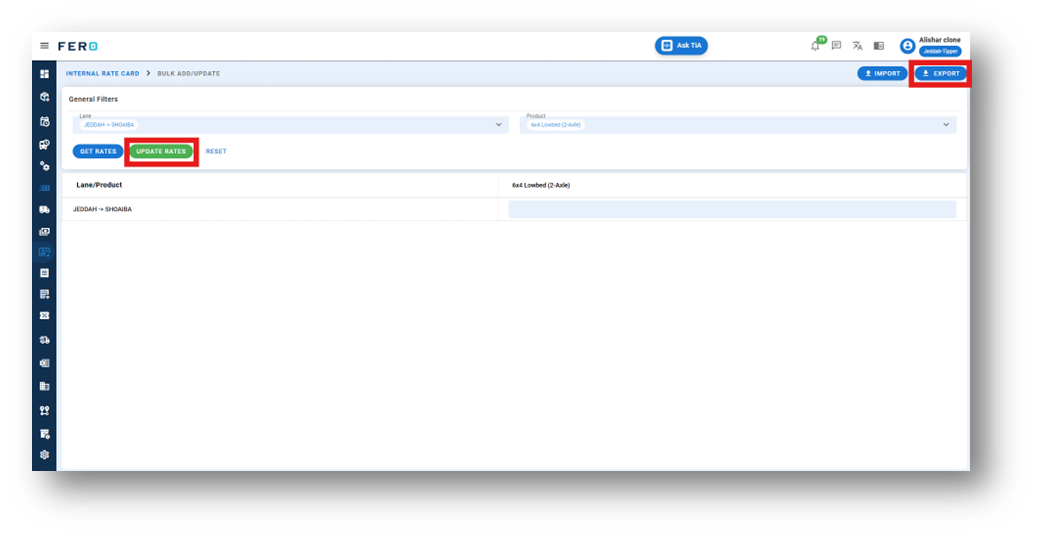
Step 4: Click on "Get Rates" to generate a template.
Step 5: Click on "Export" to download the template file. Fill in the required rates and details in the downloaded file.
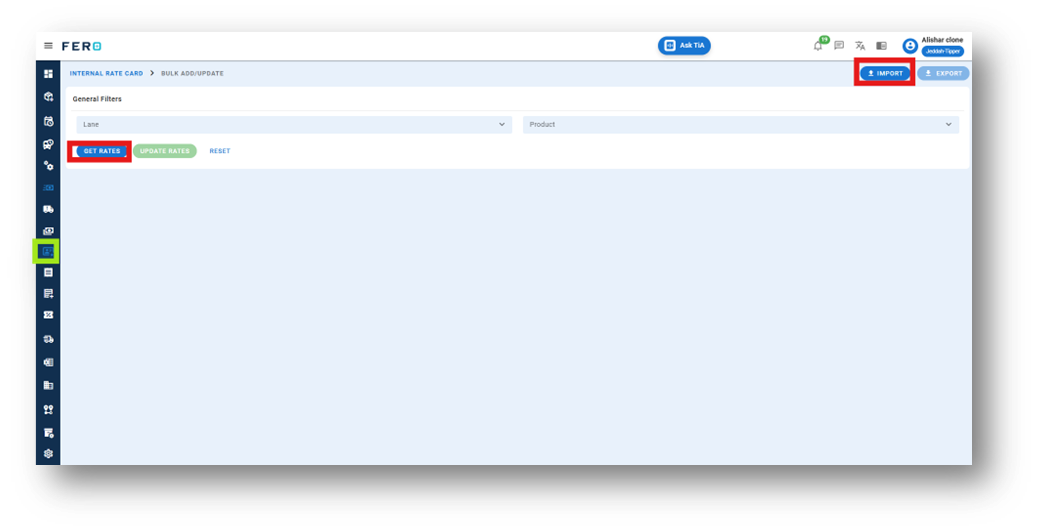
Step 6: Click on "Import" and upload the updated file.
Step 7: Review the data for accuracy Click on "Update Rates" to finalize and add the transporter lane rates to the system.