
Getting Started with Company Management
Company management Overview
Company Management involves overseeing the operations of a transportation business to ensure everything runs smoothly. Imagine you're in charge of a transportation company: your role is to manage the movement of goods from one place to another efficiently. This includes coordinating with transporters who move the items and ensuring customers receive their goods on time.
The Company Management module is divided into two key parts:
- Customer Management: Handling customer needs, ensuring their goods are transported correctly, and maintaining customer satisfaction.
- Transporter Management: Managing transporters, ensuring they move items efficiently and effectively.
This module is designed to help you keep operations running seamlessly, ensuring goods are delivered as promised and keeping both customers and transporters happy.
Company Management Video Tutorial
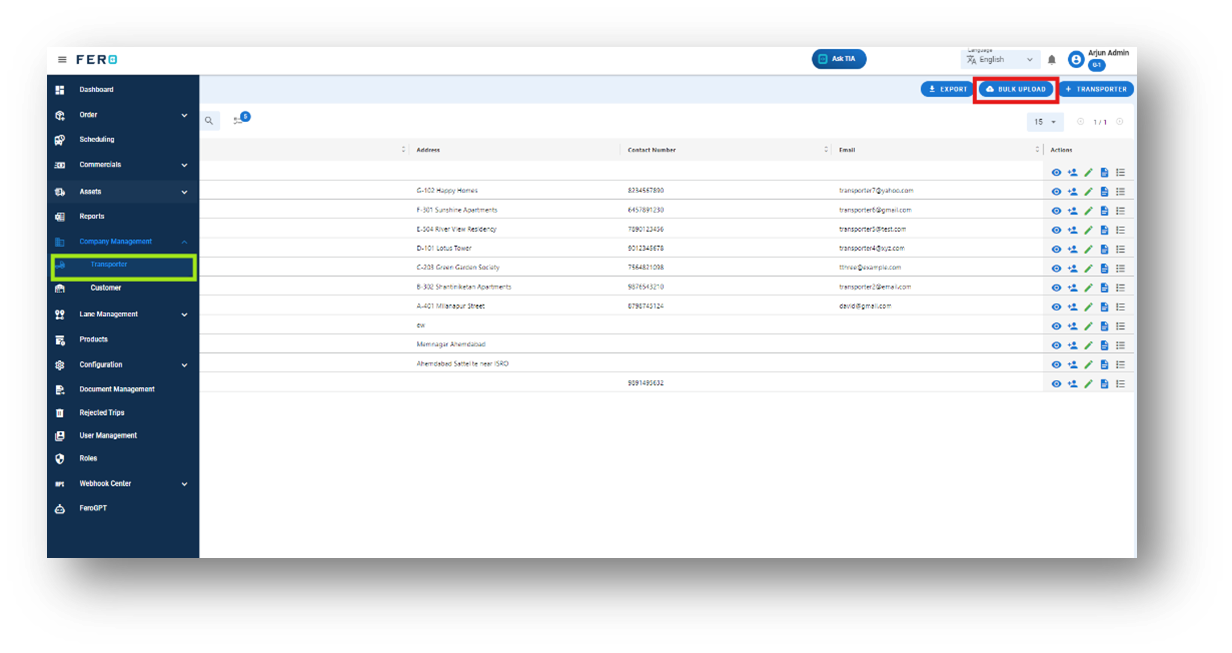
Transporter overview:
A transporter is a third-party entity responsible for moving items or orders from one location to another. Within the system, you can create login credentials for transporters, allowing them to access the platform and manage various tasks. This access helps ensure smooth operational activities and efficient management of transportation processes.
How do I setup the transporter module?
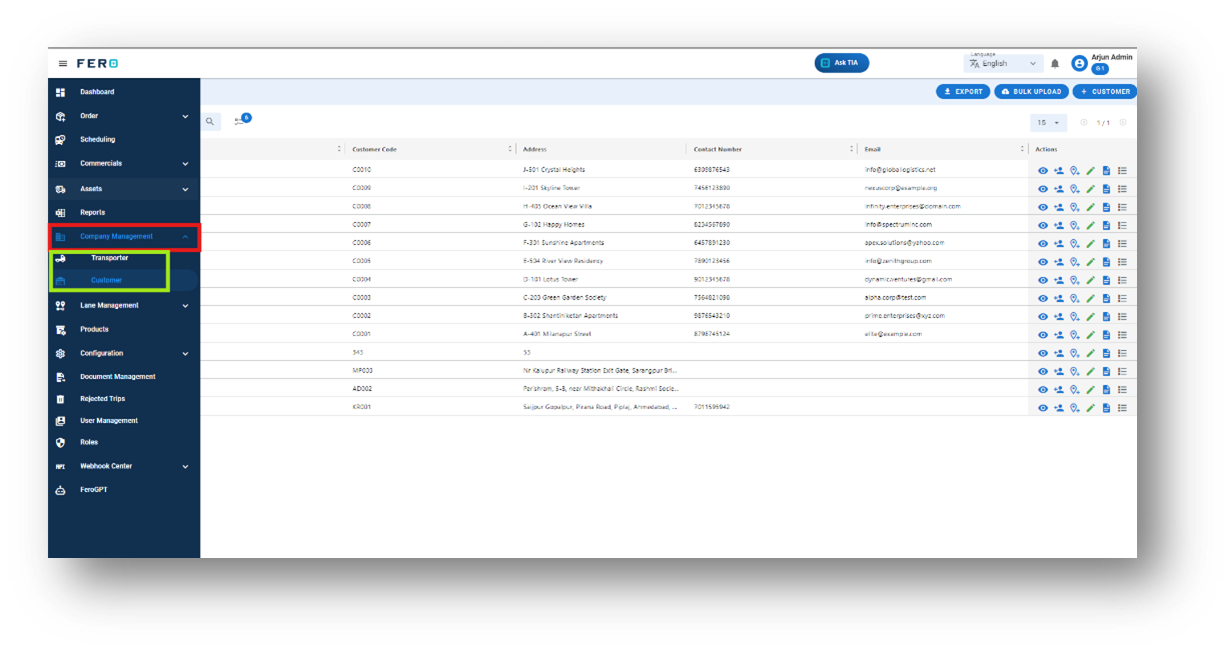
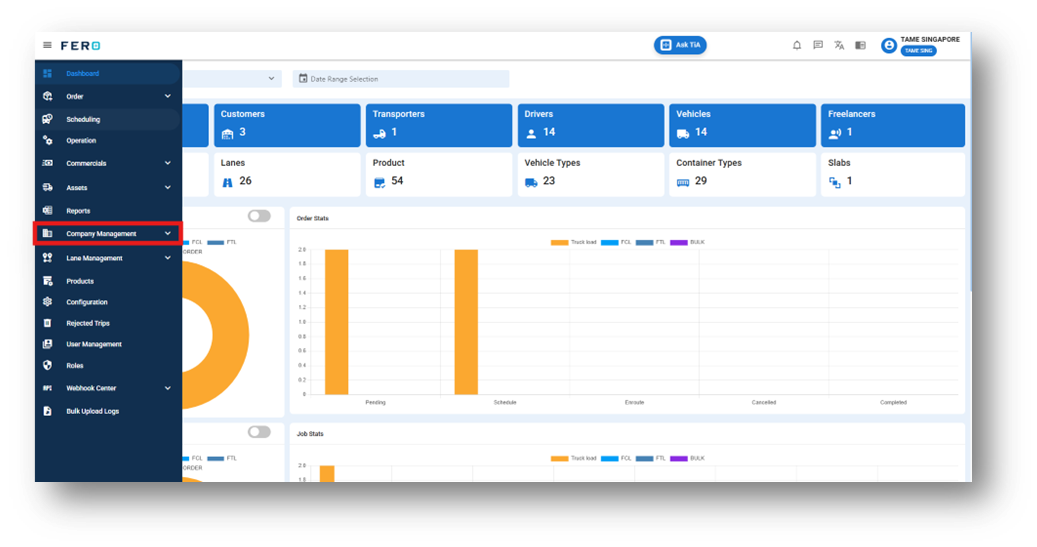
Step 1: Navigate to the company management section and click on it to reveal the drop-down list.

Step 2: Choose the Transporter option from the drop-down list to access the Transporter homepage.

Step 3: Select the "Add Transporter" option to initiate the Transportation creation process
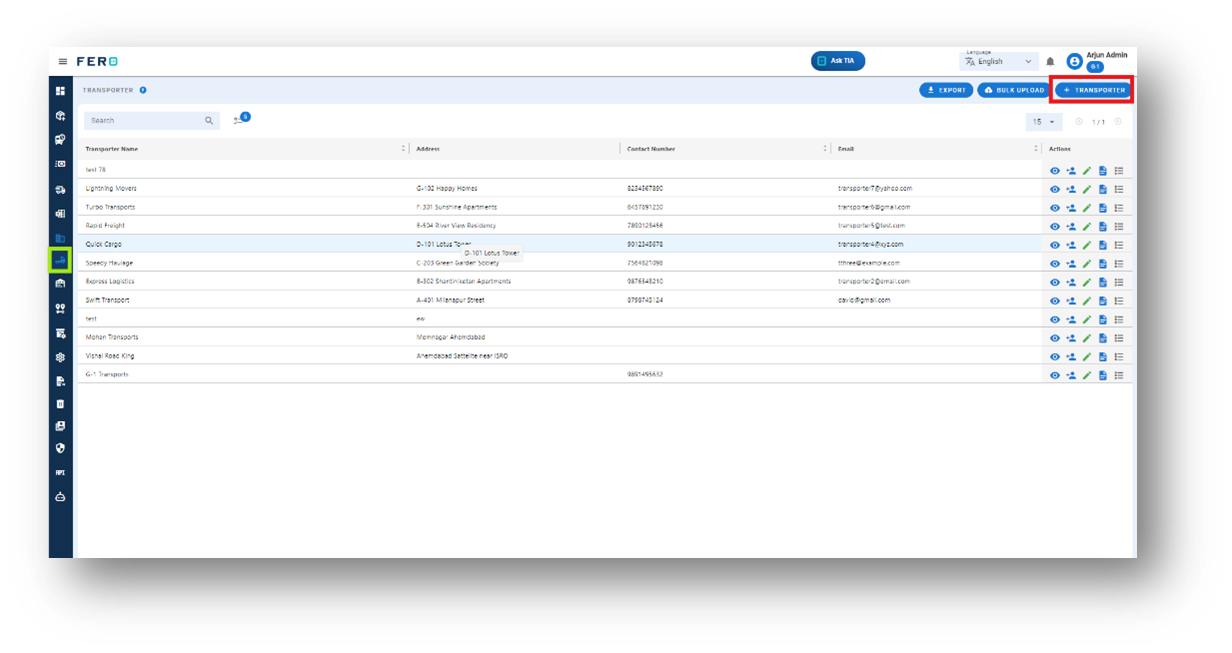
Step 4: Complete the required fields on the "Add Transporter" screen:
- Transporter Name: Enter the name of the transporter.
- Contact Number: Provide the contact number.
- Address: Enter the address details.
- Tax Number: Provide the tax number.
After filling out these fields, click "Submit" to add the transporter.

FAQs
Q1. Can I Edit Transporter Details?
Yes, Transporter details can be edited by navigating to the Transporter homepage, where all Transporter are listed. Simply locate the Transporter requiring modification and click on the edit icon. Changes made will be updated in real-time.

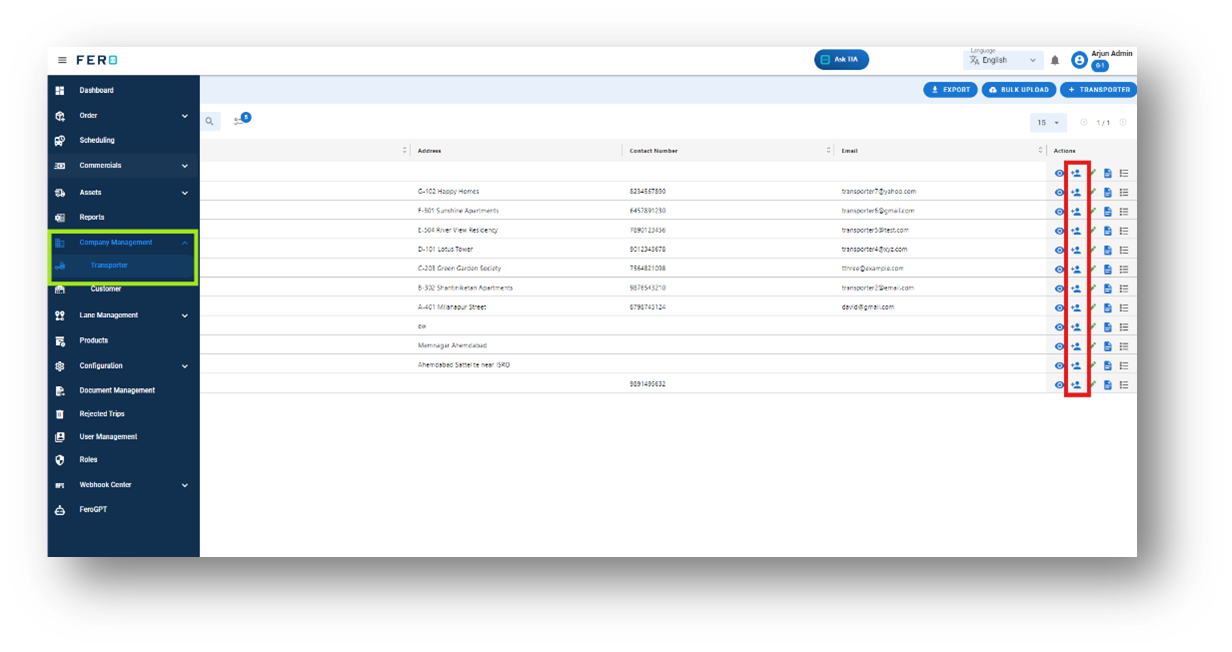
Q2. How can I create login credential for transporters?
To create login credentials for transporters, navigate to the transporter home page and look for the action field with multiple CTA buttons. Click on the second icon to create transporter login credentials.
Step to create transporter login credentials
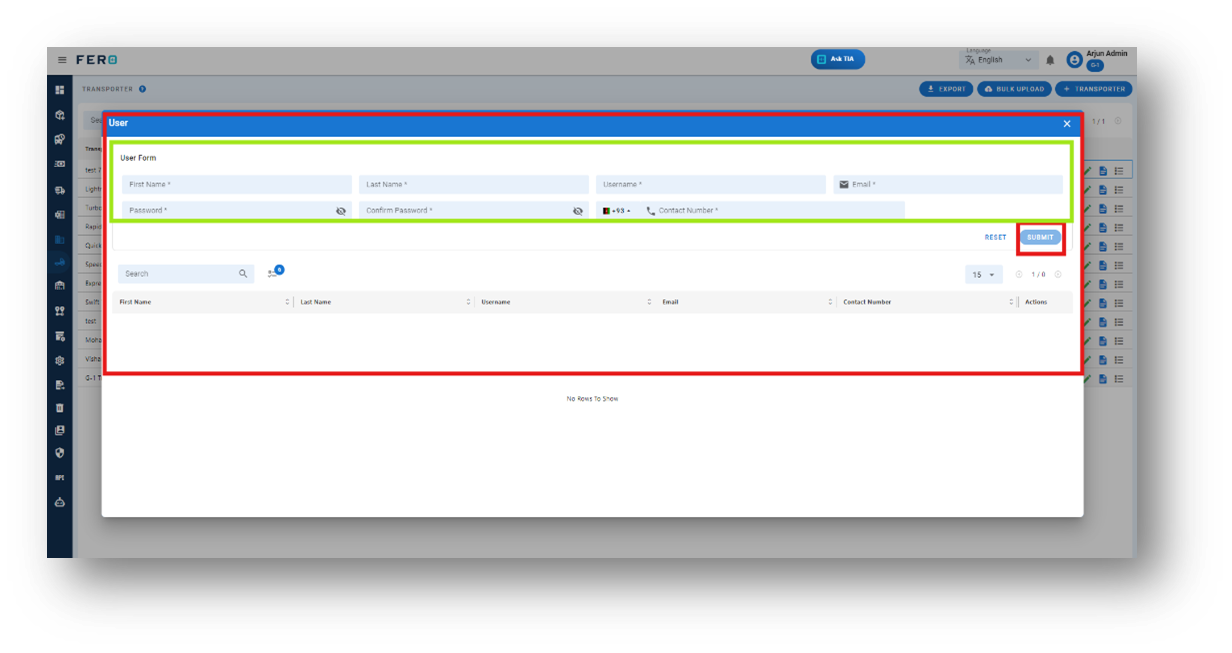
Step 1: Navigate to the Add User Section: On the transporter homepage, click on the "Add User" section.
Step 2: Complete the required fields on the "Create the Transporter login credential " screen:
- Transporter’s Name and Username: Enter the first and last name of the transporter, and then choose a username.
- Contact Number and Email: Provide the contact number and email address.
- Create Password: Create a password.
After filling out these fields, click "Submit" to add the transporter.
Note: You can create multiple user login credentials for a single transporter.
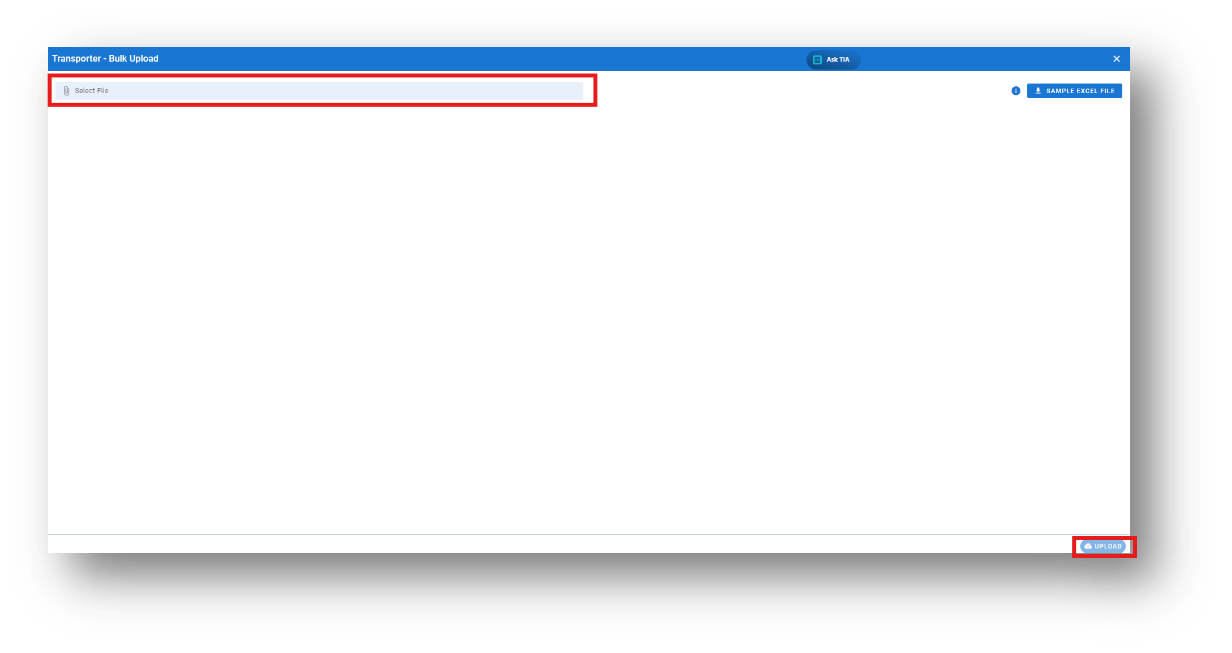
Q3. Can I Bulk Upload the Transporter?
Yes, you can bulk upload Transporters. This method is the easiest and fastest way to add various Transporters. To do this, navigate to the bulk upload option, download the sample file, enter the details into the sample file, and upload the document. All the Transporters will be added within seconds.
Steps to Bulk Upload Transporter:
Step 1: Navigate to the Bulk Upload option.
Step 2: Download the sample file and fill in all your Transporter details according to the format provided in the sample file.

Step 3: Select the completed file from your system and click the "Upload" button.
All the Transporter will be added to the system within seconds.
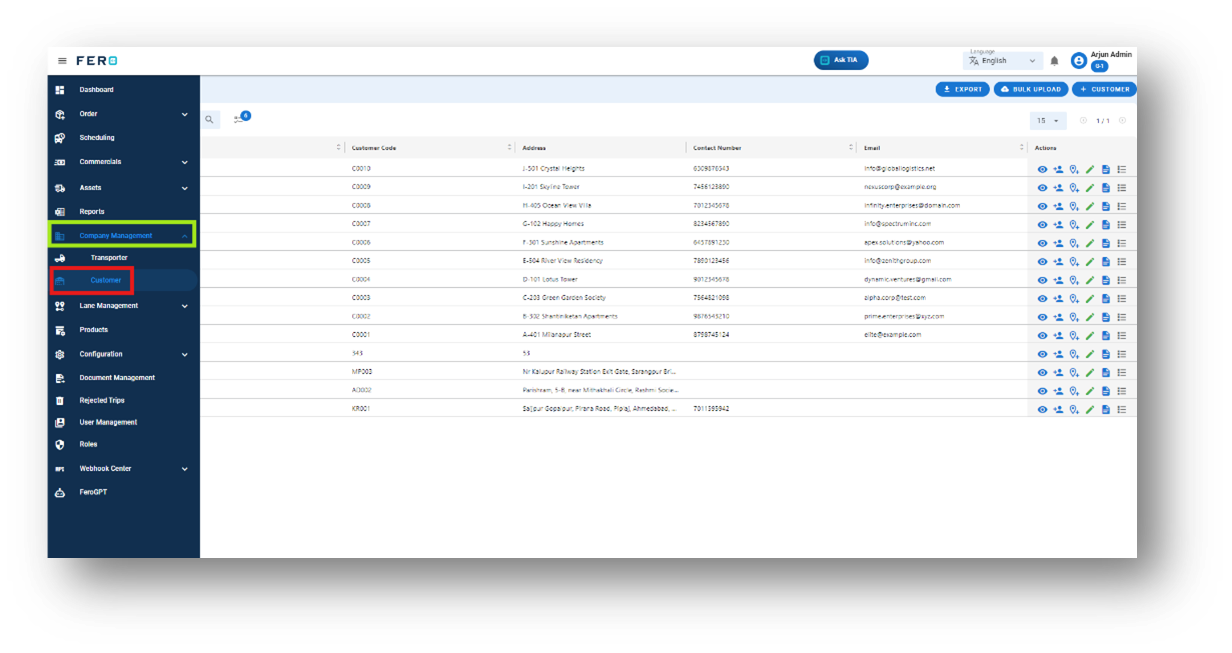
Customer overview:
Customers are individuals or businesses requiring delivery services to transport items from one location to another.
How do I setup the customer module?
Step 1: Navigate to the company management section and click on it to reveal the drop-down list.

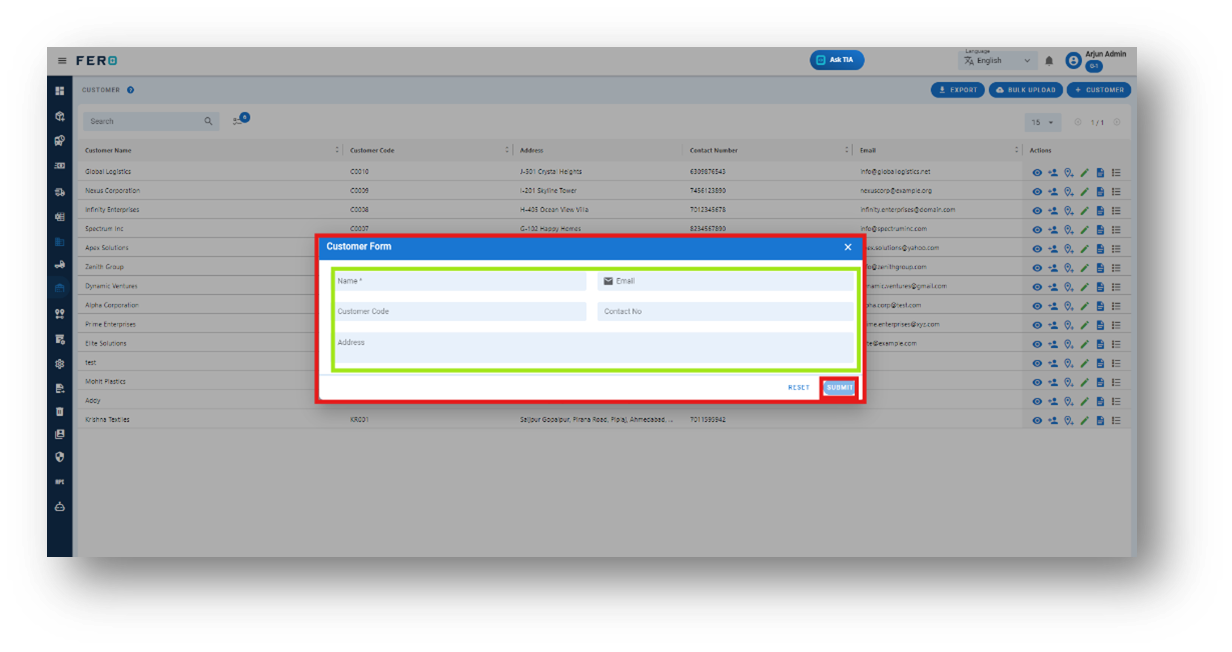
Step 2: Choose the Customer option from the drop-down list to access the Customers homepage.
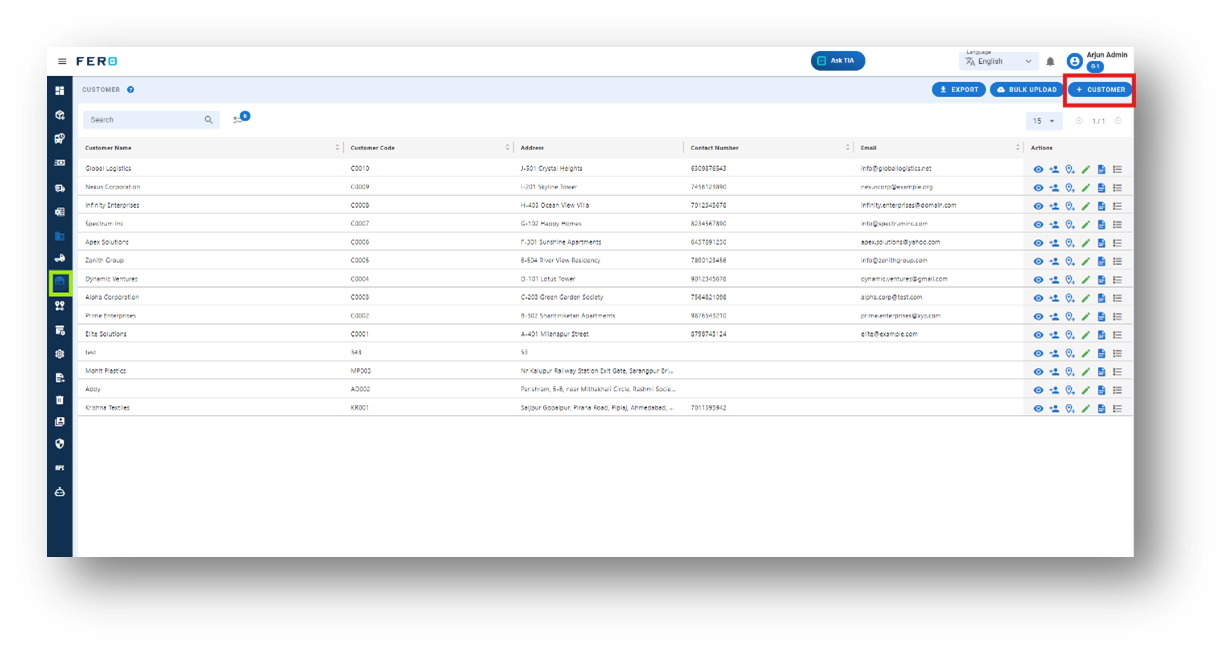
- Customer Name: Enter the name of the transporter.
- Contact Number and Email: Provide the contact number and Email.
- Address: Enter the address details.
- Customer code: Give any Customer code.
After filling out these fields, click "Submit" to add the transporter
FAQs
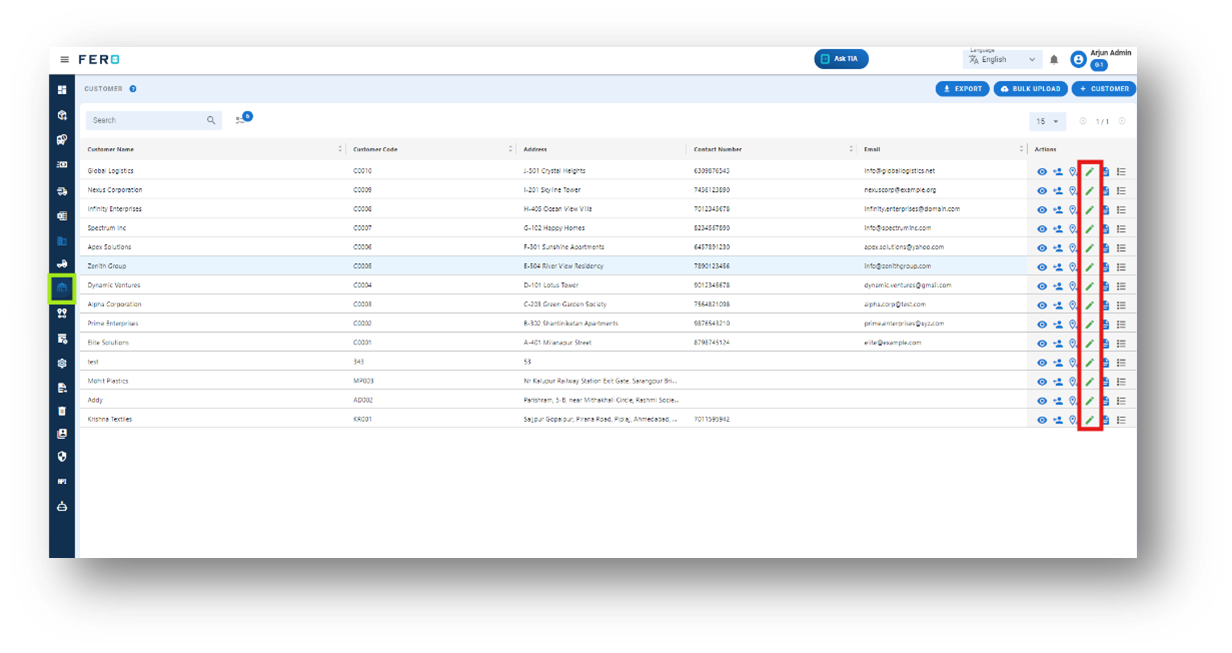
Q1. Can I Edit Customer Details?
Yes, Customer details can be edited by navigating to the Customer homepage, where all Customer are listed. Simply locate the Customer requiring modification and click on the edit icon. Changes made will be updated in real-time.
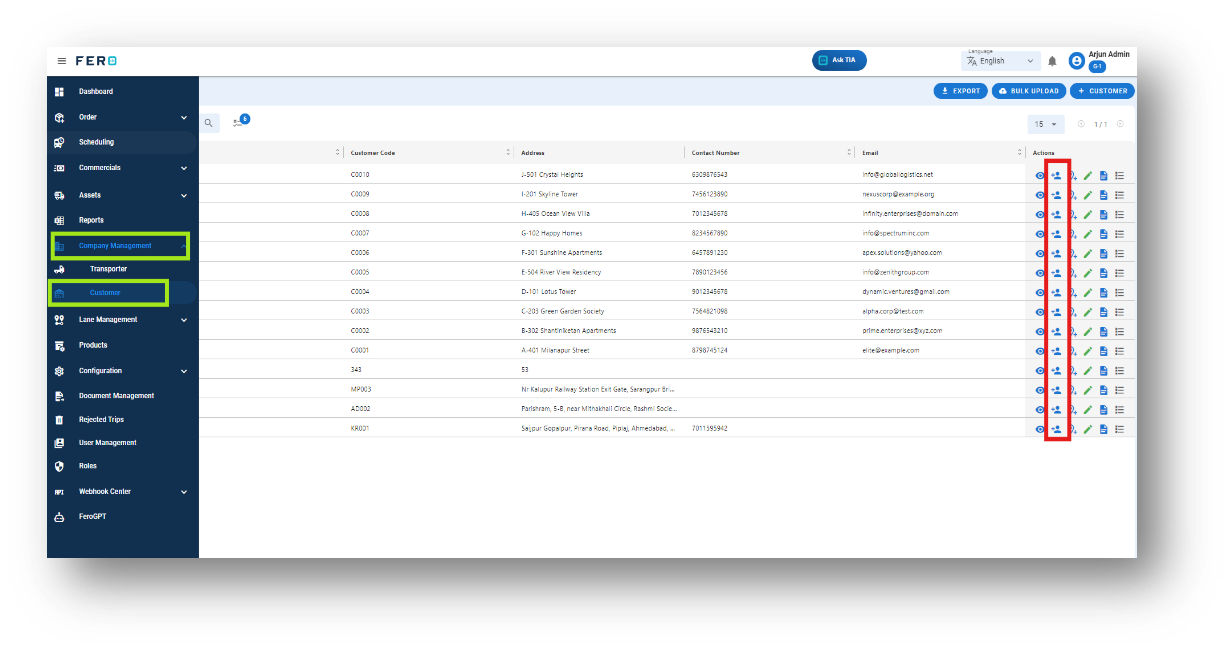
Q2. How can I create login credential for Customers?
To create login credentials for Customers, navigate to the Customers home page and look for the action field with multiple CTA buttons. Click on the second icon to create Customers login credentials.
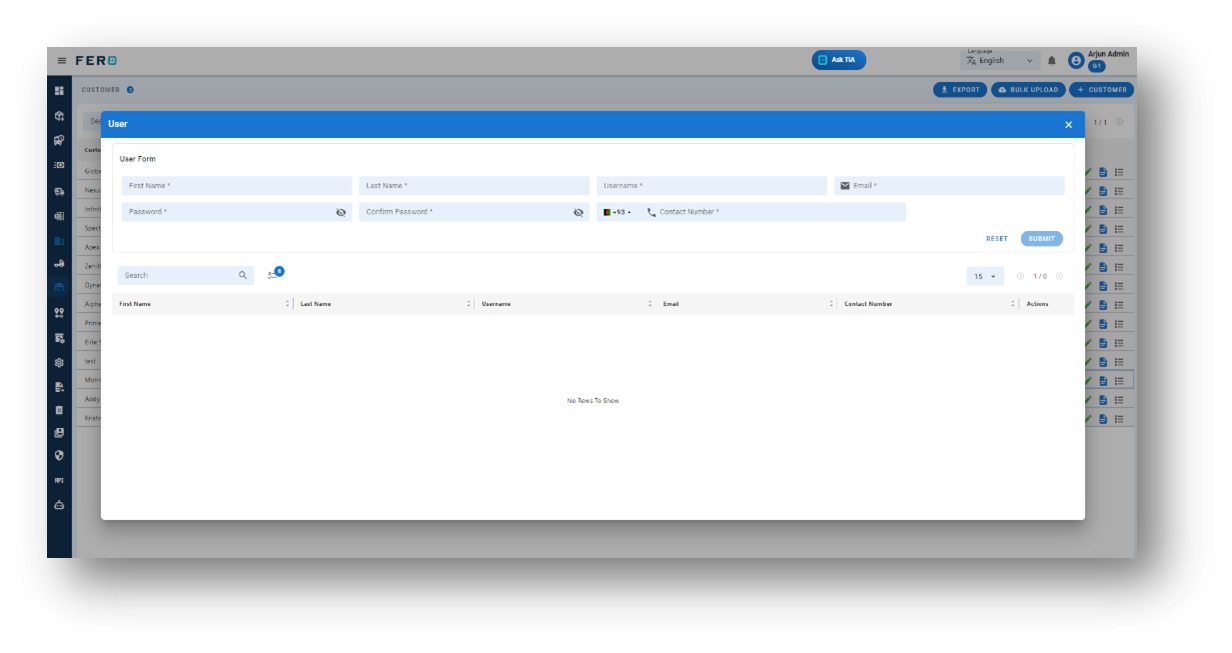
Step to create Customers login credentials
Step 1: Navigate to the Add User Section: On the Customers homepage, click on the "Add User" section.
Step 2: Complete the required fields on the "Create the Customers login credential " screen:
- Customer’s Name and Username: Enter the first and last name of the Customers, and then choose a username.
- Contact Number and Email: Provide the contact number and email address.
- Create Password: Create a password.
After filling out these fields, click "Submit" to add the transporter.
Note: You can create multiple user login credentials for a single customer.
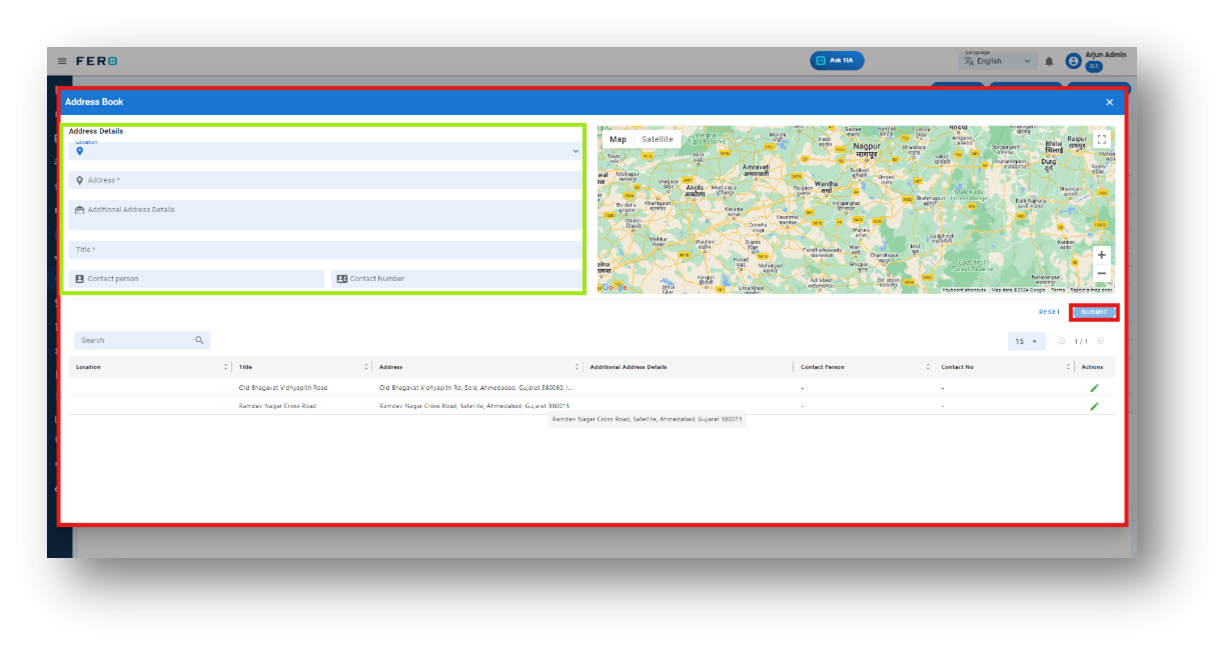
Q3. How Can I Add Multiple Addresses for a Single Customer or Maintain the Address Book of Customers?
You can add multiple addresses for a single customer, which helps in maintaining a comprehensive address book. This feature is useful for managing customers with multiple pickup points or delivery locations, ensuring smooth and efficient logistics operations. By organizing all addresses in one place, you can streamline the process of selecting the correct pickup or drop-off point for each order.
Steps to Manage and Add Multiple Address Information of Customers
Step 1: Navigate to the Add Address Section: On the Customers homepage, click on the "Add Address" section.

Step 2: Complete the required fields on the "Create the Customers login credential " screen:
- Select Location: Choose the location from the dropdown menu.
- Address Details: Add the primary address details and any additional address information.
- Title: Define the title for the address.
- Contact Person: Provide the contact person’s name and mobile number.
After filling out these fields, click "Submit" to add the Customers address.
Note: You can add multiple addresses for a single customer and edit them as needed. This feature helps you maintain an organized address book, ensuring efficient management of customers with multiple pickup or delivery points
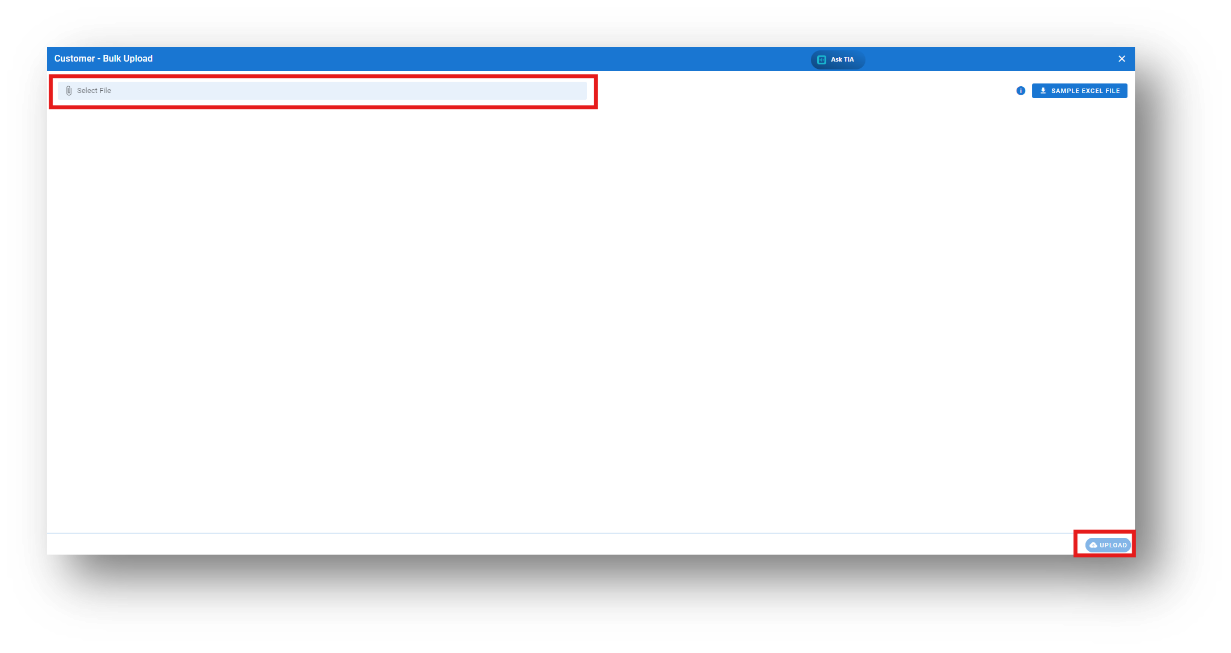
Q4. Can I Bulk Upload the Customers?
Yes, you can bulk upload Customers. This method is the easiest and fastest way to add various Customers. To do this, navigate to the bulk upload option, download the sample file, enter the details into the sample file, and upload the document. All the Customers will be added within seconds.
Steps to Bulk Upload customers
Step 1: Navigate to the Bulk Upload option.
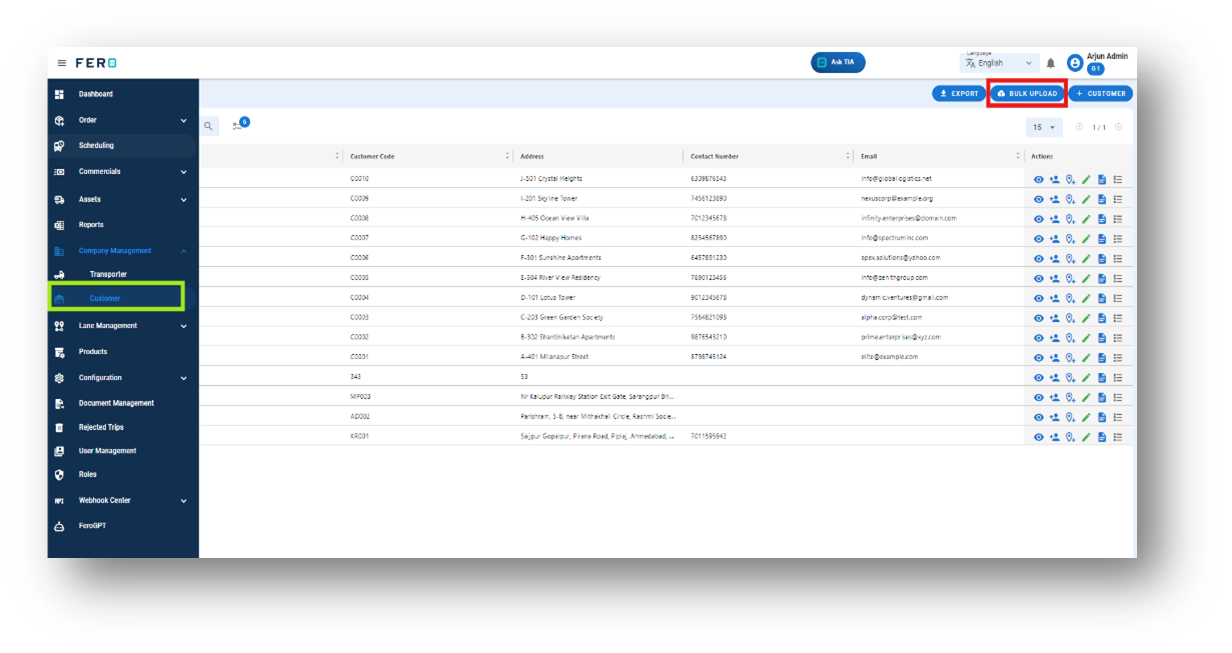
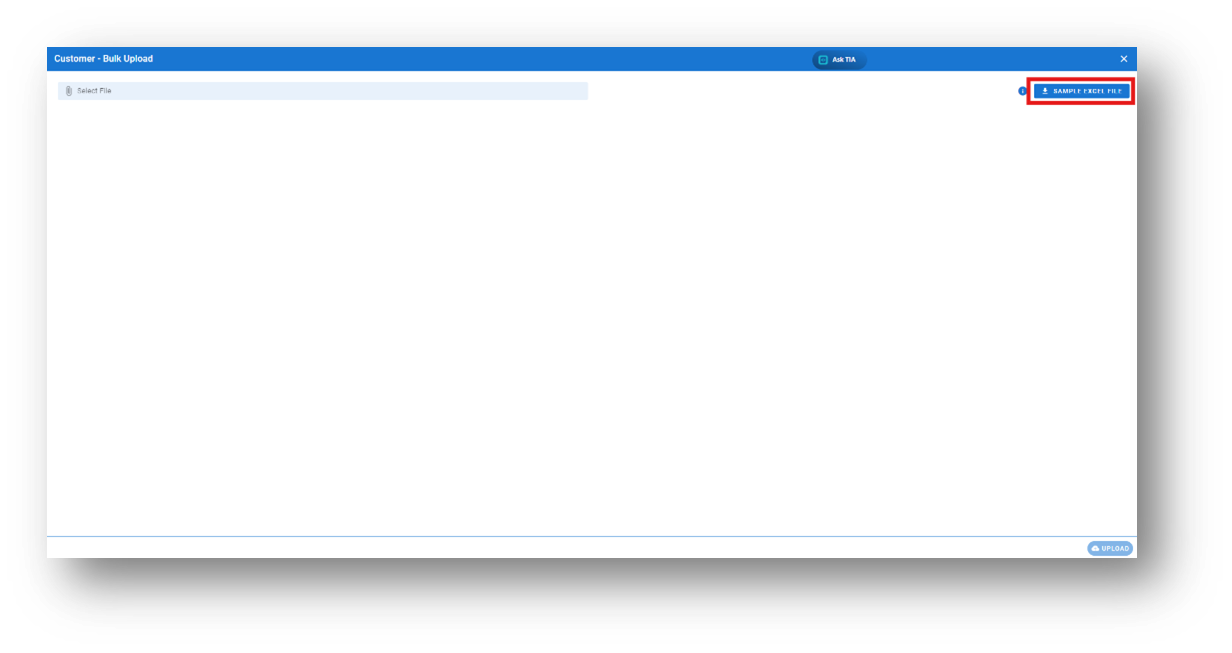
Step 3: Select the completed file from your system and click the "Upload" button.
All the Customer will be added to the system within seconds.
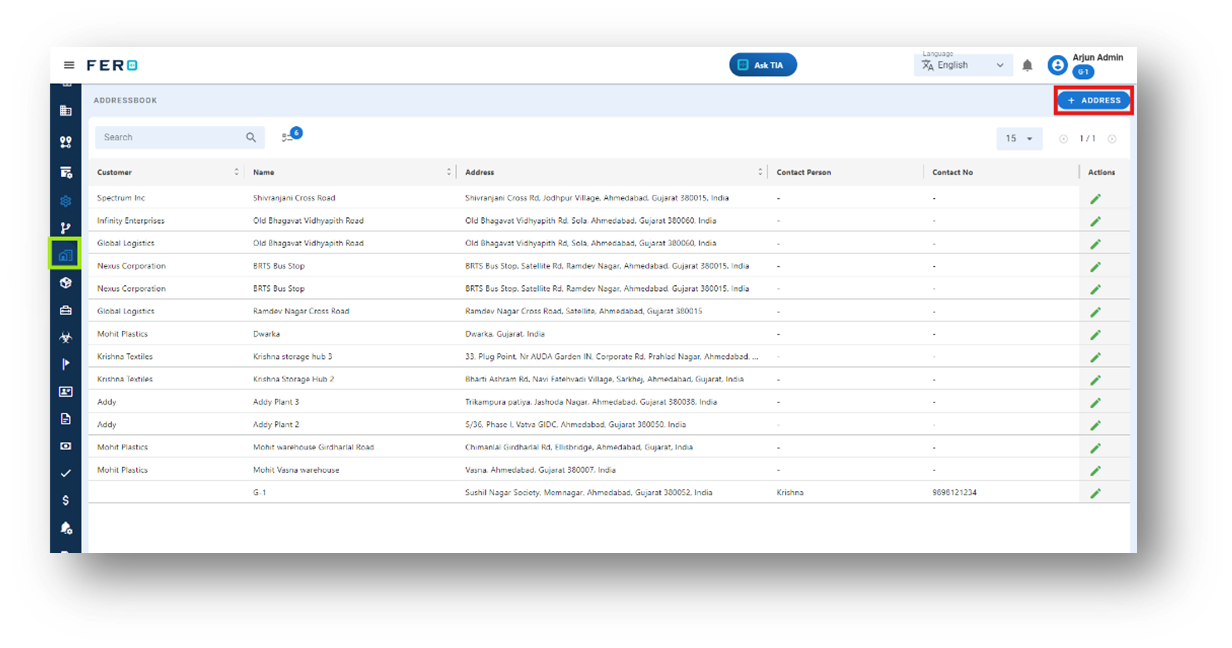
Address Book module of Company Management.
What is an Address book?
An address book is a database that stores your customers names, addresses and other contact information of your customers
How to set up an Address Book?
Step 1: Navigate to the company management section and click on it to reveal the drop-down list.
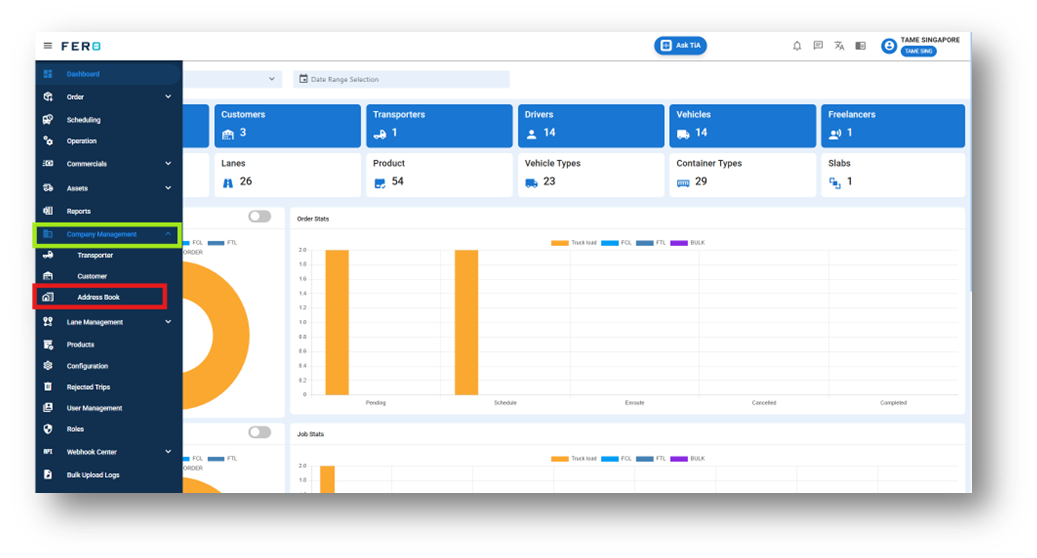
Step 2: Choose the Address book option from the Configuration homepage.
Step 3: Select the "Add Address" option to initiate the branch creation process.
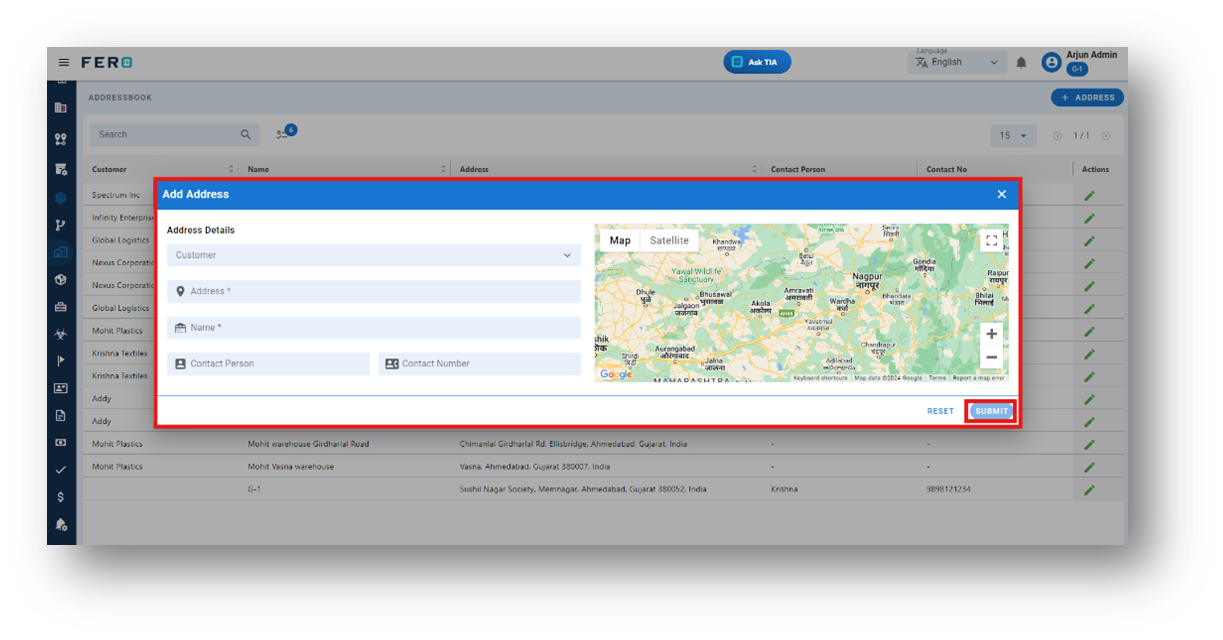
Step 4: Complete the required fields on the "Add Address" screen, including Select customer from the drop down, Contact Number, and Address Details, then click "Submit" to add the Address Book.
FAQs
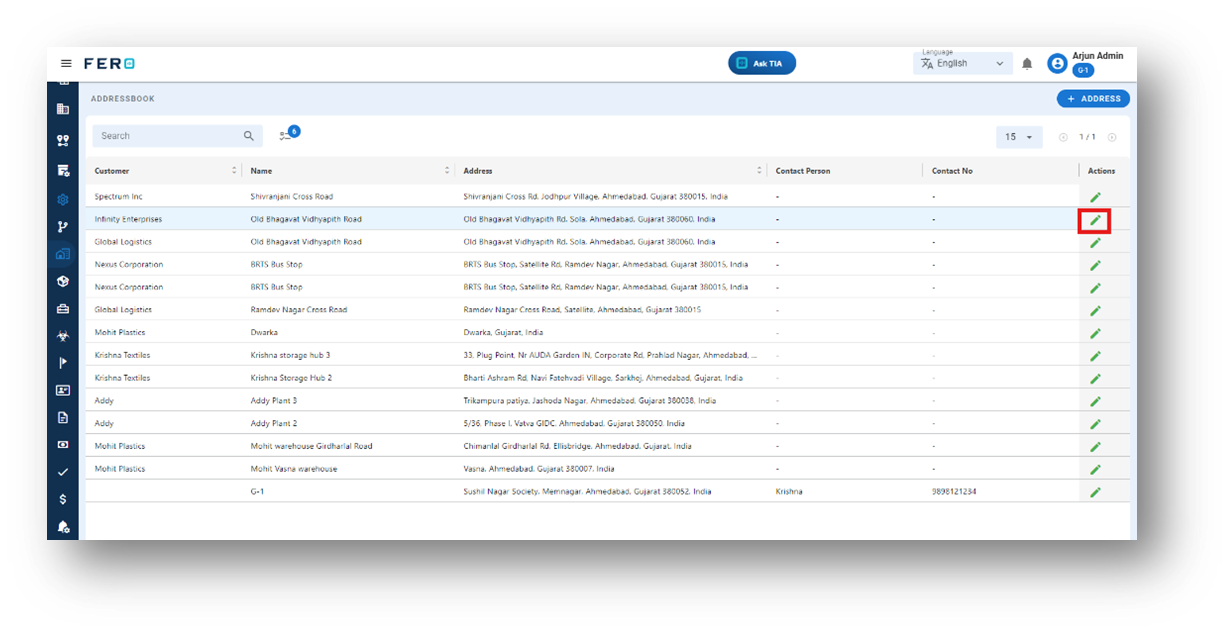
Q1. Can I Edit Address book Details?
Yes, Address book details can be edited by navigating to the Address book homepage, where all address books are listed. Simply locate the Address book requiring modification and click on the edit icon. Changes made will be updated in real-time
Q2. Can I Add Multiple Address book?
Absolutely, there are no limitations on the number of Address book you can add. Depending on your business activities and operational requirements across various locations, multiple Address book can be seamlessly incorporated into your organization's structure