
Introduction to Assets Management
Assets Overview
Assets refer to the key resources of the transportation business, including vehicles, drivers, trailers, and freelancers. In the asset module, we capture the details of these resources. This information is crucial for allocating orders and ensuring the efficient movement of items from one location to another. By managing assets effectively, businesses can optimize their operations, minimize costs, and enhance overall productivity. Additionally, maintaining a comprehensive asset overview streamlines decision-making processes and facilitates better resource utilization
Asset And Freelancers Management Video Tutorial

Asset’s vehicle module overview:
What does vehicle mean in the system?
Maintain detailed records of delivery trucks, including size and weight capacities, for efficient fleet management and allocation
How do I setup the vehicle module?
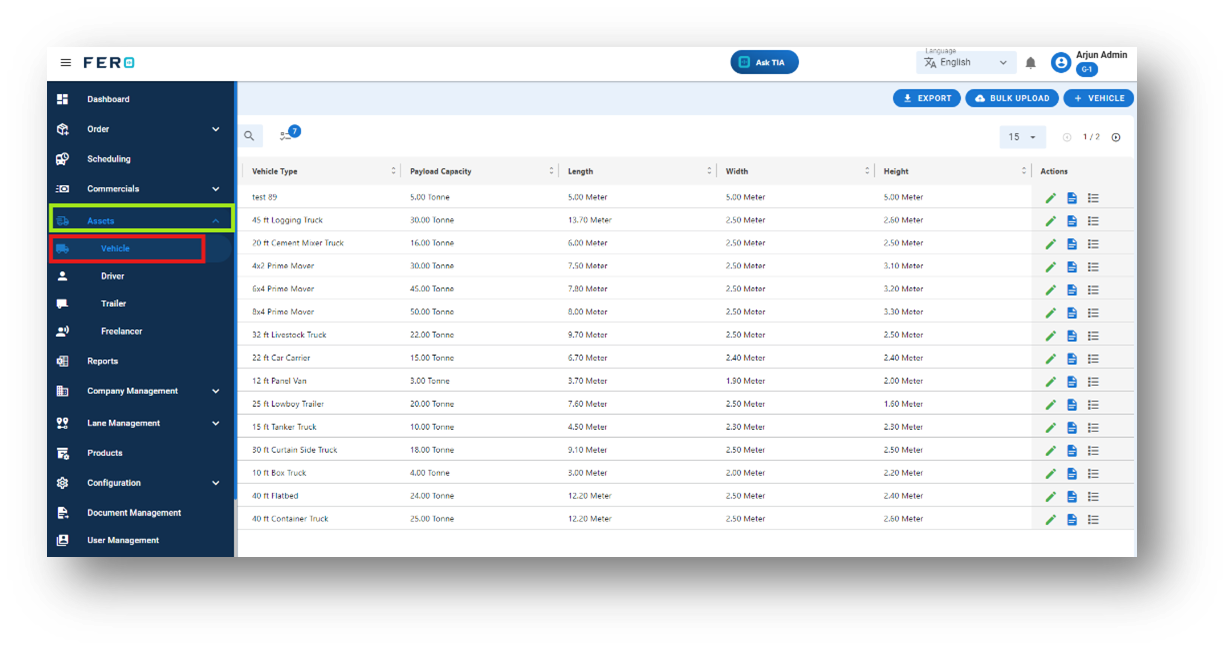
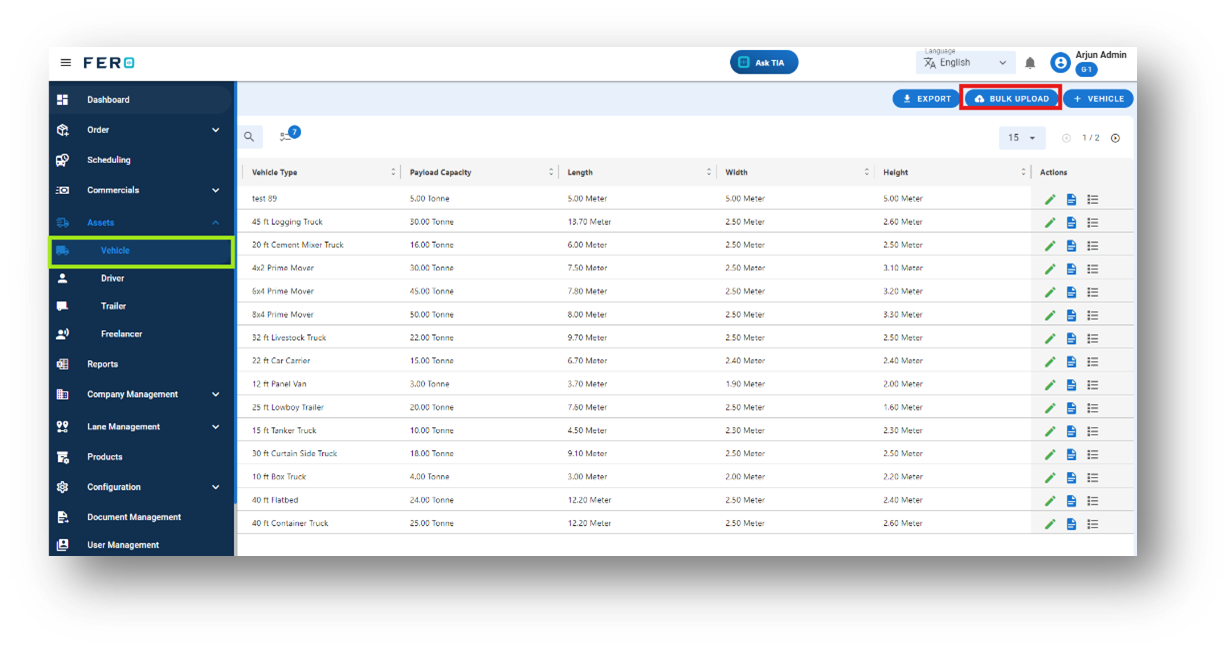
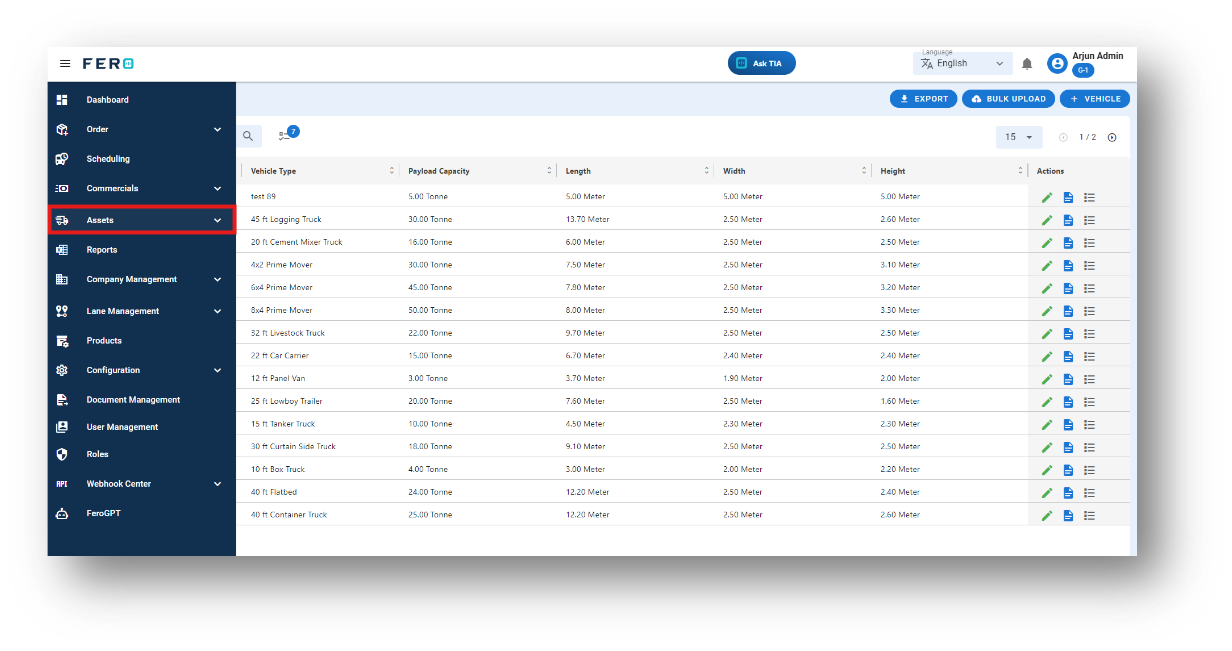
Step 1: Navigate to the assets section and click on it to reveal the drop-down list.

Step 2: Choose the vehicle option from the drop-down list to access the vehicle homepage.
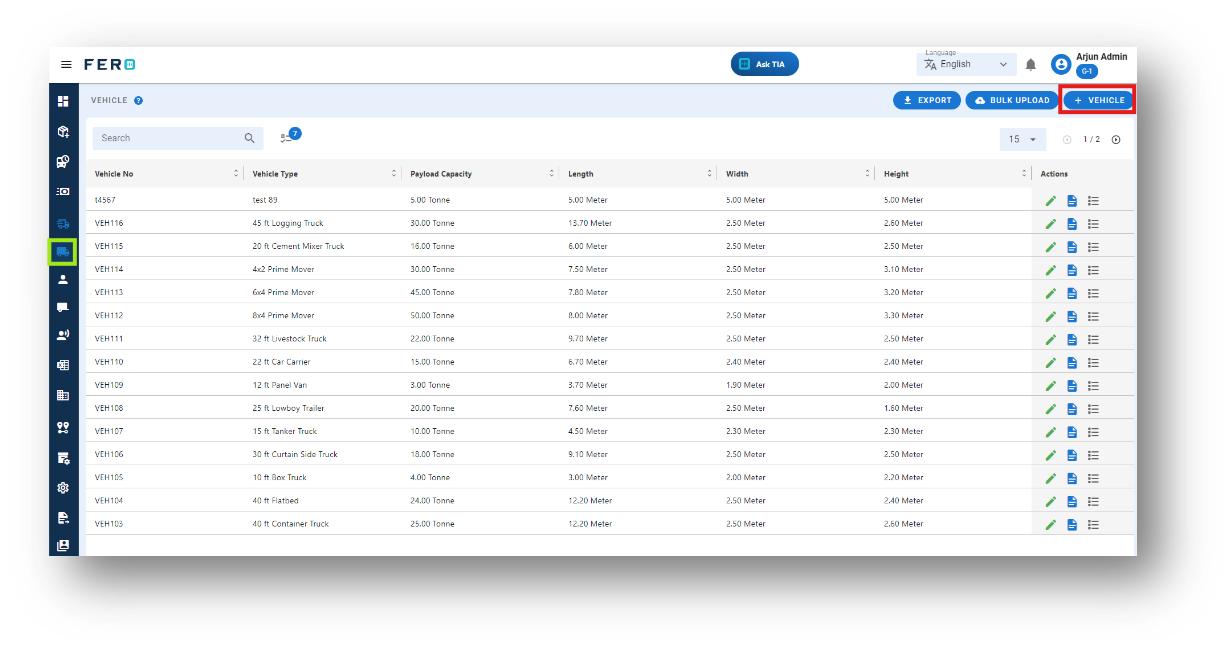
Step 3: Select the "Add Vehicle" option to initiate the vehicle creation process.
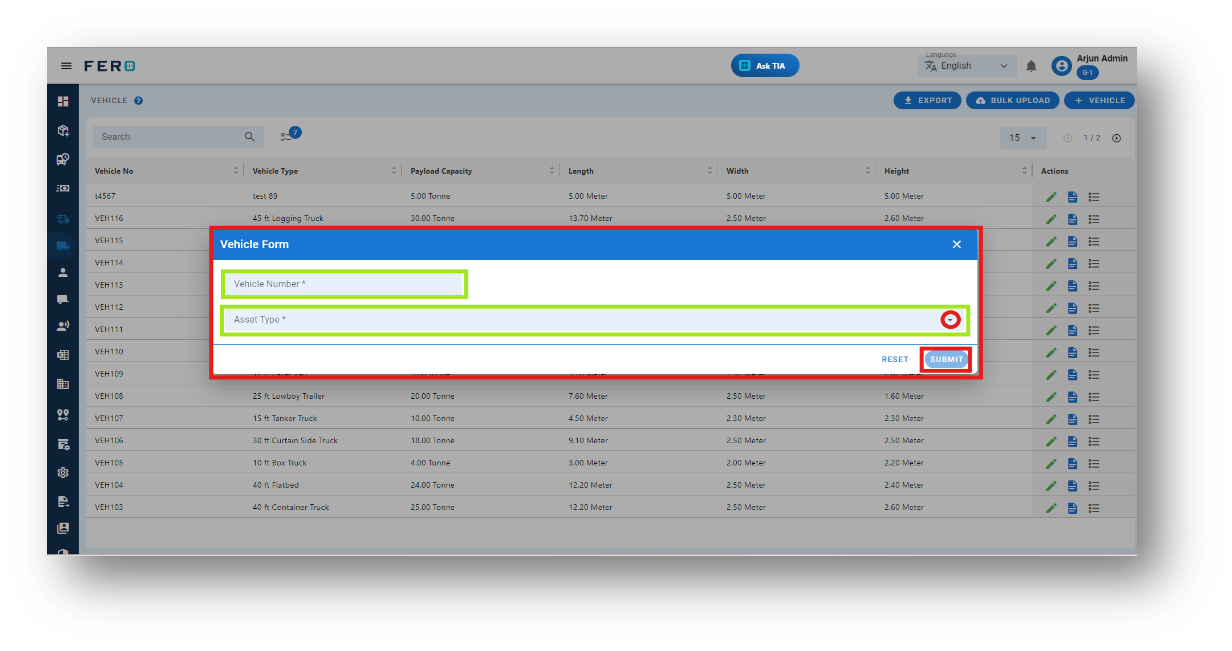
Step 4: Complete the required fields on the "Add Vehicle" screen, such as vehicle number and select the asset type from the drop-down list, then click "Submit" to add the vehicle
FAQs
Q1. Can I Edit Vehicle Details?
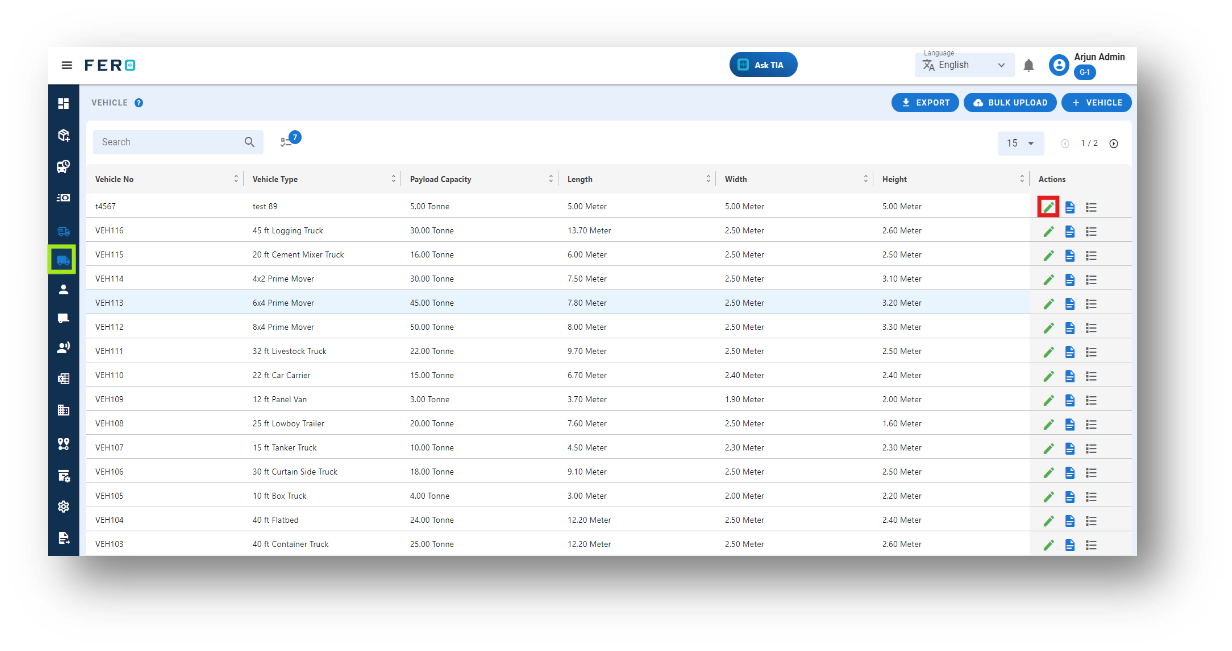
Yes, Vehicle details can be edited by navigating to the Vehicle homepage, where all Vehicle are listed. Simply locate the Vehicle requiring modification and click on the edit icon. Changes made will be updated in real-time.
Q2. Can I Bulk Upload the vehicle?
Yes, you can bulk upload vehicle. This method is the easiest and fastest way to add various vehicles. To do this, navigate to the bulk upload option, download the sample file, enter the details into the sample file, and upload the document. All the vehicles will be added within seconds.
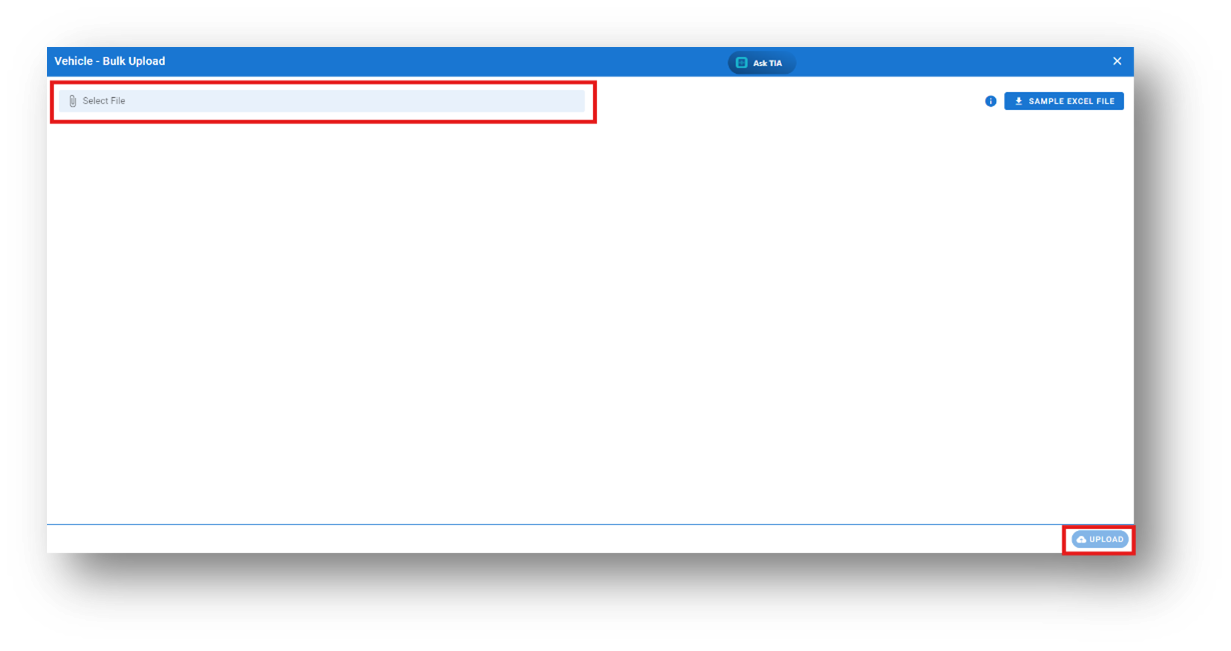
Steps to Bulk Upload Vehicles:
Step 1: Navigate to the Bulk Upload option.
Step 2: Download the sample file and fill in all your vehicle details according to the format provided in the sample file.

Step 3: Select the completed file from your system and click the "Upload" button.
All the vehicles will be added to the system within seconds.
Q2. Can I Change the Branch of a Vehicle?
Yes, you can change the branch of a vehicle. This is useful if you need to transfer a particular vehicle to a different branch for operational purposes. Simply update the branch information for the vehicle.
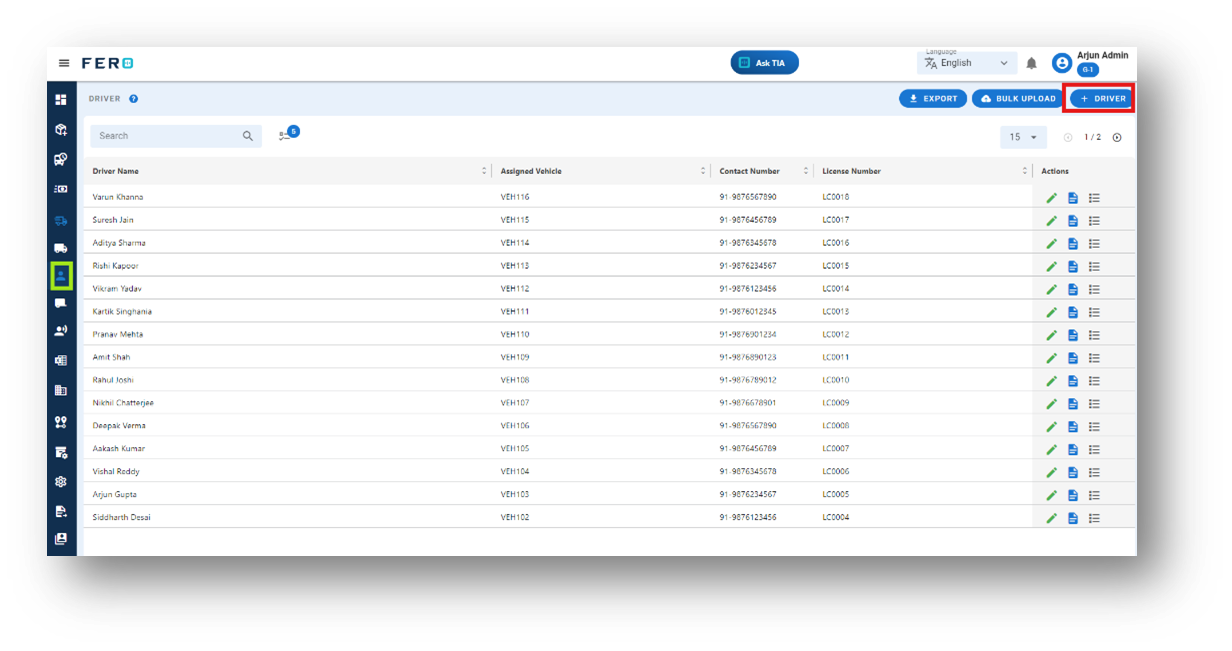
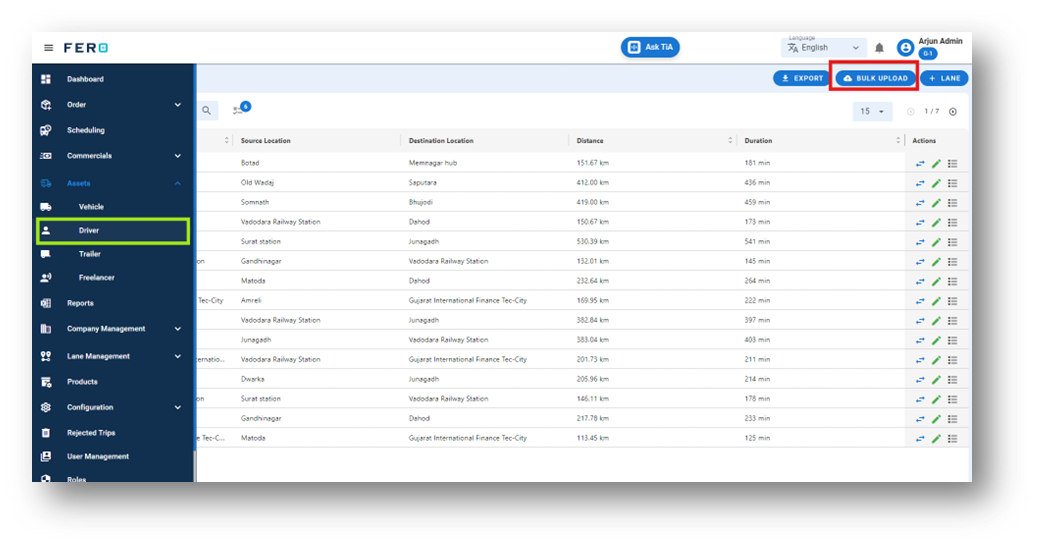
Asset’s Driver module overview:
What dose Driver means in the system?
To execute the order delivery, include driver details such as their name, phone number, and license information, ensuring smooth and accountable transportation.
How to setup Driver module?
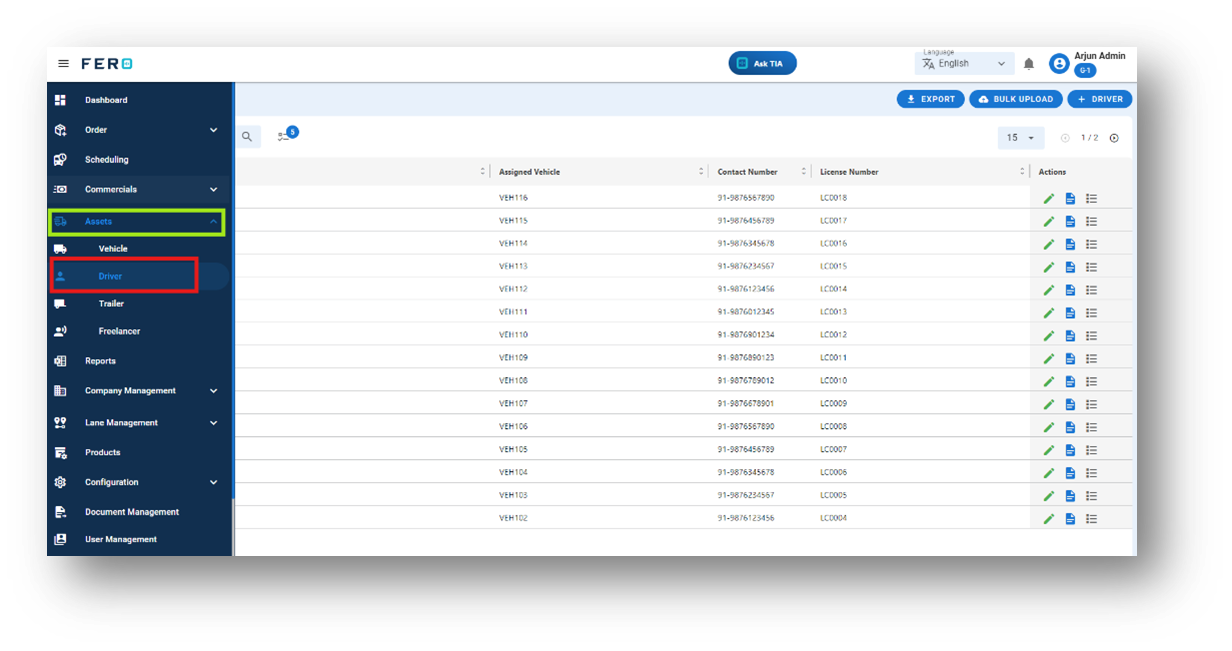
Step 1: Navigate to the assets section and click on it to reveal the drop-down list.
Step 2: Choose the driver option from the drop-down list to access the driver homepage.
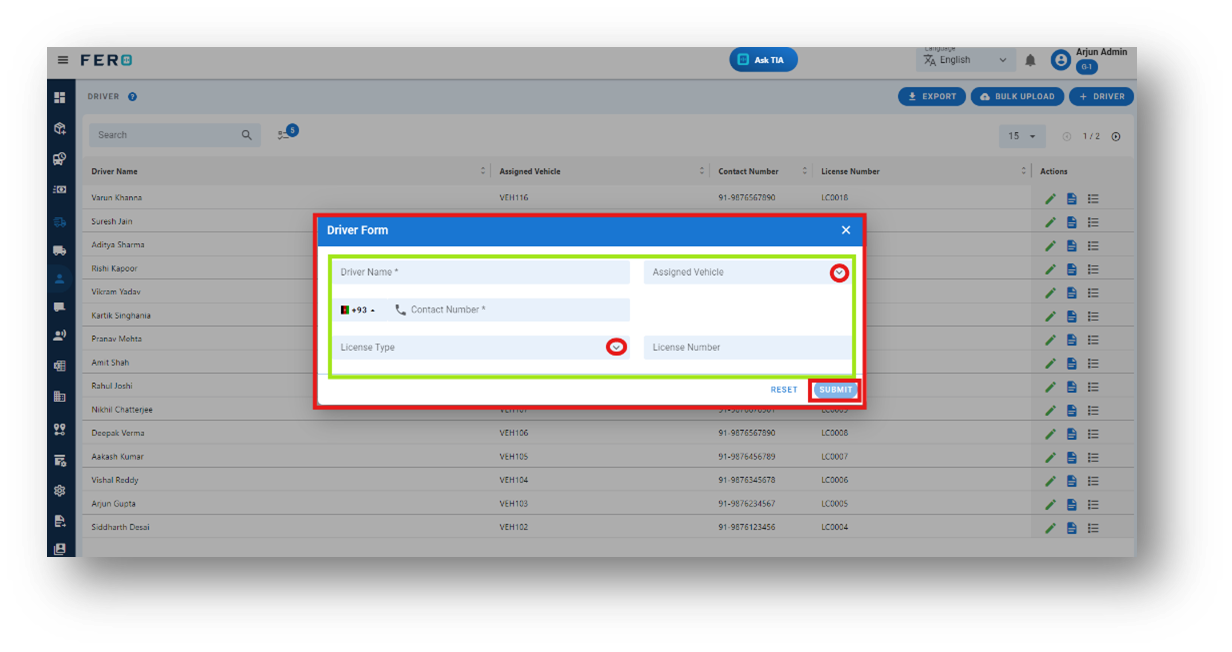
Step 3: Select the "Add Driver" option to initiate the process of adding a Driver. A pop-up screen will appear.
Step 4: Complete the required fields on the "Add Driver" pop-up page, including:
- Driver Name and Phone number
- Select the Assigned Vehicle from the dropdown list.
- License Type from the dropdown list
- License number
After filling out these fields, click the "Submit" button. Your Drivers will be added to the system, allowing you to manage it effectively within your transportation operations.
FAQs
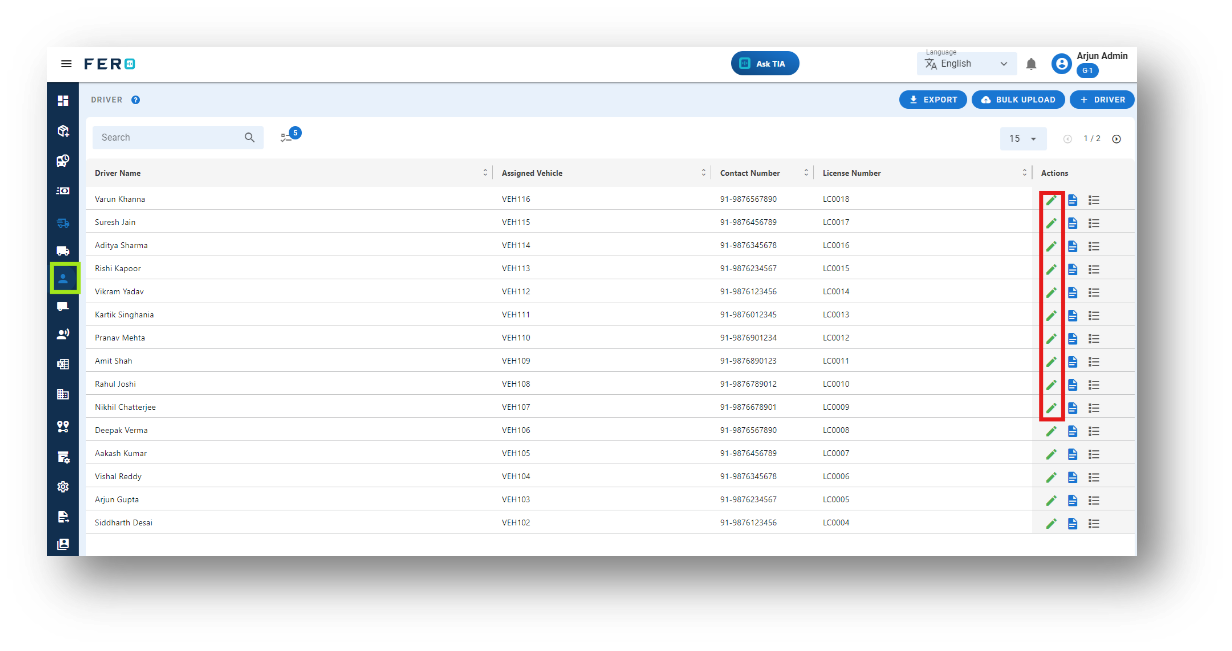
Q1. Can I Edit Driver Details?
Yes, Driver details can be edited by navigating to the driver homepage, where all drivers are listed. Simply locate the driver requiring modification and click on the edit icon. Changes made will be updated in real-time.
Q2. Can I Bulk Upload the Driver?
Yes, you can bulk upload driver. This method is the easiest and fastest way to add various drivers. To do this, navigate to the bulk upload option, download the sample file, enter the details into the sample file, and upload the document. All the driver will be added within seconds.
Steps to Bulk Upload driver:
Step 1: Navigate to the Bulk Upload option.
Step 2: Download the sample file and fill in all your Drivers details according to the format provided in the sample file.
Step 3: Select the completed file from your system and click the "Upload" button.
All the Drivers will be added to the system within seconds.
Asset’s Trailer module overview:
What dose Trailer means in the system?
Add trailer details, including size and weight capacities, to ensure optimal fleet management and allocation.
How to setup Trailer module?
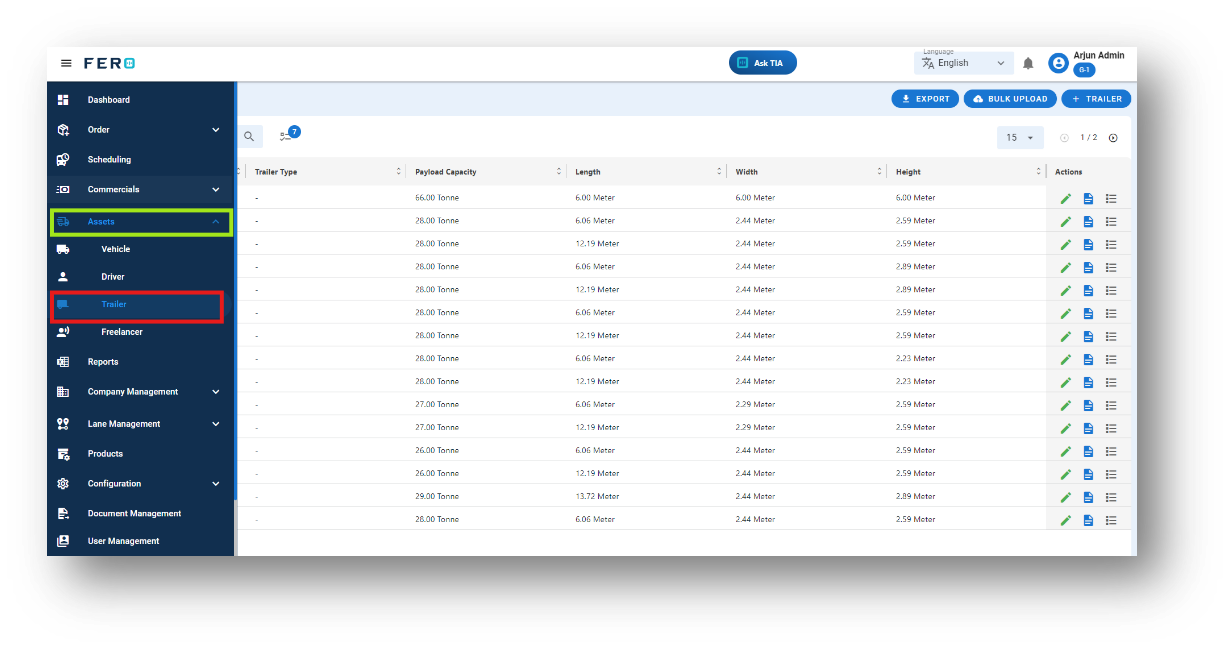
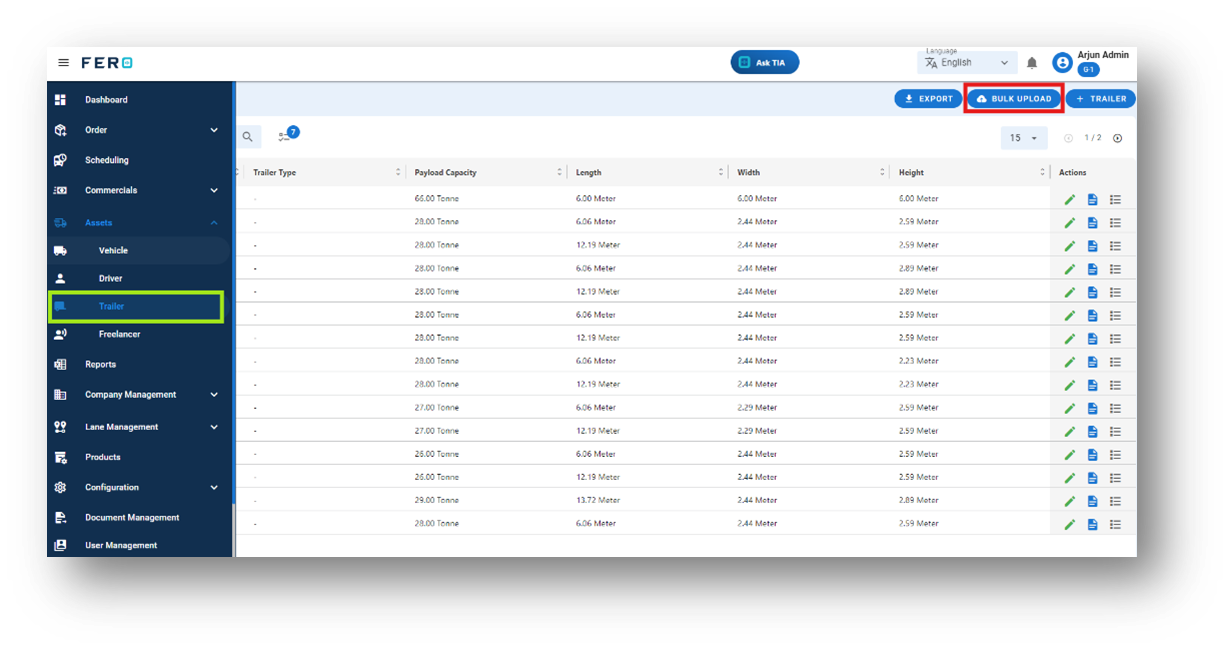
Step 1: Navigate to the assets section and click on it to reveal the drop-down list.

Step 2: Choose the Trailer option from the drop-down list to access the Trailer homepage.
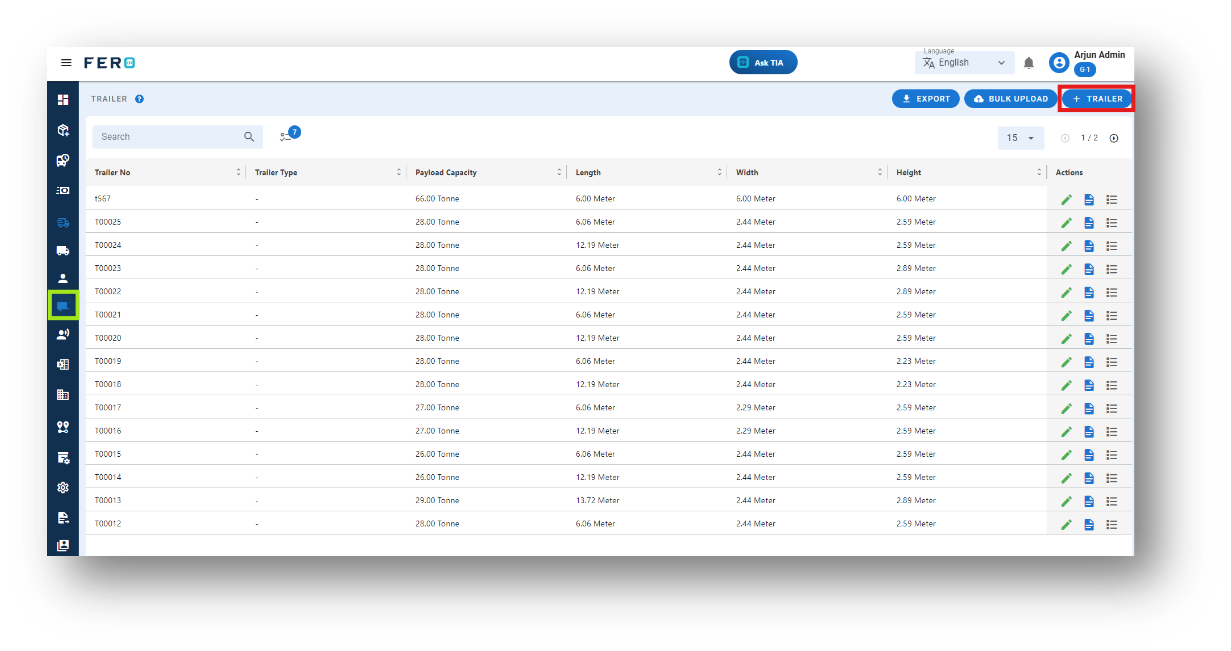
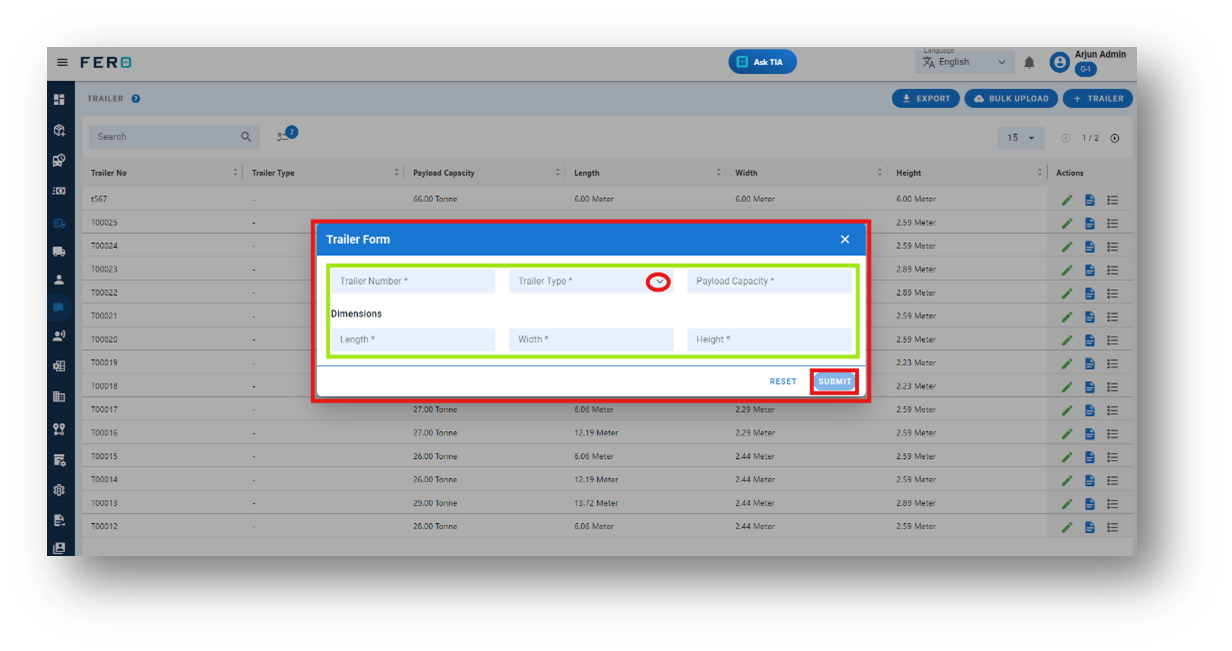
Step 3: Select the "Add Trailer" option to initiate the process of adding a Trailer. A pop-up screen will appear.
Step 4: To complete the required fields on the "Add Trailer" pop-up page:
- Trailer Number: Enter the unique identifier for the trailer.
- Trailer Type: Select the appropriate trailer type from the dropdown list.
- Payload Capacity: Enter the maximum weight that the trailer can carry.
- Dimension Details: Provide the length, width, and height of the trailer.
After filling out these fields, click the "Submit" button to add the trailer to the system. This will enable effective management within your transportation operations.
FAQs
Q1. Can I Edit Trailer Details?
Yes, Trailer details can be edited by navigating to the Trailer homepage, where all Trailer are listed. Simply locate the Trailer requiring modification and click on the edit icon. Changes made will be updated in real-time.

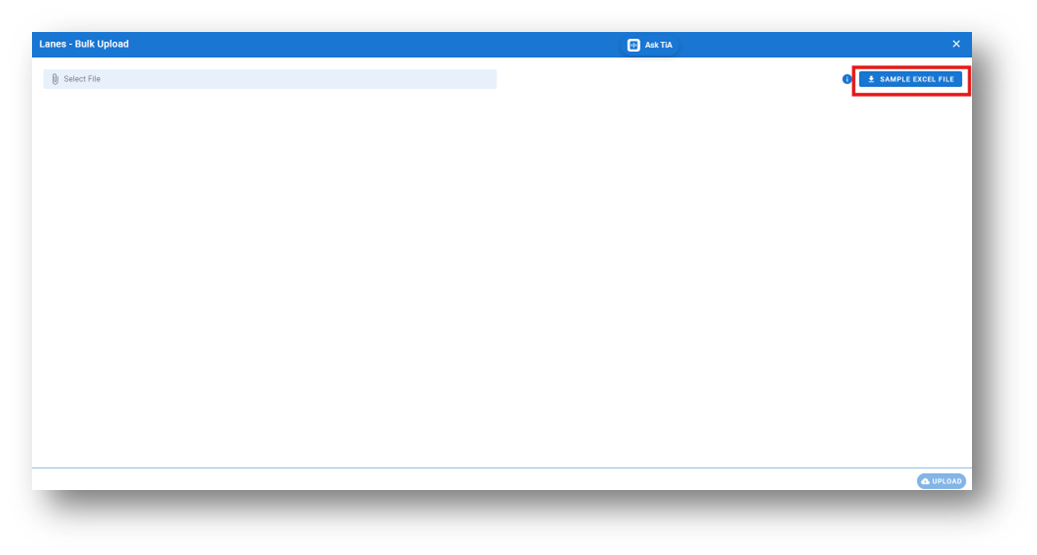
Q2. Can I Bulk Upload the Trailer?
Yes, you can bulk upload Trailer. This method is the easiest and fastest way to add various Trailer. To do this, navigate to the bulk upload option, download the sample file, enter the details into the sample file, and upload the document. All the Trailer will be added within seconds.
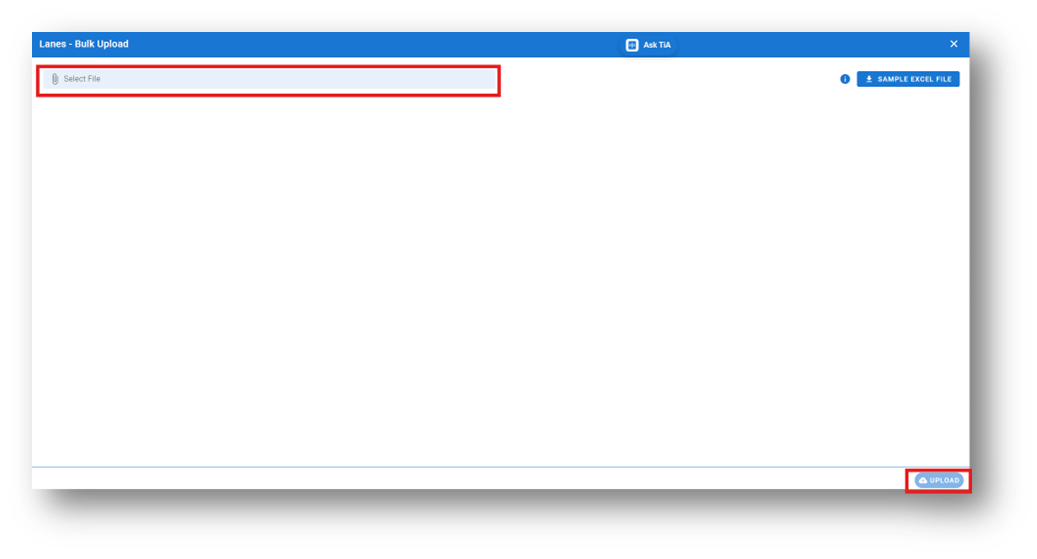
Steps to Bulk Upload trailer:
Step 1: Navigate to the Bulk Upload option.
Step 2: Download the sample file and fill in all your Trailer details according to the format provided in the sample file.
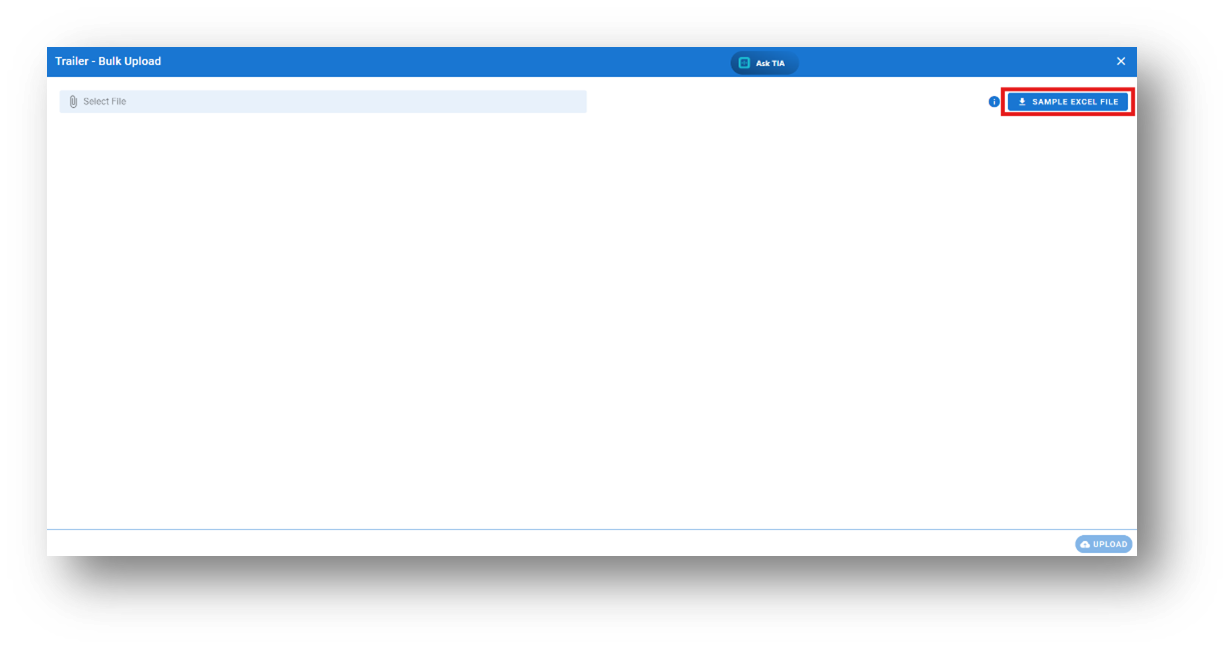
Step 3: Select the completed file from your system and click the "Upload" button.
All the trailer will be added to the system within seconds.

Q2. Can I Change the Branch of a Trailer?
Yes, you can change the branch of a Trailer. This is useful if you need to transfer a particular Trailer to a different branch for operational purposes. Simply update the branch information for the Trailer.
Asset’s Freelancer module overview:
What dose Freelancer means in the system?
Utilize independent truck drivers or carriers, known as freelancers, for flexible and scalable fleet management. Include freelancer details such as vehicle information and license details, offering versatility for individual shipments.
How to setup Freelancer module?
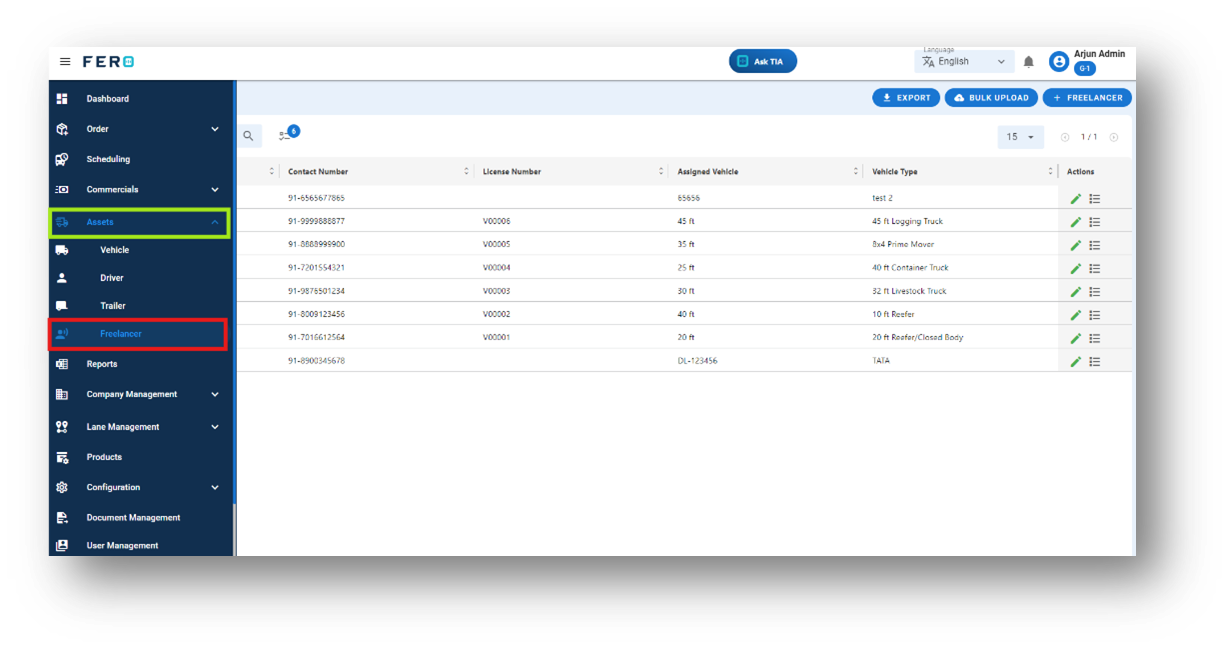
Step 1: Navigate to the assets section and click on it to reveal the drop-down list.
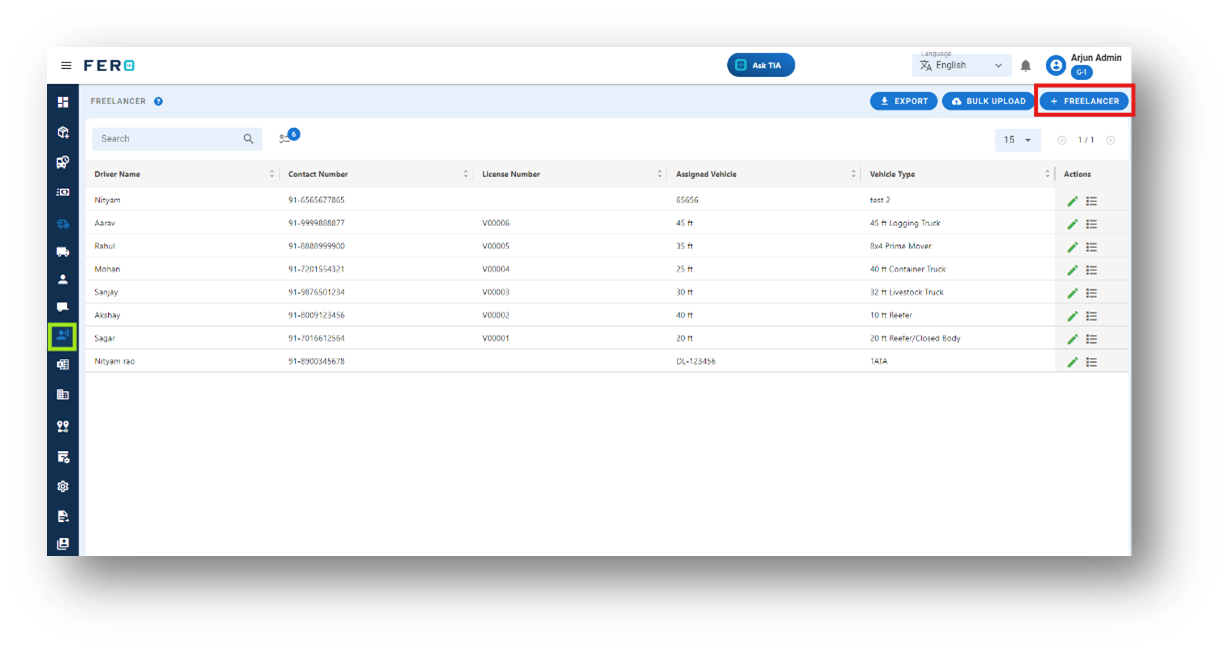
Step 2: Choose the Freelancer option from the drop-down list to access the Freelancer homepage
Step 3: Select the "Add Freelancer " option to initiate the process of adding a Freelancer. A pop-up screen will appear.
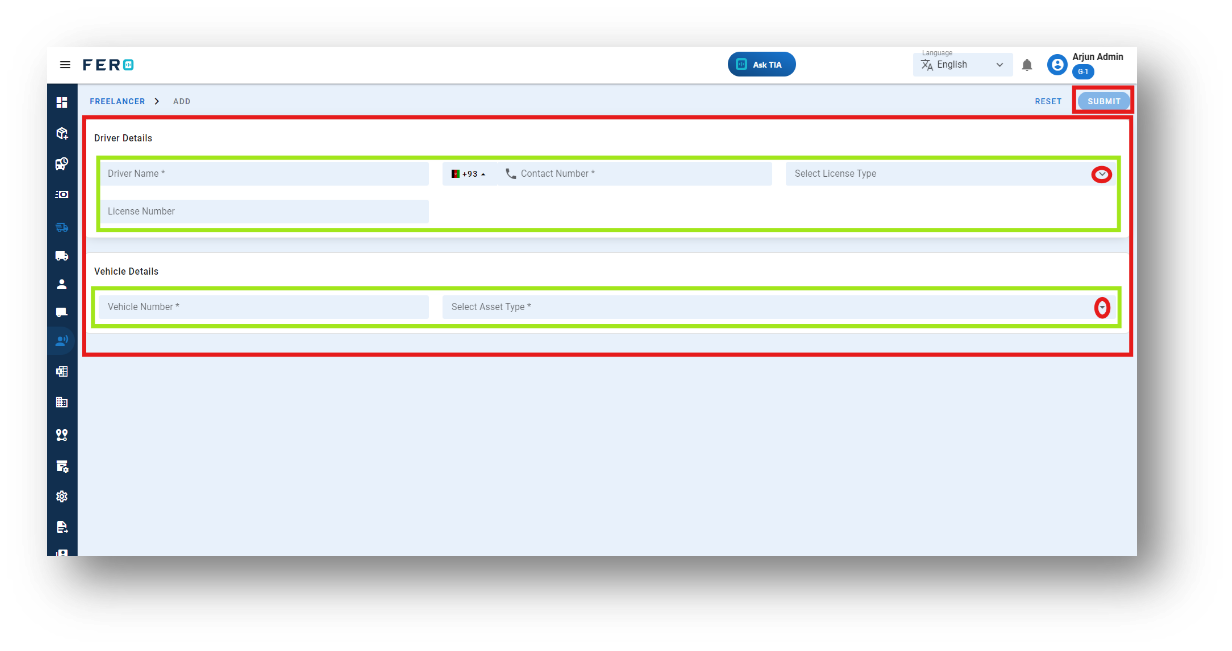
Step 4: Complete the required fields on the "Add Freelancer" pop-up page, including:
- Freelancer's Name and Phone Number
- Choose the License Type from the dropdown menu
- Enter the License Number
- Select the Asset Type from the dropdown list and provide the freelancer's vehicle number.
After filling out these fields, click the "Submit" button to add the driver to the system. This will enable effective management within your transportation operations.
FAQs
Q1. Can I Edit Freelancer Details?
Yes, Freelancer details can be edited by navigating to the Freelancer homepage, where all Freelancer are listed. Simply locate the Freelancer requiring modification and click on the edit icon. Changes made will be updated in real-time.
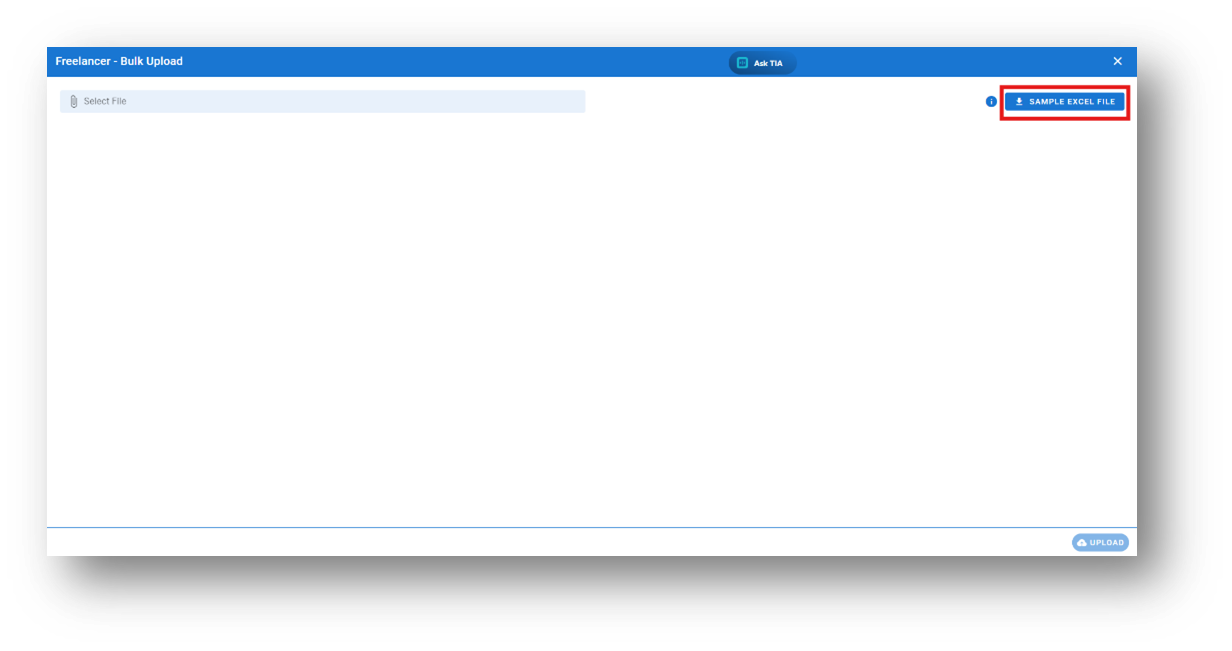
Q2. Can I Bulk Upload the Freelancer?
Yes, you can bulk upload Freelancers. This method is the easiest and fastest way to add Multiple Freelancer. To do this, navigate to the bulk upload option, download the sample file, enter the details into the sample file, and upload the document. All the Freelancer will be added within seconds.
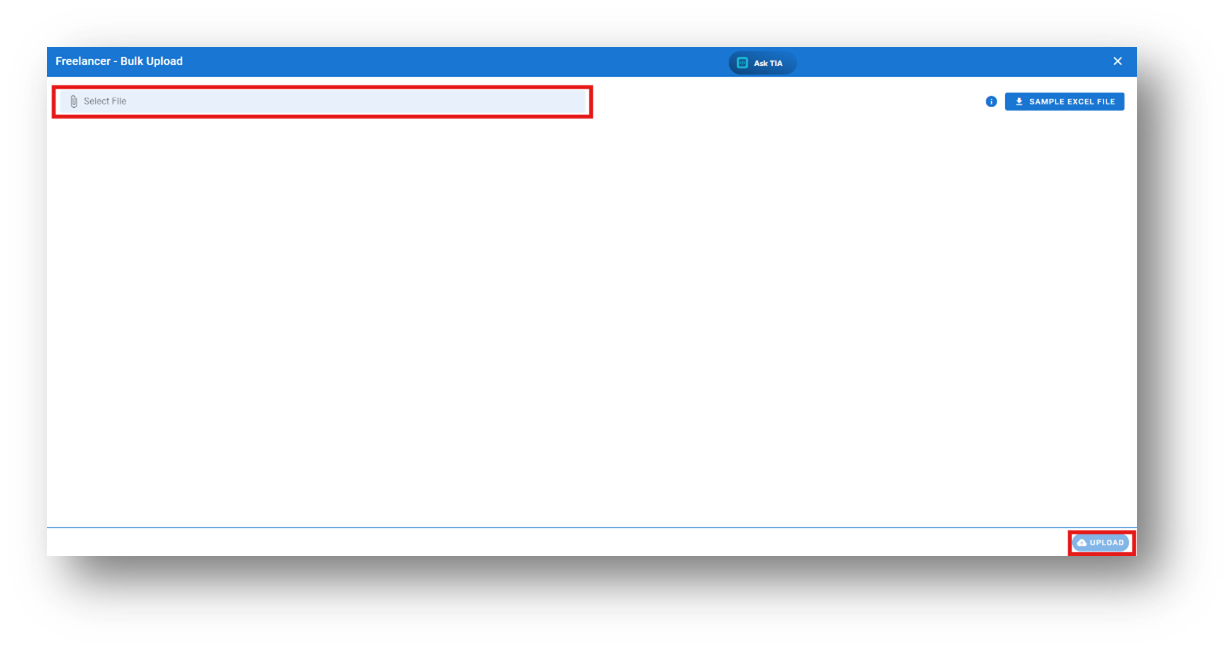
Steps to Bulk Upload Freelancer:
Step 1: Navigate to the Bulk Upload option.
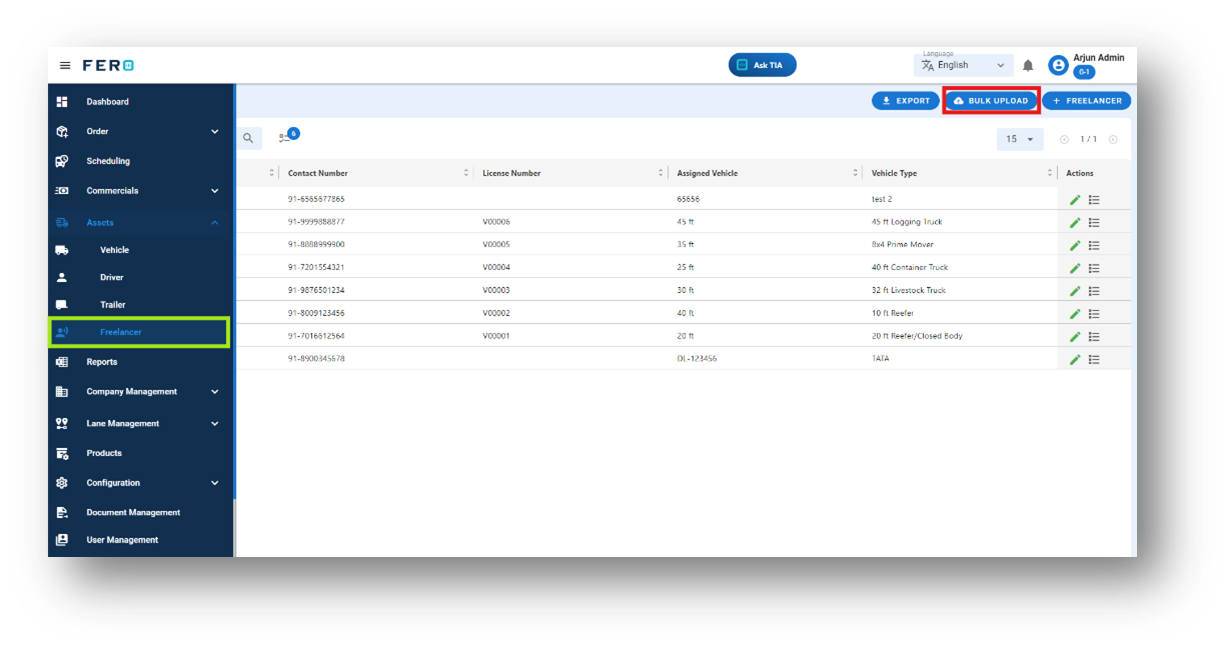
Step 2: Download the sample file and fill in all your Freelancer details according to the format provided in the sample file.
Step 3: Select the completed file from your system and click the "Upload" button.
All the Freelancer will be added to the system within seconds.
Asset’s Activity type module overview:
What dose Activity type means in the system?
Asset Activity Type Easily track and update the status of your vehicles and trailers with our new custom input feature. View detailed statistics such as vehicle utilization and operational insights directly on the page, allowing you to monitor vehicle and trailer performance alongside associated trips—all in one place.
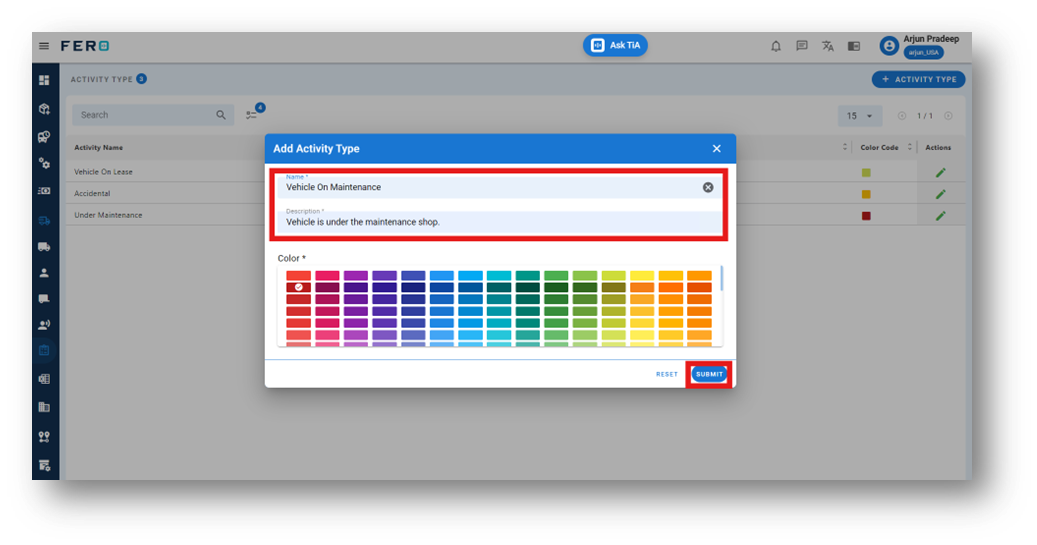
How to setup Activity type module?
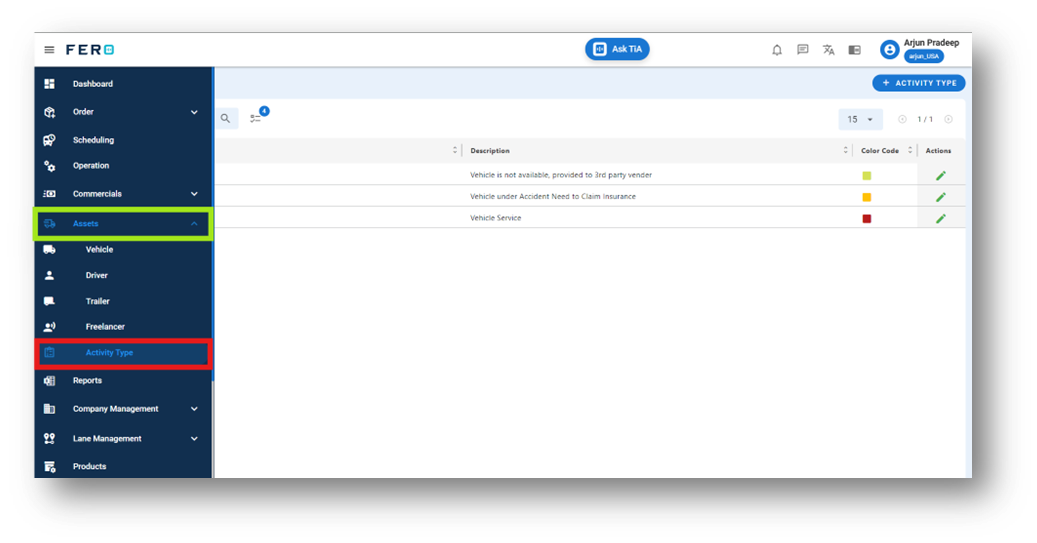
Step 1: Navigate to the assets section and click on it to reveal the drop-down list.
Step 2: Choose the Activity Type option from the drop-down list to access the Activity type homepage
Step 3: Select the "Add Activity Type " option to initiate the process of adding a Activity. A pop-up screen will appear.
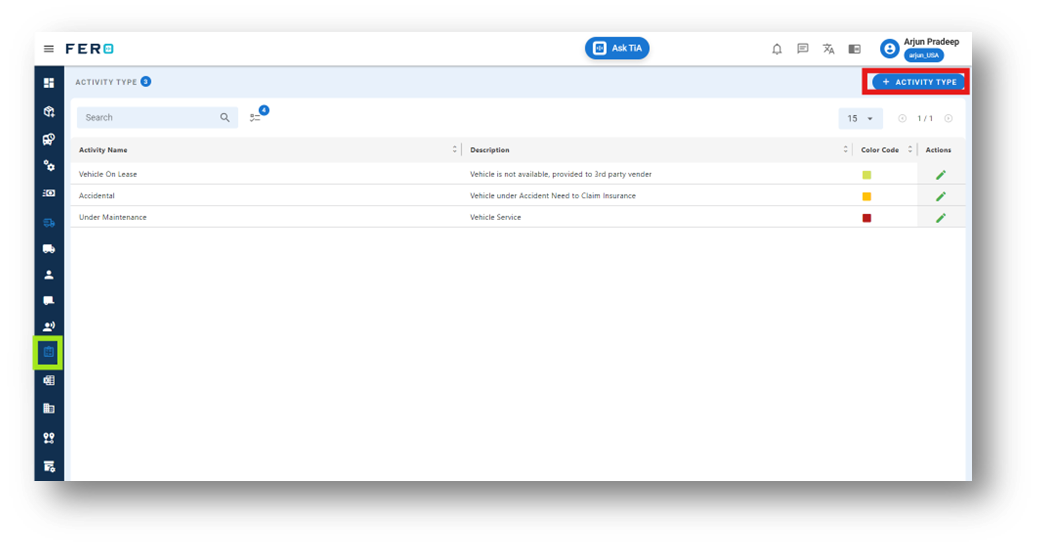
Step 4: Complete the required fields on the "Add Activity Type" pop-up page, including:
- Name of the Activity
- Define the Activity name in description
After filling out these fields, click the "Submit" button to add the Activity type to the system. This will enable effective management within your transportation operations.
Assigning an Activity Type to a Vehicle
Once an activity type is created, it must be assigned to a vehicle to track vehicle statistics and status effectively. Follow the steps below to add the activity type to a vehicle:
Steps to Add an Activity Type to a Vehicle:
- Navigate to the Vehicle Module: Go to the "Vehicle" section within the "Asset" field.
- Select the Vehicle: On the vehicle page, click on the eye icon to view detailed information.
- Access the Activity Tab: In the vehicle details, navigate to the Activity tab.
- Add a New Activity: Click on the "Add Activity" button. A form will appear.
- Select Activity Type and Date: Choose the appropriate Activity Type from the dropdown and set the relevant dates.
- Submit: Click Submit to assign the activity type to the vehicle.
Assigning an Activity Type to a Trailer
Once an activity type is created, it must be assigned to a trailer to track trailer statistics and status effectively. Follow the steps below to add the activity type to a trailer:
Steps to Add an Activity Type to a Trailer:
- Navigate to the Trailer Module: Go to the "Trailer" section within the "Asset" field.
- Select the Trailer: On the trailer page, click on the eye icon to view detailed information.
- Access the Activity Tab: In the trailer details, navigate to the Activity tab.
- Add a New Activity: Click on the "Add Activity" button. A form will appear.
- Select Activity Type and Date: Choose the appropriate Activity Type from the dropdown and set the relevant dates.
- Submit: Click Submit to assign the activity type to the trailer.